 2 × Skt-Zo Leg
Dungeon Osavora
Bzzegg Supervisor's Checkpoint
Level 170 dimension dungeon in Osavora, in the Bzzkkbz Zowzrbz, at [24,23]: a single room, five waves of Kabombz that explode when they die, and an invulnerable boss that must be trapped with their Zoeufs, the Bzzegg Supervisor. Quests to start, room, strategy, monsters, achievements and loot.

Quests linked to the Bzzegg Supervisor's Checkpoint
The dungeon quest, Laying Leaders, is completed by defeating the Bzzegg Supervisor in a single fight. To reach the Bzzkkbz Zowzrbz, you need a Rikiki Wand or to have completed A Sizeable Problem. Accept Laying Leaders before entering: a fight won without the quest in progress doesn't count.
Without it, you need a Rikiki Wand to enter. Corporal Gobastol is testing Major Qiu's shrinker: survey three nests, collect the alterations from the four Kabombz and repair his compiler.
- Start
- Corporal Gobastol, Osavora outpost
- Prerequisites
- Level 150
 Automatic Dimensional Reducer20 Orichor and 28,081,000 XP
It is completed on the Bzzegg Supervisor. The Curious Quadrabz wants the queens to call back their guards: talk to the Big Bzzulky, defeat the Bzzegg Supervisor in a single fight, go see him again, then negotiate with the three queens.
- Start
- Curious Quadrabz, Bzzkkbz Zowzrbz
 Bzzulky Entrails2 of each Kabombz ingredient of the key, 35 Orichor and 28,081,000 XP
The Kabombz Tuft, which drops from the boss and all its monsters, is used as an offering at Gargandyas's Temple during the Rest season, for Destroyer of Worlds.
The room of the Bzzegg Supervisor's Checkpoint
A dimension dungeon: a single room, but five waves of monsters, on turns 1, 6, 11, 16 and 21, or sooner if you clear the current wave. The scenery, then the tactical view with the starting cells (blue: you, red: the monsters). Tap an image to enlarge it.

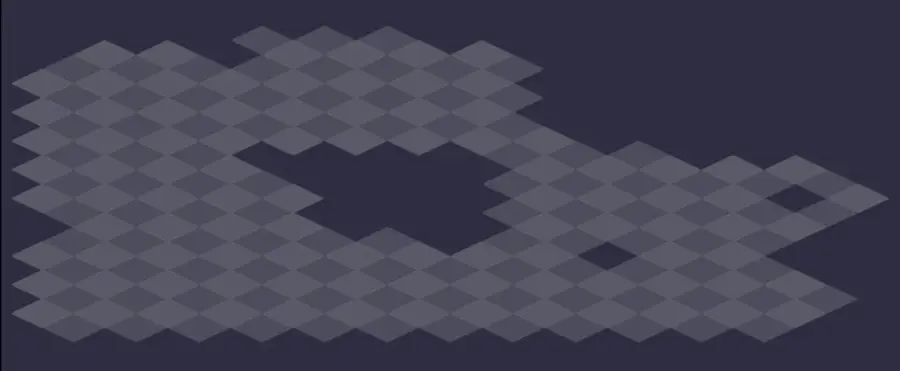
Defeat the Bzzegg Supervisor
Everything explodes on death
Each Kabombz killed, each Bzzegg destroyed and the Bzzegg Supervisor itself explode in an area, on your characters as well as on the monsters. Check who is nearby before landing the final blow, and stay at a distance. Only the Bzzoctor and its Bzzegg heal instead of hitting.
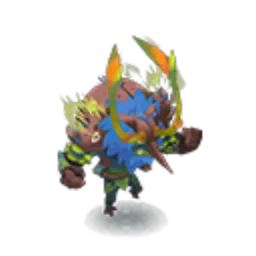
Level 170
 8,800 HP
 15 AP
 5 MP
- Resistances (%)
 Earth 5%
 Fire 2%
 Water 1%
 Air 3%
 Neutral -11%
Invulnerable at the start, it hits little: its real danger is Kabombz Summoning, which adds a Kabombz from turn 2 and then every 4 turns. It only becomes vulnerable after four Bzzegg explosions. After that, it teleports every turn onto the nearest character and summons its double. Weak to Neutral.
 Kabombz Summoning
Summons a random Kabombz, from turn 2 and then every 4 turns: the only real danger of the first phase.
-
Bzztoss
Teleportation without line of sight, then damage around its arrival cell; when vulnerable, it also pulls. Gravity prevents it, but only while it is invulnerable.
 Carapabz
Shield for all its monsters for one turn; when vulnerable, it gives itself a bigger one and calls the babies back to it.
 Clonebz
A double with half its HP, with 4 MP and 1,000 lock, which explodes after two turns. Killed before then, it doesn't explode and the boss takes 20% more damage for one turn.
 Abzzlation3 AP · 5 Range ·33 to 37 Air damage · 23 to 27 Air damage · Pushes back 2 cells · -1 Range
Pushes back 2 cells, in a line or diagonally; when vulnerable, it also removes Range.
-
Bzzovolution
Hatches a Bzzegg right away and speeds up its monsters' laying. Destroy the Bzzeggs before its turn.
-
Bzzovolution
Hatches a Bzzegg right away and speeds up its monsters' laying. Destroy the Bzzeggs before its turn.
The four-step strategy against the Bzzegg Supervisor
Let the Kabombz lay. Don't kill the Kabombz right away: you need their Bzzeggs to unlock the boss. A Kabombz only lays if it can cast its main damage spell, and only one Bzzegg at a time: if you play at a distance, place summons near them. The Kamikabz, which can lay again every turn, is the most useful.
Make the Zoeufs explode on it. Push or pull a Zoeuf against the Bzzegg Supervisor, then destroy it: if the boss is in the area, it gets a Zoeuf'd state. At the fourth, it becomes vulnerable for the whole fight. For a Bzzulky Zoeuf, the boss must be the nearest entity, since the explosion swaps places with it.
Kill the Bzzegg Supervisor fast. When vulnerable, it gains 20% critical and 10% final damage, teleports every turn onto the nearest character and summons a double. Focus everything on it. Killing the double stops it from exploding and makes the boss take 20% more damage for one turn. Move away before the final blow: its death strikes in a circle of 3 cells.
Finish the waves. Once the boss is dead, the waves remain. Their monsters arrive invulnerable until the end of their first turn, with 25% less HP from the second wave on. Finish off each Kabombz in the middle of its fellows for chain reactions, except the Bzzoctor, whose explosion heals: kill it far from the monsters, close to you.
Zoeufs and hatchings
Each Kabombz lays a Bzzegg on the cell targeted by its main spell. Left alive, it grows every turn, switches to “Ready to hatch” one turn before, then becomes a baby of the same monster, at 50% vitality, which immediately joins its summoner. It hatches in 3 turns in Birth, 2 in Hunt, 4 in Rest.
Destroyed beforehand, it explodes: damage in its area and a two-turn bonus to all entities hit, allies and enemies alike. A 1-cell square for the Kamikabz, a ring of 2 for the Quadrabz, a circle of 2 for the Bzzoctor, a place swap with the nearest entity for the Bzzulky. Bzzovolution hatches a Bzzegg at once, from turn 2 and then every 3 turns.
The seasons of Osavora
There is no regular dimension modifier in Osavora: the current season takes its place. Birth: ending on your turn-start cell gives a shield, and a small heal if you haven't attacked. Hunt: each enemy finished off gives 1 AP and 3% final damage, stackable three times. Rest: any summon gives 1 MP to the summoner and the summon.
The season also changes the monsters: explosion damage, hatching delay, babies' bonus and the Bzzulky's swap range, 4 Range in Birth, 5 in Hunt, 3 in Rest.
The monsters of the Bzzegg Supervisor's Checkpoint
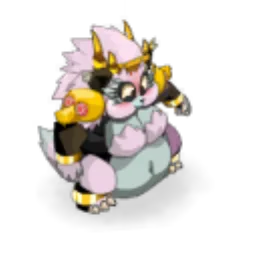
Four level 162 Kabombz, joined during the fight by the babies from their Bzzeggs and by those the Bzzegg Supervisor summons. They deal a lot of damage for this level. The resistances in red are their weaknesses.
In which order to kill the monsters
- Kamikabz — the most dangerous, with 8 MP and a rush in a line up to 8 Range; keep it anyway while the boss is invulnerable, since it lays the most.
- Bzzoctor — it heals its allies and makes you Unhealable: kill it far from them, its explosion would heal them.
- Quadrabz — AP, MP and Range removal.
- Bzzulky — shields for its allies, and a place swap on death.

Level 162
- 3,500 HP
- 10 AP
- 8 MP
- Resistances (%)
- Earth 9%
- Fire -2%
- Water -2%
- Air -10%
- Neutral 5%
With 8 MP and Aspibz, it reaches you from very far away: hide behind obstacles to cut its lines. Eggzzrukus lays a Bzzegg every turn if the previous one is gone, Bzzimpact makes it more powerful. Weak to Air.
 Eggzzrukus5 AP · 4 Range ·83 to 97 Earth damage · Triggers: Season on Egg
Strikes in a square and lays a Kamikabz Bzzegg; castable every turn, it is the best source of Bzzeggs.
-
Aspibz3 AP · 8 Range · Advances 7 cells ·31 to 35 Earth steal
The Kamikabz pulls itself to its target, in a line: an obstacle on the line blocks it.
 Bzzimpact4 AP · 5 Range ·20 to 24 Earth damage · 50 Power
Two hits, and power stackable four times for the Kamikabz.
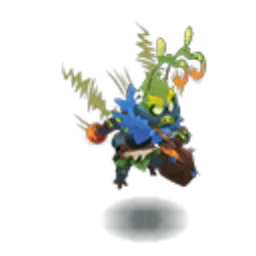
Level 162
- 3,300 HP
- 11 AP
- 5 MP
- Resistances (%)
- Earth -9%
- Fire -3%
- Water -4%
- Air 10%
- Neutral 6%
Reggzzcovery heals the monsters and makes you Unhealable for one turn, a state that can be dispelled. Evabzzion teleports it and gives AP and flight to its allies. Dead, it heals everything around it: finish it off near you, far from the monsters. Weak to Earth.
 Reggzzcovery5 AP · 8 Range ·79 to 91 Air healing · Unhealable State · Triggers: Season on Egg
Heals the monsters, makes you Unhealable for one turn (dispellable) and lays a Bzzoctor Bzzegg, from turn 2.
-
Tornabzzo5 AP · 9 Range ·74 to 86 Air damage · 100 Power
Strikes in a line and gives power to the monsters hit.
 Evabzzion3 AP · 5 Range · Teleports to the targeted cell · 50 Flight ·2 AP
The Bzzoctor teleports and gives 2 AP and flight to the monsters around its arrival cell.
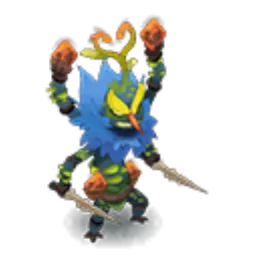
Level 162
- 3,900 HP
- 11 AP
- 4 MP
- Resistances (%)
- Earth 0%
- Fire -11%
- Water 8%
- Air -1%
- Neutral 4%
Akuabz removes 1 AP, Bzzsplash 1 MP, and Vaporeggzzise removes Range and reveals invisible entities while laying its Bzzegg. Its explosion strikes in a ring of 2 cells. Weak to Fire.
 Vaporeggzzise5 AP · 6 Range · Reveals invisible entities · -2 Range ·65 to 75 Water damage · Triggers: Season on Egg
Strikes in a circle, removes Range, reveals invisible entities and lays a Quadrabz Bzzegg.
 Akuabz4 AP · 8 Range ·42 to 48 Water damage · -1 AP
 Bzzsplash3 AP · 6 Range ·31 to 35 Water damage · -1 MP
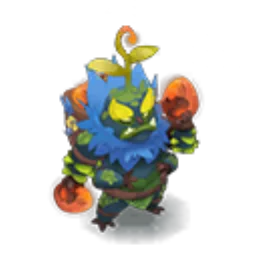
Level 162
- 4,500 HP
- 11 AP
- 4 MP
- Resistances (%)
- Earth -4%
- Fire 11%
- Water -8%
- Air -6%
- Neutral 7%
Eggzzplosion strikes in a circle, without line of sight, and lays a Bzzulky Zoeuf; Aegibz protects it with an ally. On death, it swaps places with the nearest entity and hits it: watch your positioning. Weak to Water.
 Eggzzplosion5 AP · 6 Range ·79 to 91 Fire damage · Triggers: Season on Egg
Strikes in a circle, without line of sight, and lays a Bzzulky Bzzegg on the targeted cell.
 Vampibombz3 AP · 6 Range ·32 to 38 Fire steal · -10 Lock · 10 Lock
 Aegibz
Shield for the Bzzulky and an allied monster, once per turn.
Preparing your run through the Bzzegg Supervisor's Checkpoint
A dimension dungeon for teams of level 160 to 170, more technical than hard once the Zoeuf mechanic is understood. People come for Laying Leaders, for the achievements and for the Bzzegg Supervisor's Leafy Undies, which drop at 19%.
How to enter the Bzzegg Supervisor's Checkpoint
The entrance is in the Bzzkkbz Zowzrbz, in the Osavora dimension, at . You reach Osavora through a portal at the Voyagers' Tower , then the zone with a Rikiki Wand or after A Sizeable Problem. You need a Key to the Bzzegg Supervisor's Checkpoint (consumed) or the automatic group search: the key ring doesn't work here.
Crafting the Key to the Bzzegg Supervisor's Checkpoint
It is crafted by a handyman. Four ingredients drop from the dungeon's Kabombz, at 19%: Bzzulky Entrails, Bzzoctor Juice, Kamikabz Skull and Quadrabz Cartilage. The Kabombz Leg is bought for 1 Orichor from Collector Tramshandy ; Corn, Belladonna (harvesting) and Cod (fishing) complete the recipe.
| Ingredient | Quantity | Level |
|---|---|---|
 Corn |
3 | 160 |
 Belladonna |
2 | 160 |
 Cod |
2 | 170 |
 Kabombz Leg |
1 | 170 |
| Bzzulky Entrails |
2 | 170 |
 Bzzoctor Juice |
2 | 170 |
 Kamikabz Skull |
2 | 170 |
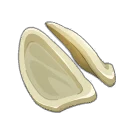 Quadrabz Cartilage |
2 | 170 |
Which team to bring against the Bzzegg Supervisor
Positioning. To unlock the boss, you must push or pull four Bzzeggs against it before destroying them. Positioning classes make all the difference, especially for Special and Duo.
Play at a distance, with summons. At a distance, you avoid the explosions and most of the spells. But a Kabombz only lays if it can hit: summons near them make them lay without exposing your characters.
Something to heal and dispel. The explosions hurt and the Bzzoctor makes you Unhealable every other turn. A dispel removes the Unhealable state, and a healer or a protector helps you take the hits, especially for Conqueror.
The five achievements of the Bzzegg Supervisor's Checkpoint
Each achievement gives 28,081,000 XP and 2 Bzzegg Supervisor's Leafy Undies; Duo doubles the XP. Special is played within the first five turns, and Duo has only a token time constraint.
| Achievements | Condition | Points | XP |
|---|---|---|---|
 Bzzegg Supervisor's Checkpoint |
Defeat the Bzzegg Supervisor in its dungeon. | 10 | 28 081 000 |
| Bzzegg Supervisor (Conqueror) |
Defeat the Bzzegg Supervisor in its dungeon while completing the “Conqueror” challenge. | 10 | 28 081 000 |
| Bzzegg Supervisor (Tight) |
Defeat the Bzzegg Supervisor as a team in its dungeon while completing the “Tight” challenge. | 10 | 28 081 000 |
| Bzzegg Supervisor (Duo) |
Defeat the Bzzegg Supervisor in its dungeon while completing the “Duo” challenge. | 20 | 56 162 000 |
| Bzzegg Supervisor (Special) |
Defeat the Bzzegg Supervisor in its dungeon while completing the “Bombzerman” challenge. | 10 | 28 081 000 |
Conqueror
An ally who kills one or more enemies must end their turn on the cell one of them occupied. The Bzzulky and its Bzzegg swap places before dying: end on the cell where they landed. Summons count, Bzzeggs included: end on the cell of the destroyed Bzzegg. You therefore have to play near the monsters, so plan for heals and protections.
Tight
Each ally must end their turn on a cell adjacent to another ally. Summons don't count: you need a character or a companion next to you. Beware of the Bzzulky and its Bzzegg: with no MP, finishing them off near you makes you swap places, at 4 Range in Birth, 5 in Hunt, 3 in Rest.
Special: Bombzerman
The Bzzegg Supervisor must not be invulnerable when the second wave starts. It must be vulnerable before the start of turn 6: don't kill any monster before then, to keep as many Bzzeggs as possible. Place characters or summons near the Kabombz from turn 1: at one Bzzegg per turn, it is vulnerable from turn 4, sooner if you blow up several at once. It hatches a Bzzegg on turns 2 and 5: plan ahead.
Duo
Two characters maximum, fewer than 60 turns. The 60 turns are not a real constraint. A positioning class is strongly recommended to unlock the boss quickly; the rest is a matter of damage, so you never fall behind on the waves.
Drops and loot of the Bzzegg Supervisor's Checkpoint
Base in-game rates, before Prospecting bonuses.
On the Bzzegg Supervisor
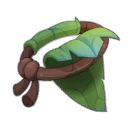 Bzzegg Supervisor's Leafy UndiesGarment19 %
 Nougat Rabmarac BarTreat6 %
 Kabombz TuftHair3,2 %
 Bzzegg Supervisor CarapaceCarapace3,2 %
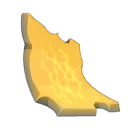 Graogarm ScaleSkin2,4 %
 Al Howin GobtubbyCeremonial pet1 %
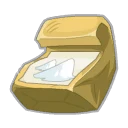 Bag of SaltContainer1 %
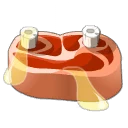 Lean CarrionMeat0,9 %
On the henchmen of the Bzzegg Supervisor
- Bzzulky EntrailsMiscellaneous Resource · Bzzulky19 %
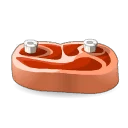 Lean MeatMeat · Bzzulky19 %
 Kabombz AntennaeQuest Resource · Bzzulky19 %
- Kamikabz SkullBone · Kamikabz19 %
- Quadrabz CartilageBone · Quadrabz19 %
- Bzzoctor JuiceLiquid · Bzzoctor19 %
 Regenerating LymphDivine Dimensions · Bzzulky12 %
 Nourishing MilkDivine Dimensions · Bzzulky12 %
 Burning BloodDivine Dimensions · Bzzulky12 %
 Bzzulky BzzeggEgg · Bzzulky3,2 %
- Kabombz TuftHair · Bzzulky3,2 %
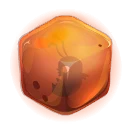 Kamikabz BzzeggEgg · Kamikabz3,2 %
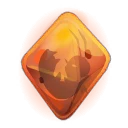 Quadrabz BzzeggEgg · Quadrabz3,2 %
 Bzzoctor BzzeggEgg · Bzzoctor3,2 %
- Graogarm ScaleSkin · Bzzulky2,4 %
 OrichorToken · Bzzulky1,8 %
- Bag of SaltContainer · Bzzulky1 %
Where is the Bzzegg Supervisor's Checkpoint?
In the Bzzkkbz Zowzrbz, in the Osavora dimension, at . You reach Osavora through a portal at the Voyagers' Tower ; the zone requires a Rikiki Wand or the A Sizeable Problem quest.
What level should you do the Bzzegg Supervisor's Checkpoint at?
Minimum level 160, 170 recommended. Its Kabombz, level 162, hit hard for that level.
Which quest should you do at the Bzzegg Supervisor's Checkpoint?
Laying Leaders, at the Curious Quadrabz's . It is completed by defeating the Bzzegg Supervisor in a single fight and gives back two of each Kabombz ingredient of the key.
How do you make the Bzzegg Supervisor vulnerable?
Make four Zoeufs explode against it. Each Zoeuf destroyed with the boss in its area gives it a Zoeuf'd state; at the fourth, it is vulnerable for the rest of the fight.
Should you kill the Kabombz first?
No, keep them while you unlock the boss: they are the ones that lay the Bzzeggs. The Kamikabz, which lays every turn, is the most useful, but also the most dangerous.
Should you destroy the Zoeufs?
Yes, before they hatch, and preferably against the Bzzegg Supervisor while it is invulnerable. Their explosion also hits your characters: move away.
How many waves do you have to face?
Five, on turns 1, 6, 11, 16 and 21, or sooner if you clear the current wave. From the second on, the monsters have 25% less HP, but remain invulnerable until the end of their first turn.
Does the key ring work for the Bzzegg Supervisor's Checkpoint?
No, the key ring doesn't work here. You need a Key to the Bzzegg Supervisor's Checkpoint, or go through the automatic group search.
Can you do the Bzzegg Supervisor's Checkpoint with two?
Yes, it is even an achievement: Duo, in fewer than 60 turns. Bring a positioning class to move the Bzzeggs, and enough damage to keep up with the waves.

Comments
No comments yet. A tip, or a detail about this page? Be the first.