 2 × Skt-Zo Leg
Quest Nauseating Swamps
The Cania Bandits
Level 100 quest, at Meriana's in the Nauseating Swamps at [-6,-3]: recover the three dragon scales of the Cania bandits through a legendary treasure hunt. All the steps, the Bountyken, the Map of Cania and the fight.
What to prepare
You need 9 Bountyken, so at least 9 completed wanted-notice quests of level 120 or lower, to buy the three copies of the Map of Cania. The copies and the map cannot be traded.
 9 × Bountyken1 per wanted target of level 120 or lower captured, at the Bounty Hunter at [5,-6]
Quest Resources, obtained along the way
 1 × Copy of the Map of Cania 1/33 Bountyken at the Bounty Hunter
 1 × Copy of the Map of Cania 2/33 Bountyken at the Bounty Hunter
 1 × Copy of the Map of Cania 3/33 Bountyken at the Bounty Hunter
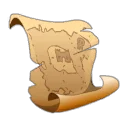 1 × Map of Caniaassembled at the Desk in the Treasure Chest at [-25,-36]
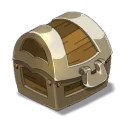 1 × Cania Bandits' Treasure Chestafter the fight against the bandits
The 8 quest steps
-
1Talk to Meriana
Dialogue · Meriana
Her potion had no effect on Dark Vlad's powers. Meriana now wants to turn you into a dragon by rebuilding Prysmaradoth's talisman. To make it, she needs the three dragon scales held by the three Cania bandits.
Meriana · [-6,-3] -
2Get 9 Bountyken
Items · Bounty Hunter
Since update 3.4, map copies no longer drop in treasure hunts: you buy them with Bountyken. In the Amakna Castle militia, the Bounty Hunter gives 1 Bountyken for each wanted target of level 120 or lower that you have captured. You need 9, which means at least 9 completed wanted-notice quests.
Dialogue
- “Say you're interested”
- Bountykenreceived
-
3Buy the three map copies
Items · Bounty Hunter
Buy each copy of the Cania map from him for 3 Bountyken each. If you have any Bountyken left, he also sells a Hunter's Box of Fragments for 1 Bountyken, once Draconthropy is completed: it contains treasure hunt map fragments.
Make sure to buy the three different copies: 1/3, 2/3 and 3/3.
- Copy of the Map of Cania 1/3received
- Copy of the Map of Cania 2/3received
- Copy of the Map of Cania 3/3received
-
4Assemble the Map of Cania
Go to the Treasure Chest and use the Desk to assemble a map from the three copies.
- 1 × Copy of the Map of Cania 1/3to hand over
- 1 × Copy of the Map of Cania 2/3to hand over
- 1 × Copy of the Map of Cania 3/3to hand over
- Map of Caniareceived
-
5Start the Cania Bandit Treasure hunt
With the Map of Cania, use the Drafting Table and start the legendary treasure hunt “Cania Bandit Treasure”. Do it like a normal hunt, until you find the bandits' location.
-
6Defeat the Cania bandits
Combat
Once you reach the goal, ask for help if needed by giving your position, then start the fight against the three Cania bandits. It can be done in a group. After the victory, you receive a Cania Bandits' Treasure Chest in your consumables.
Only the player who started the hunt gets the Cania Bandits' Treasure Chest.
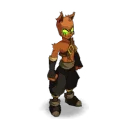 Nomekop Wodlyfight · level 100 · 6,000 HP · 10 AP · 6 MP
- Cania Bandits' Treasure Chestreceived
-
7Open the bandits' chest
Open the Cania Bandits' Treasure Chest: the Scale of Courage, the Scale of Endurance and the Scale of Ferocity go into your quest inventory. They are quest items and cannot be traded or bought at the auction house.
 Scale of Couragereceived
 Scale of Ferocityreceived
 Scale of Endurancereceived
-
8Bring the scales back to Meriana
Items · Meriana
Show the three scales to Meriana to complete the quest. If you keep talking, she entrusts you with the next one.
- 1 × Scale of Courageto hand over
- 1 × Scale of Ferocityto hand over
- 1 × Scale of Enduranceto hand over
The fights
Level 100
Ecaflip bandit. Throughout the fight, he has a 20% chance of healing himself for the value of each line of damage received. He can also summon the puppets of his two accomplices, Eratz and Edasse.
-
Wodly's Law
Cast from the very start of the fight, with no end. In 20% of cases, it is healed when you hit it; otherwise it takes the damage normally.
-
Feline Finesse
Reveals invisible units, removes 3 AP and 3 MP for 1 turn from enemies, and gives 20 damage for 2 turns to its allies, in a circle of 4 range around it. It gains 3 AP for 1 turn and 3 range for 2 turns.
-
Nine-Tails
Melee only: hits for 1,000 Neutral and removes from the target either 9% resistance or 99 Power, for 9 turns.
-
Rife Banditry
From 2 to 10 range, in a cross of size 1: hits for 400 Water, steals 50 Chance and applies 15% erosion for 2 turns. Pulls you in or pushes you back 5 cells.
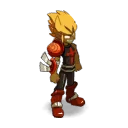
Level 100
A bandit with everything of an Iop, who notably strikes with Iop's Wrath. Each line of damage received gives him 40 Power for 2 turns, stackable. Preferably hit him with Earth or Agility, his weaknesses.
-
Protest
Gains 40 Power, stackable, for 2 turns, for each hit received. Active for the whole fight.
-
Slash
Melee only: hits for 700 Earth, then 300 as life steal, and removes 2 MP for 1 turn.
-
Seismic Jump
Teleports up to 5 range and removes 15% resistance and 2 MP from characters adjacent to its arrival cell.
-
A Thousand Deathblows
Up to 5 range, in a cross of size 3, like Iop's Sword: hits for 500 Earth or Fire and removes 10% critical for 2 turns. The spell's damage increases by 15 the following turn.
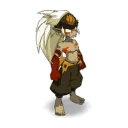
Level 100
Sacrier bandit. Each line of damage received gives him 200 in a characteristic for 5 turns, stackable.
-
Troubling Punishment
Gains 200 in a characteristic, stackable, for 5 turns, for each hit received. Active for the whole fight.
-
Bloody Attraction
From 2 to 15 range: pulls 7 cells.
-
Traitorous Blow
Up to 4 range: hits for 500 Neutral, plus an Air hit that depends on your HP.
-
Sanguine Permutation
Up to 15 range: swaps places with an ally or an enemy, gives its allies 50 Power and removes 50 Strength, Agility, Intelligence and Chance from its enemies, for 2 turns.
The rewards
- XP2,457,000 experience points
 28,752 kamas
 4 × Ino-Naru Bracelet
 4 × Kurookin Fabric
 2 × Mane in Bloom
Related quests
The quest follows The Birth of a Mission and unlocks Draconthropy, which Meriana gives you right away. It is part of the Green Emerald achievement, which covers eight quests.
- Start
- Meriana

Achievements · World Quests
Green Emerald
Complete all the Emerald Dofus quests.
Gives the Emerald Dofus
- See Dark Vlad Again and Still LiveLvl. 45
- Who Kicks the Kicked Ass's Ass?Lvl. 50
- The Soul StealerLvl. 50
- Nabur's Lost LoveLvl. 90
- The Birth of a MissionLvl. 100
- The Cania BanditsLvl. 100
- DraconthropyLvl. 100
- A Trip Back in TimeLvl. 120
Where does The Cania Bandits quest begin?
With Meriana, in the Nauseating Swamps at . You must have completed The Birth of a Mission.
How do you get the scales of the Cania bandits?
Through the legendary treasure hunt “Cania Bandit Treasure”. Since update 2.58, the bandits no longer roam around Cania: you need the Map of Cania, then win the fight at the end of the hunt and open the chest you get.
How many Bountyken do you need?
9 Bountyken, 3 per map copy. The Bounty Hunter, in the Amakna Castle militia at , gives 1 per wanted target of level 120 or lower captured.
Which wanted notices give a Bountyken?
The 32 wanted targets of level 120 or lower: Akornaddikt the squirrel, Sam Wyz, Guman, Stellia Blutzell, Bolete Master, Craff Tibballs, Ogivol Scalarcin, Boothe Baybe, Dumsh, Brumen Tinctorias, Nono the Wobot, Marzwel the Goblin, Qil Bil, Armada the Invincible, Tyranna the Terrible, Dragodingo, Turnado, Aermyne 'Braco' Scalptaras, Musha the Oni, Simbadas, Degolas, Rok Gnorok, Carlita of Augerfeld, Naganita, Beeteloot, Prince Sharmin, Spykting, Gobrechaun, War T'Lillyput, Lafinkowi, Morblok and Mastoslob.
Where do you assemble the Map of Cania?
At the Treasure Chest at , with the Desk. The hunt is then started at the Drafting Table.
Can the fight be done in a group?
Yes, but only the player who started the hunt receives the Cania Bandits' Treasure Chest, which contains the three scales.
What does the quest give?
2,457,000 XP, 28,752 kamas, 4 Ino-Naru Bracelet, 4 Kurookin Fabric and 2 Mane in Bloom.

Comments
No comments yet. A tip, or a detail about this page? Be the first.