 2 × Skt-Zo Leg
Dungeon Osavora
The Ripper's Altar
A level 200 dimension dungeon in Osavora, at [12,2]: a single room, five waves and an invulnerable boss that teleports onto you, the Ripper. Quests to start, seasons, strategy, monsters, achievements and loot.

Quests linked to the Ripper's Altar
The dungeon quest, Remarkable Guest, ends in the Altar: you must defeat the Ripper, then talk to it before leaving. Accept it before entering: a fight won without the quest in progress does not count.
Talk to the Ripper before leaving. After the six marks of the villagers, defeat it, stay in the dungeon and choose the dialogue about its hunting ritual. Leaving without talking to it forces you to come back.
- Start
- Village Guard, Rhoarim Village
- Prerequisites
- Level 180
 Touslecat Bandana2 of each monster resource, 50 Orichor and 50,000,000 XP
For later
The Ripper's Hair is requested. Hemyt the Hermit asks for it to tell the story of the Reprobate. It is obtained in the Altar, notably during Remarkable Guest: keep it, you will not have to redo the dungeon.
- Start
- Worried Lionodas, Rhoarim Village
- Prerequisites
- Level 180 and Trouble in Paradise
 Killtamer Bone Dagger2 of each monster resource, 50 Orichor and 50,000,000 XP
The room of the Ripper's Altar
A dimension dungeon: a single room, five waves of monsters, arriving on turns 1, 6, 11, 16 and 21. The map is small, and its obstacles are your only shelter from the Ripper's line of sight. Tap an image to enlarge it.

Defeat the Ripper
Endangered Species
At the start of its turn, the Ripper teleports onto the closest character in its line of sight and applies Endangered Species to them for the whole fight. A second teleport onto them kills them, and it can then chain onto all visible characters. End every turn out of its line of sight: Gravity does not stop it.
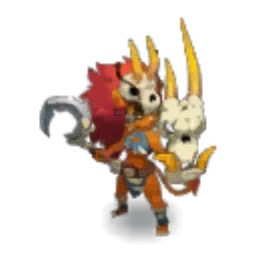
Level 220
 13,000 HP
 12 AP
 6 MP
- Resistances (%)
 Earth 20%
 Fire 15%
 Water 15%
 Air 20%
 Neutral 25%
It starts invulnerable, and only the Hunting Altar can remove that. At 1 HP, it enters Barbarism, recovers all its HP and changes spells; it cannot be eroded and cannot be made unhealable. Weak Point: Fire and Water; Neutral is what it takes best.
 Hemorrazor3 AP · 4 Range ·46 to 54 Fire damage · 10 Fire damage per 1 MP used · Triggers: Repercussion
One-turn poison: each MP you use costs HP. Dispel it, otherwise move as little as possible that turn.
 Brutank4 AP · 4 Range ·31 to 35 Water damage · 31 to 35 Fire damage · Shares damage · Triggers: Repercussion
Shares damage between the monsters in the area, without line of sight. Can be dispelled: remove it before your big turn.
 Procrastination5 AP · melee ·93 to 108 Water damage · Push Away 1 cell · Triggers: Repercussion
In melee: pushes its target one cell, and the Ripper steps back as well.
 Realignment3 AP · 5 Range ·56 to 65 Fire damage · 10% Erosion · Triggers: Repercussion
In Barbarism: stackable erosion for 2 turns and a one-cell pull, without line of sight.
 Proxicario4 AP · 4 Range · Advance 4 cells ·83 to 97 Water damage · 100 Flight · -100 Flight · Triggers: Repercussion
In Barbarism: it pulls itself in a line up to its target and steals Flight from them. Do not stay lined up with it.
 Swolaudacity5 AP · on itself ·47 to 54 Water damage · 47 to 54 Fire damage · Triggers: Repercussion
In Barbarism: hits in a circle around it and steals 500 vitality from each target for 2 turns.
The five-step strategy against the Ripper
Out of its line of sight. From the first to the last turn, end behind an obstacle so that it does not teleport onto you. It never teleports onto a summon: place one in front of it or in front of you if you are exposed.
Remove its invulnerability. Do it as early as possible: once vulnerable, it stays that way for the whole fight. The method depends on the season, detailed below. If that is impossible on turn 2, hit its acolytes in the meantime, but keep alive the monster used for the unlock.
Up to its 1 HP threshold. Hit it while keeping it at a distance and removing its MP. Dispel Brutank's damage sharing. At the start of its turn, it gains 1 permanent MP per monster lined up with it, Altar included: place it away from any allied line.
Barbarism, the second phase. At 1 HP, it recovers all its HP and becomes much more dangerous: you have to start over, and fast. There is no invulnerability between the two phases: a Rogue, an Iop or a Sram can set up their turn, leave it a few HP, then cross the threshold and finish it off before it plays again.
Finish the waves. With The Ripper dead, the fight becomes much simpler. Keep the monsters at a distance, remove the Range of the Voracles and watch their seasonal reactions until wave 5.
Removing its invulnerability depending on the season
Each monster triggers its seasonal reaction after 5 damage lines, and the Hunting Altar copies it onto the entity closest to it. In Birthing Season, it is the Voracle: trigger its reaction, which makes it invisible, and in the same turn place the Ripper as close as possible to the Altar. It becomes invisible in turn: hit it to reveal it, and it loses its invulnerability.
In Hunting Season, it is the Killtamer, who swaps places with the closest entity at least 4 Range away from it. Trigger its reaction, place the Killtamer or a character as close as possible to the Altar, and the Ripper at exactly 4 Range from that entity: the swap makes it vulnerable. Wedge the target against an obstacle so that it is not pushed in the meantime.
In Resting Season, it is the Touslecat, whose reaction reflects the next attack taken. Trigger it, then place a character as close as possible to the Altar and in the Ripper's line of sight: it teleports onto them, its spell is reflected and it loses its invulnerability.
The Hunting Altar
Summoned at the start of the fight, it is invulnerable and has 100,000 HP. Each turn, it copies the monsters' spells and the seasonal reactions that were triggered, then replays them at the end of the turn on the entity closest to it, with reduced effects. Its spell effects show what it is about to reproduce.
Since it only dies once all the waves have been eliminated, the waves always arrive on turns 1, 6, 11, 16 and 21. The new monsters are invulnerable until the end of their first turn, but have 25% less HP from wave 2 onward.
Its seasonal reaction
The Ripper has its own as well, every 5 attacks taken: in Birthing Season, it pulls the closest character one cell; in Hunting Season, it gains 200 Power for 3 turns; in Resting Season, it removes all spell effects from your characters and summons. Count your damage lines before casting your boosts.
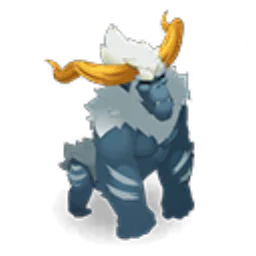
The monsters of the Ripper's Altar
Only three level 200 monsters, but all dangerous, and each season strengthens them: +1 MP in Birth, +20% final damage in the Hunt, +20% vitality in Rest. Always keep alive the one used to unlock the Ripper. The resistances in red are their weaknesses.
In which order to kill the monsters
- Killtamer — she swaps places with your characters and doubles the damage of the next attack taken.
- Voracle — it hits hard at range and heals its allies; if you cannot kill it, remove its range.
- Touslecat — it pulls, steals MP and hits very hard in melee, but keeps its distance.

Level 200
- 7,100 HP
- 12 AP
- 6 MP
- Resistances (%)
- Earth 21%
- Fire -6%
- Water 14%
- Air 0%
- Neutral 16%
Braidwhip swaps its place with yours, then brings you back at the end of your turn: dispel yourself or take Gravity, or use it to reposition it. Plaitorment makes you take 170% of the next attack, Plait-out Poaching gives 1,000 vitality to its allies. Weak to Fire.
 Braidwhip3 AP · 4 Range ·56 to 65 Air damage · Switches positions · Triggers: Repercussion
Position swap, then a second swap at the end of the target's turn. Gravity or dispelling cancels it.
 Plaitorment4 AP · 4 Range ·65 to 75 Fire damage · Damage taken x170% · Triggers: Repercussion
Increases the damage taken by the target for the next attack only: do not waste your big spell on a marked character.
 Plait-out Poaching
+1,000 vitality to the other monsters for 2 turns, stackable twice and dispellable. Also Push Away or pulls the characters near the monsters.

Level 200
- 6,000 HP
- 12 AP
- 6 MP
- Resistances (%)
- Earth -5%
- Fire 26%
- Water 1%
- Air 21%
- Neutral 13%
All its spells have modifiable range: remove its Range and it loses most of its effectiveness. Divination and Hauspice heal its allies, Pres'age's glyph heals the monsters and hits the characters that end their turn there. Weak to Earth.
 Hauspice2 AP · 7 Range ·37 to 43 Earth damage · Push Away 2 cells · Triggers: Repercussion
Push Away 2 cells; on the target's next turn, heals the monsters around it.
 Divination4 AP · 7 Range ·74 to 86 Earth damage · 11 to 13 Earth damage · 21 to 26 Earth heals · Triggers: Repercussion
Hits the target, hurts then heals the monsters in its line of sight: this also advances their seasonal reaction.
 Pres'age4 AP · 7 Range ·46 to 54 Water damage · Places an end-of-turn glyph · Triggers: Repercussion
Cross-shaped glyph: it heals the monsters that end their turn there and hits the characters. Always get out of it.
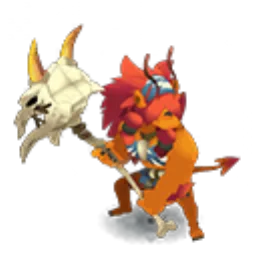
Level 200
- 8,200 HP
- 12 AP
- 6 MP
- Resistances (%)
- Earth 21%
- Fire 4%
- Water 9%
- Air 26%
- Neutral 6%
Sloth pulls and steals 1 MP, Feligance hits everything around it and gives resistances to distant monsters. Do not place a summon near it: Roaring Punch also hits the entity closest to its target, so your characters that stayed at a distance.
 Sloth3 AP · 4 Range ·42 to 48 Air steal · Pulls 1 cell · Steals 1 MP · Triggers: Repercussion
Life steal, pulls one cell and steals 1 MP, up to three times per turn.
 Feligance6 AP · on itself ·111 to 129 Earth damage · Triggers: Repercussion
Steals tackle around it and gives 10% resistances, stackable, to monsters more than 3 Range away. Can be dispelled.
 Roaring Punch
In melee: hits the target and the character or summon closest to it, and the Touslecat gains vitality.
Preparing your run through the Ripper's Altar
The hard dungeon of the dimension, for level 190 to 200 teams that know how to play lines of sight. People come for Remarkable Guest, the achievements and The Ripper's Claw: bring burst and a dispel.
How to enter the Ripper's Altar
The entrance is in Rhoarim Village, in the Osavora dimension, at . To reach Osavora, take a portal from the Voyagers' Tower . You need a Key to the Ripper's Altar, which is consumed: the key ring does not work in a dimension.
Crafting the Key to the Ripper's Altar
It is crafted at a handyman's workshop. Three ingredients drop from the dungeon's monsters, at 12%: Touslecat Bandana, Voracle Divinatory Bone and Killtamer Bone Dagger. The Rhoarim Shampoo is bought from Collector Tramshandy for 3 Orichor; Icefish (fishing), Snowdrop and Frosteez (harvesting) complete the recipe. Remarkable Guest and The Scarred King each give two copies of the three monster resources.
| Ingredient | Quantity | Level |
|---|---|---|
 Frosteez |
1 | 200 |
 Snowdrop |
1 | 200 |
 Icefish |
1 | 200 |
 Rhoarim Shampoo |
1 | 200 |
| Touslecat Bandana |
2 | 200 |
 Voracle Divinatory Bone |
2 | 200 |
| Killtamer Bone Dagger |
2 | 200 |
Which team to bring against the Ripper
Stall, heal, protect. The map is small: you will take a lot of damage. MP removal, protection and healing let you last through five waves.
A dispel. Brutank, Hemorrazor's poison, Feligance's resistances and Braidwhip's swap can all be dispelled. A class with a debuff spell is strongly recommended.
Burst for the second phase. The Ripper fully rebuilds itself at 1 HP. A class able to kill it in one turn after the threshold (Rogue, Iop, Sram, or an Eliotrope and Iop duo) avoids having to face the second phase.
The comfortable classes. Burst classes (Rogue, Iop, Sram) get through the second phase, a Pandawa tank last in initiative helps with the unlock in Hunting Season, the Enutrof stalls with Corruption and Pull Out, the Feca protects. Take the current season into account: a ranged team suffers in Birth, a melee team in Hunt, a burst team in Rest.
The five achievements of the Ripper's Altar
Each achievement gives 200,000,000 XP and 2 The Ripper's Claw, Trio doubles the XP. With five waves, the fight lasts more than 20 turns: each challenge must hold until the last wave.
| Achievements | Condition | Points | XP |
|---|---|---|---|
 The Ripper's Altar |
Defeat the Ripper in this boss's dungeon. | 10 | 200 000 000 |
| The Ripper (Nomad) |
Defeat The Ripper in its dungeon while completing the “Nomad” challenge. | 10 | 200 000 000 |
| The Ripper (Trio) |
Defeat The Ripper in its dungeon while completing the “Trio” challenge. | 20 | 400 000 000 |
| The Ripper (In the Line of Fire) |
Defeat The Ripper in its dungeon while completing the “In the Line of Fire” challenge. | 10 | 200 000 000 |
| The Ripper (Special) |
Defeat The Ripper in its dungeon while completing the “Altared” challenge. | 10 | 200 000 000 |
Nomad
Allied fighters must use all their movement points every turn. Partially fleeing fails the challenge. Little extra difficulty, but a constant positioning constraint. Never get tackled, and keep it in mind throughout the fight: even well hidden behind an obstacle with 1 MP left, you will still have to move.
In the Line of Fire
Allied fighters must end their turns in at least one enemy's line of sight. Simpler than it seems, thanks to the Hunting Altar: end in the Altar's line of sight and use it as an obstacle, with the Ripper placed behind it. Check every turn that no character is visible to it; place a summon in front of it if needed.
Special: Altared
No enemy other than the Ripper may suffer the effects of the Hunting Altar. At each end of turn, the entity closest to the Altar must be the Ripper, a character or a summon. In wave 1, place a summon in contact with the Altar every turn, with your summoner last in initiative: if the Altar kills it, the achievement fails. Then, stick a tank to the Altar, ideally a Pandawa, who tackles the monsters and can no longer be pushed; Gravity protects them from the Killtamers. In Hunting Season, unlock with a character, never with the Killtamer. Priority Focus on the Killtamers.
Trio
Three characters maximum, under 80 turns. The hardest achievement in the dungeon. Birthing Season is the best suited: its MP bonus is countered by the removal. You need a class or a duo capable of big burst, for example a Rogue who sets up a wall of bombs to kill the Ripper on turn 4 or 5, played last, while a Sadida removes MP and a Pandawa places and hits in an area. Unlock it on turn 2 and expect to still have wave 1 alive when wave 2 arrives.
Drops and loot of the Ripper's Altar
Base in-game rates, before Prospecting bonuses.
On the Ripper
 The Ripper's ClawBone12 %
 Nougat Rabmarac BarTreat6 %
 Fortunawa CookieTreat6 %
 Graogarm ScaleSkin3 %
 The Ripper's ManeHair2 %
 Rhoarim CombBone2 %
 Bag of SpicesContainer1 %
 Al Howin GobtubbyCeremonial pet1 %
 Paragon of PowerMain quests0,7 %
 Tasty CarrionMeat0,6 %
On the henchmen of the Ripper
 Nourishing MilkDivine Dimensions · Killtamer12 %
 Burning BloodDivine Dimensions · Killtamer12 %
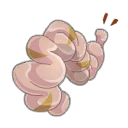 Oddnivore IntestineQuest Resource · Killtamer12 %
 Regenerating LymphDivine Dimensions · Killtamer12 %
 Tasty MeatMeat · Killtamer12 %
- Killtamer Bone DaggerBone · Killtamer12 %
- Voracle Divinatory BoneBone · Voracle12 %
- Touslecat BandanaGarment · Touslecat12 %
 OrichorToken · Killtamer3,6 %
- Graogarm ScaleSkin · Killtamer3 %
- Rhoarim CombBone · Killtamer2 %
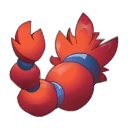 Killtamer PlaitHair · Killtamer2 %
- Fortunawa CookieTreat · Killtamer2 %
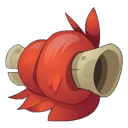 Voracle BlowoutHair · Voracle2 %
 Touslecat FringeHair · Touslecat2 %
- Bag of SpicesContainer · Killtamer1 %
The seasons of Osavora
One modifier per season
Osavora has no classic dimension modifier, but a bonus per season. Birth: an ally who ends their turn on their starting cell gains a shield, and healing if they did not attack. Hunt: finishing off an enemy gives 1 AP and 3% final damage, stackable. Rest: summoning gives 1 MP to the summoner and the summon.
The monsters' seasonal reactions
In Birth, the Touslecat removes 1 Range from everyone, the Voracle becomes invisible and heals itself, the Killtamer skips the turn of whoever triggers it. In Hunt, the Touslecat leaves a glyph, the Voracle gives critical hits to the monsters, the Killtamer swaps places from 4 Range or more. In Rest, the Touslecat reflects the next spell, the Voracle pushes 3 cells, the Killtamer teleports to the opposite side. A monster finished off in state 4 triggers nothing.
Minimize its rebuilding
Erosion and Unhealable do not work on the Ripper. Spells that reduce healing received, like Arrow of Torment, Groute or Carving Up, or the common spell Grunob's Lesson, did work, however: apply them before its 1 HP threshold.
Where is The Ripper's Altar?
In Osavora's Rhoarim Village, at . Osavora is reached through a portal from the Voyagers' Tower .
What level should you do The Ripper's Altar at?
Level 190 minimum, 200 recommended. The Ripper is level 220, and this is the hardest dungeon in the dimension.
Why does the Ripper stay invulnerable?
The Hunting Altar must copy the right monster's seasonal reaction. Voracle in Birth, Killtamer in Hunt, Touslecat in Rest: placed in the right spot, it loses its invulnerability for the whole fight.
How do you avoid being killed by the Ripper?
End every turn out of its line of sight. Its second teleport onto a character marked by Endangered Species kills them; it does not teleport onto summons, and Gravity does not stop it.
What happens at 1 HP?
It enters Barbarism and recovers all its HP. Its spells change and it becomes more dangerous: a burst class can finish it off right after the threshold, before it plays again.
Which monster should you target first in the Ripper's Altar?
The Ripper, as soon as it is vulnerable. Among its acolytes, aim first at the Killtamer, and remove the Range of the Voracles; keep alive the one used for the unlock.
Which quest should you do in The Ripper's Altar?
Remarkable Guest, with the Village Guard . Defeat the Ripper then talk to it before leaving, otherwise you will have to come back.
Do you need a key for every run of the Ripper's Altar?
Yes, the key ring does not work in a dimension. Three ingredients drop from the dungeon's monsters, and the Rhoarim Shampoo costs 3 Orichor.
Which season is the most favorable?
The one that does not penalize your team. At range, Birthing Season is a problem; in melee, the Hunt; with burst, Rest. For the Trio, Birth is the most manageable.



Comments
No comments yet. A tip, or a detail about this page? Be the first.