 2 × Skt-Zo Leg
Dungeon Destroyers' Nightmare
Battle of the Crimson Dawn
Level 200 dungeon in the Destroyers' Nightmare, in [1,0]: five rooms under a modifier that punishes any turn ended with no enemy in sight, and an invulnerable boss protected by its two imps, The Eternal Conflict. Quests, strategy, monsters, achievements and loot.
Quests linked to the Battle of the Crimson Dawn
The dungeon is out of reach without The Weight of Its Gaze, which opens access to the Destroyers' Nightmare. Three level 200 quests then go through the dungeon map: a drop to collect, a sigil to obtain and a confrontation with The Eternal Conflict.
Without it, no Destroyers' Nightmare. Throw a Dream of Harmony into the demonic well on the Atoll of the Possessed, then withstand Ch'Tyx's gaze: the pentacle requires all twelve classes, played by players or by the Atoll's NPCs for kamas.
- Start
- Pandamonium Guardian, Atoll of the Possessed
- Prerequisites
- Level 50 and Pandala Awakens
For later
You need an Imp Toy, dropped by the Demoloch. Ayuto is looking for a clue about the Destroyers: get the toy in the dungeon (the Demoloch only appears with five or more characters), show it to her, then join her at the cenotaph entrance, at .
- Start
- Ayuto, Destroyers' Nightmare
- Prerequisites
- Level 180 and The Weight of Its Gaze
 Malephisto Shoulder3 shoulders and 50,000,000 XP
One of the twelve sigils is obtained here. Pol Dullbow has you gather the sigils of the Protectors of the Months to reforge the Menologium: Raval's is picked up in , on the dungeon map.
- Start
- Pol Dullbow, Kingdom of Amakna
- Prerequisites
- Level 180 and Of Crops and Cruelty
One step has you survive The Eternal Conflict. Rimanda and the Huppermages send you to the Destroyers' Nightmare; after Aurora Horror and The Eternal Conflict, go back to see the Destroyers' Nightmare at .
- Start
- Draconiros
- Prerequisites
- Level 180 and The Beginning of the End
 Destroyer Spike2 spikes and 60,000,000 XP
The 5 rooms of the Battle of the Crimson Dawn
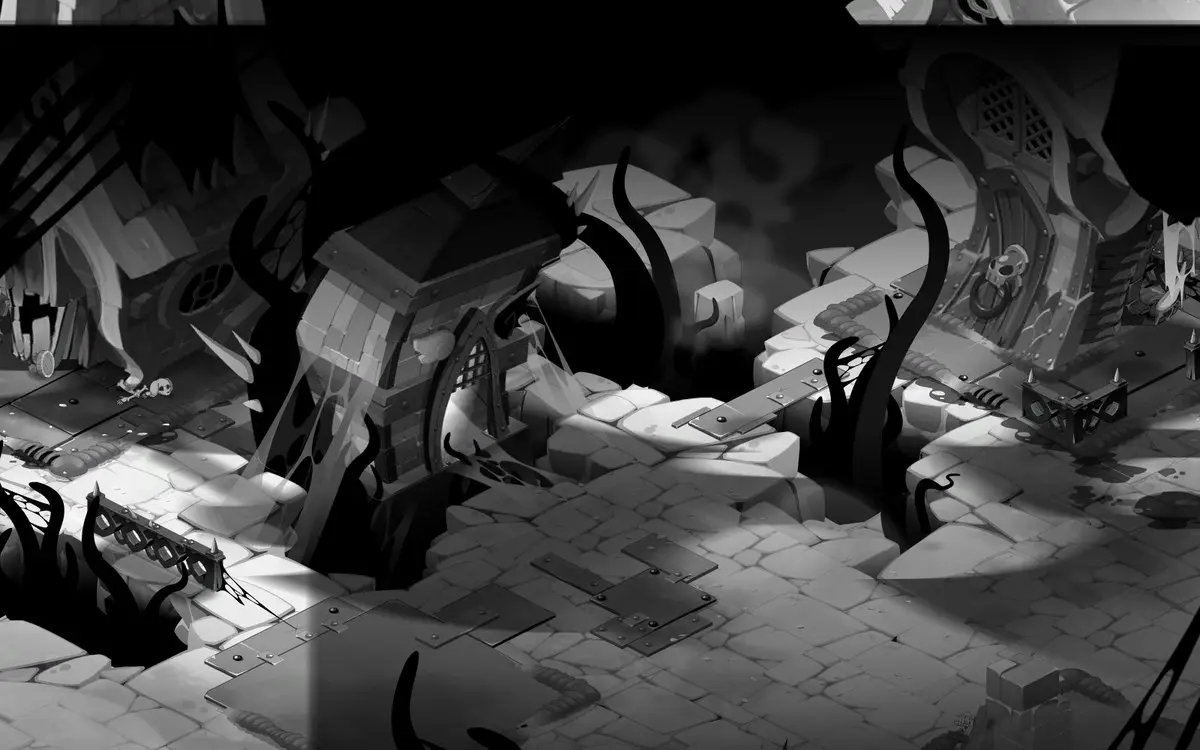
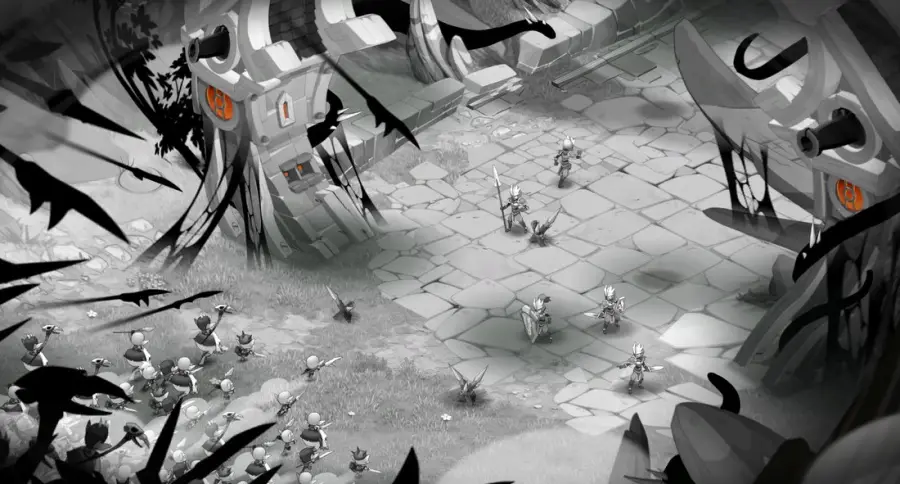
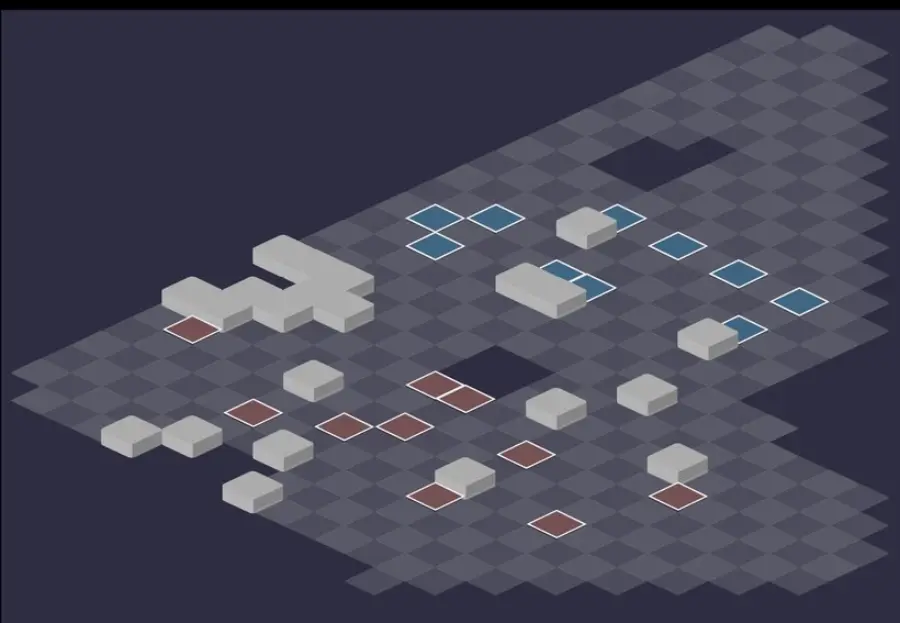
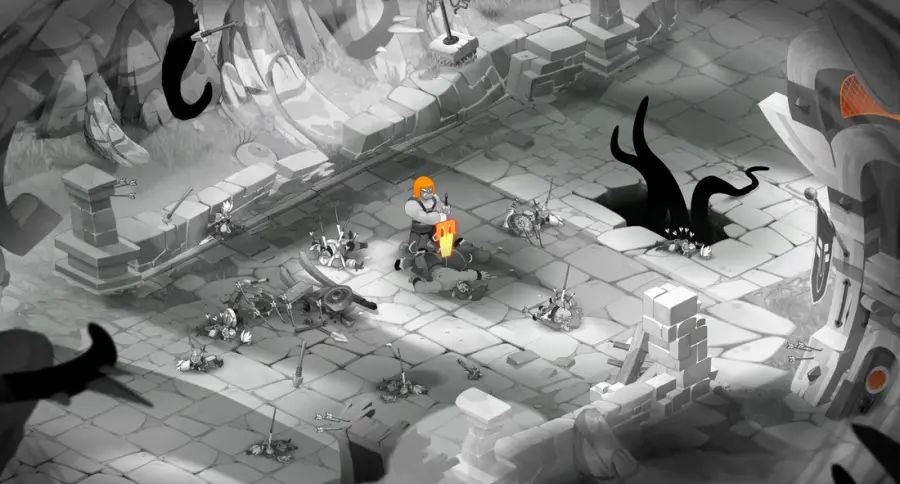
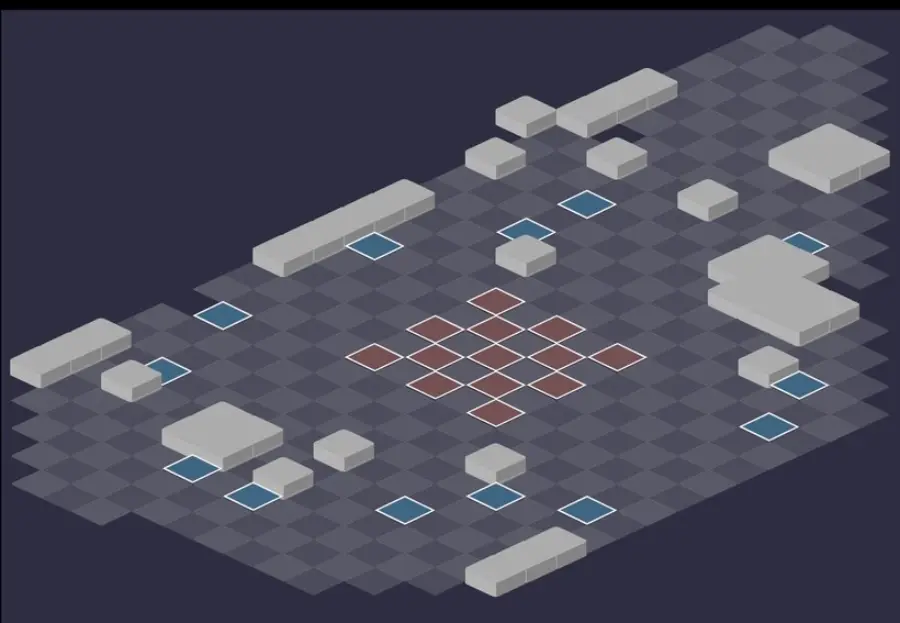
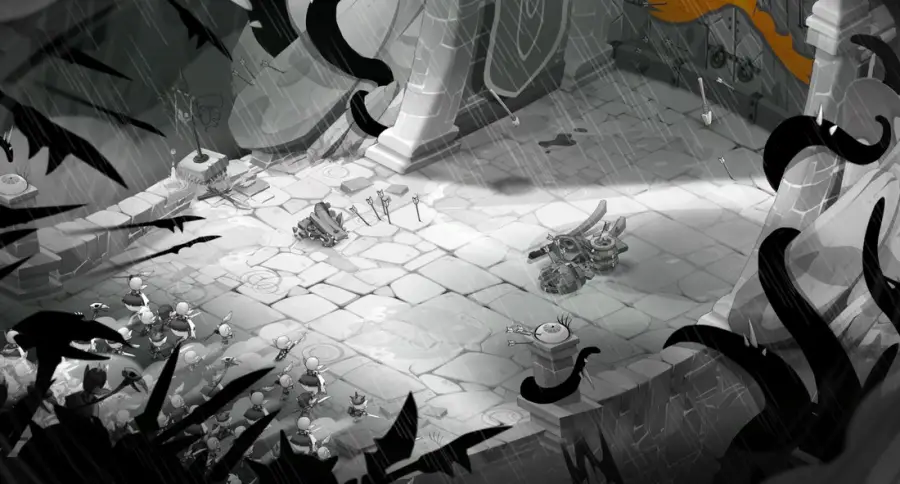
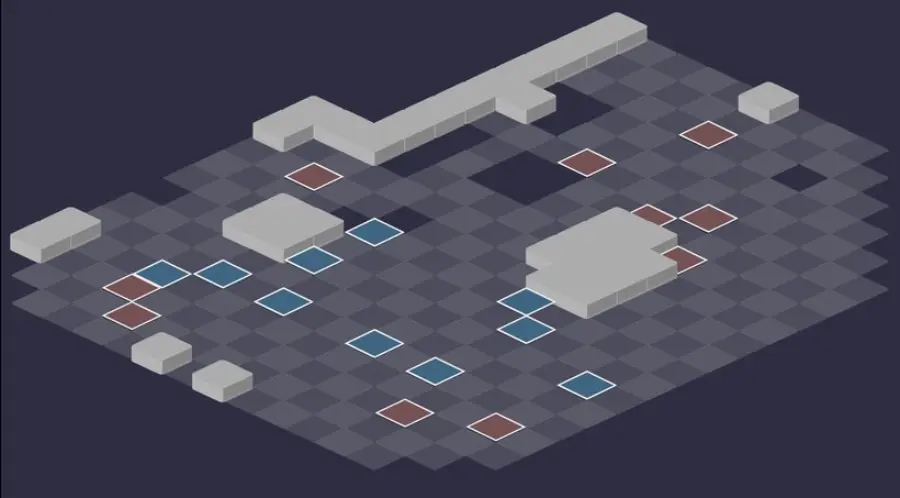
Five fights. In every room, the zone modifier applies: end every turn with an enemy in line of sight, otherwise the Destroyers' Nightmare appears. The rule is detailed in the boss section. For each room: the setting, then the tactical view with the starting cells (blue: you, red: the monsters). Tap an image to enlarge it.
Room 1
Room 2
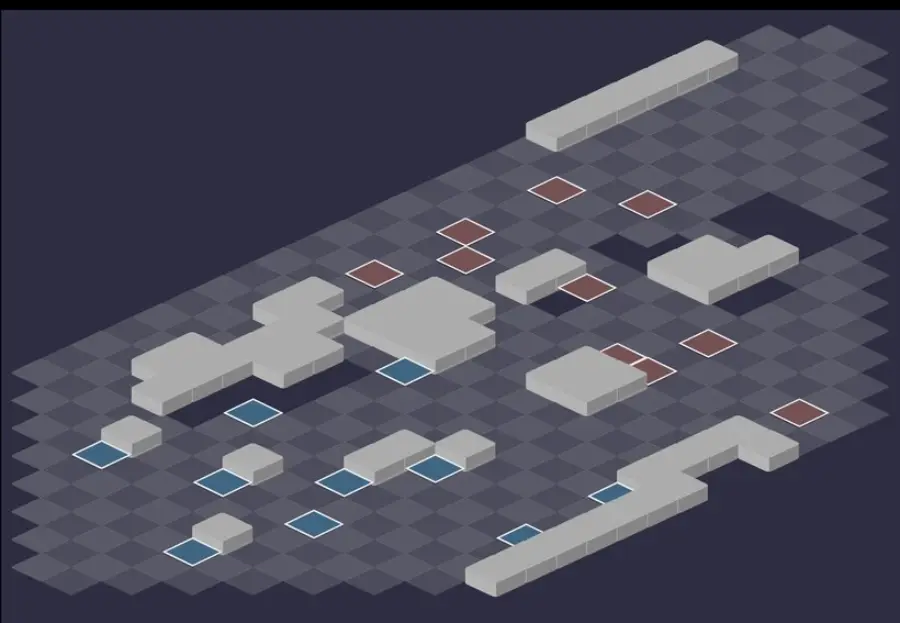
Room 3
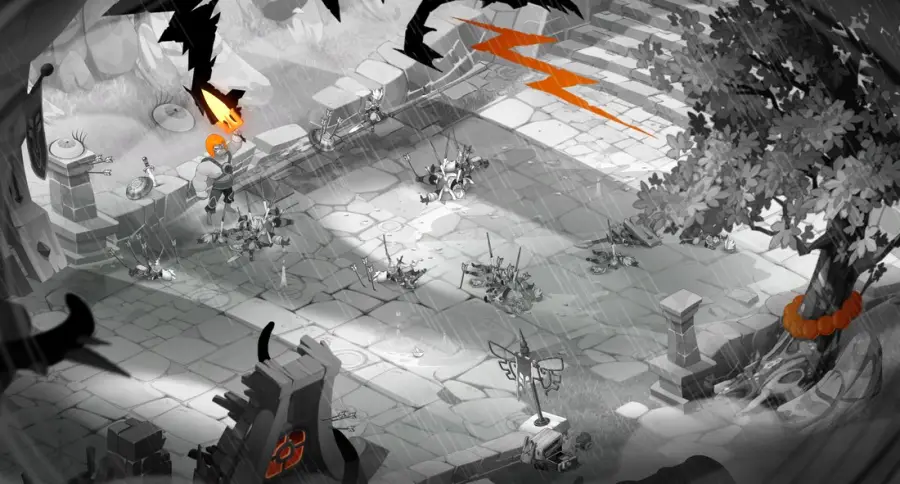
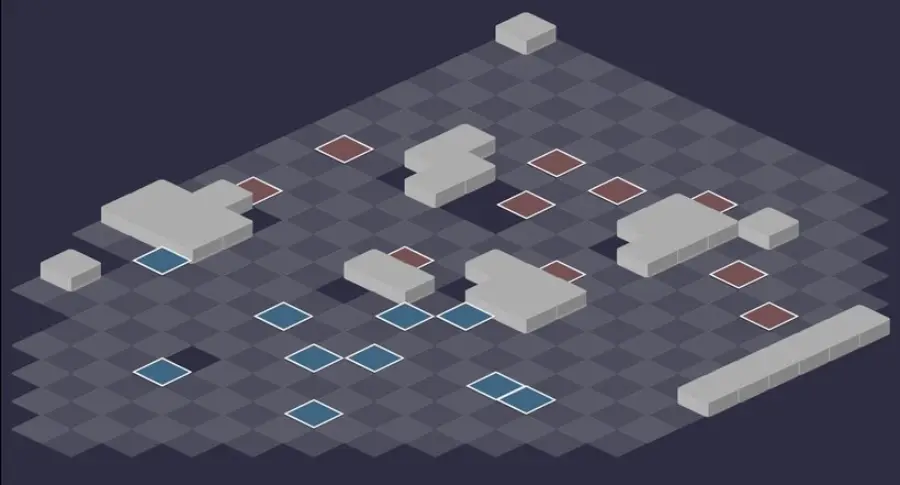
Room 4
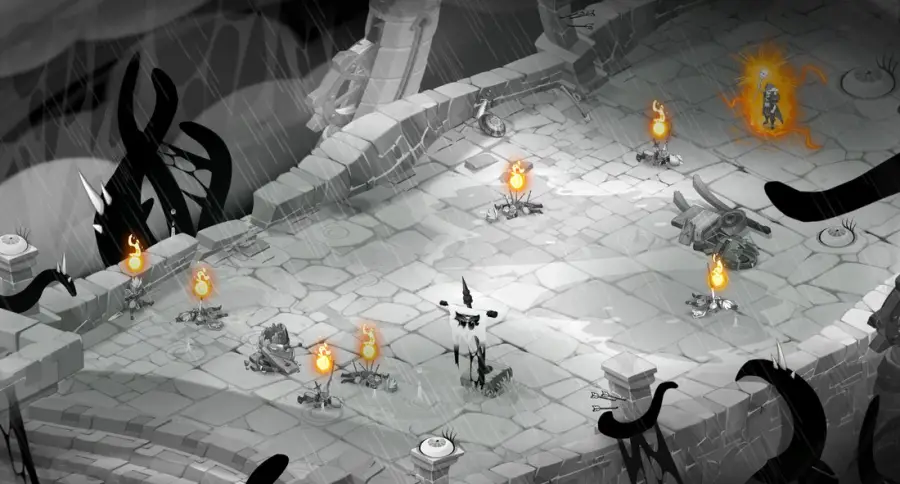
Room 5
Defeat The Eternal Conflict
A threshold that only X state removes
The Eternal Conflict is invulnerable in melee and at range as long as its two imps live, and a threshold at 4,000 HP protects it even when you kill them. Only the X state removes this threshold: you have to make it accumulate 10 Bontarian Wrath states and 10 Brakmarian Wrath.

Level 220
 20,000 HP
 20 AP
 4 MP
- Resistances (%)
 Earth 29%
 Fire 17%
 Water 23%
 Air 31%
 Neutral 20%
It is Heavy for the whole fight: it can't be carried. It hits hard in melee with Fist of the Dark City and at medium range with Fist of the White City, but at a distance, it does very little, apart from a 3-cell leap every 4 turns. Weak Point: Fire, at 17%.
 Fist of the Dark City2 AP · melee ·83 to 97 Fire damage · Push Away 4 cells
In melee, it pushes 4 cells, and each Brakmarian Wrath state increases its pushback damage. Do not end your turn stuck to it.
 Fist of the White City3 AP · 5 Range · 10% Erosion ·46 to 54 Water damage
Erodes the target. Its range grows by one cell per Bontarian Wrath state; in X state, it hits up to 15 Range without line of sight.
 Cycle of Violence3 AP · 7 Range · Pulls 4 cells ·-2 AP · -3 Range
Pulls 4 cells in a cross pattern and removes range, plus 2 AP near the point of impact. It doesn't cast it on a carrier of the Lavasmith Dofus.
 Crimson Dawn Massacre4 AP · 3 Range · Effect duration: -4 · Teleports to the targeted cell ·38 to 44 Fire damage · 38 to 44 Water damage · 20% Erosion · Heavy State · Unmovable State
Jump of 3 cells without line of sight, cooldown 4 turns, shortened if it starts its turn in contact with your characters. If it hits an enemy, it becomes Unmovable: the state can be dispelled.
The five-step strategy against The Eternal Conflict
Monsters first. Kill the Malephisto first, then the Demoloch if there are five or more of you. Meanwhile, keep the boss and its imps at a distance: push it back and remove its MP every turn, it dodges them well.
Kill the Bontangel. Position yourself at the bottom of the map, the boss at the top, behind blocks, and pull the Bontangel close to you to hit it in melee. Once it is dead, you have 2 turns to hit the boss at range before it resummons it. Repeat until the 4,000 HP threshold.
Raise its states to 10. Reverse the usual setup: Bontangel at range, Brakimp close to you. Hit the Brakimp in melee and the Bontangel at range. If your MP removal offsets the MP it gains, raise Hatred first so you can push it away, then Wrath when you are ready.
Prepare the X state. Wait for it to cast Crimson Dawn Massacre, which will not come back during its vulnerability, and remove as many MP from it as possible: in X state, it is immune to MP removal. The turn before, boost yourselves, apply your vulnerabilities and protect yourselves.
Finish or stall. It kills its imps, becomes vulnerable for 2 turns and gains 9,000 shield and 400 flight. Kill it if you have the damage, otherwise stall: it resummons its imps, has lost its threshold, and you only need to kill the Bontangel again to finish its last HP.
The Destroyers' Nightmare modifier
If a character ends their turn with no enemy in line of sight, the Destroyers' Nightmare appears 2 cells or more away from them, for one turn. Always end your turn in an enemy's line of sight as long as monsters are alive: when only The Eternal Conflict remains, the rule no longer applies.
When an enemy dies, those who had it in line of sight become invisible for one turn, except when an imp dies. Note where the monsters are before finishing one off, and cut its lines of sight with an obstacle or a summon. Invisibility can be dispelled.
The Destroyers' Nightmare
It has 17,000 HP, hits very hard, swaps places and creates illusions; it gains 3 MP and 15% damage if it sees an enemy at the start of its turn. It also appears when an imp dies (25% chance) and when the boss enters the X state. Apply Gravity to it and move it away: its spells have little reach.
The monster that summons it doesn't drop below 1 HP while it's there. Let it disappear on its own instead: it then returns all entities to their starting positions, which often works in your favor, and heals enemies for only 10%. The only exception is a boss that started near you.
Wrath, Hatred and X state
The Bontangel (invulnerable at range) and the Brakimp (invulnerable in melee) start with 10 states, the boss with 0. Each Column of Light or Column of Flames cast, each ranged hit on the Bontangel and each melee hit on the Brakimp transfers a state to the boss. Each state strengthens it: Wrath extends the range of Fist of the White City, Hatred makes its pushes heavier and gives it 1 MP every two states.
At 10 and 10, it enters X state at the start of its next turn, only once per fight. During those 2 turns, Fist of the White City hits up to 15 range with no line of sight: a Feca Truce cast the previous turn can absorb its first turn.
The monsters of the Battle of the Crimson Dawn
Five level 200 Destroyers, with the Demoloch appearing only from five characters. Each one receives a random bonus at the start of the fight, Ahcos: beware of Chaotic Frenzy, which gives the monster 2 MP. Resistances in red are their weaknesses.
In which order to kill the monsters
- Malephisto — its poisons, including the one that removes 4 MP, are the most restrictive of the fight.
- Demoloch — with five or more players, it heals its allies and summons copies of itself.
- Diabelial — it hits from very far away and, along with the Malephisto, is among the biggest damage dealers.
- Brutasmodan, then Typhomet — the first rushes into melee, the second reflects damage and steals MP from a distance.

Level 200
- 6,300 HP
- 16 AP
- 5 MP
- Resistances (%)
- Earth -20%
- Fire 8%
- Water 12%
- Air -18%
- Neutral 19%
Its poisons are the most annoying in the dungeon: Demonic Pact hits hard after 3 turns and removes 4 MP, False Tragedy erodes and roots. Hatred Prison leaves a glyph that costs AP. Weak to Earth and Air.
 Hatred Prison2 AP · 6 Range ·40 to 46 Fire damage · Places a glyph-aura
Places a glyph around the target: walking on it costs HP, flight and 2 AP. Go around it.
 False Tragedy4 AP · 8 Range ·42 to 48 Fire damage · 30% Erosion · Rooted State
2-turn poison, with erosion and the Rooted state. It can be dispelled.
 Demonic Pact5 AP · 11 Range ·42 to 48 Water damage · 111 to 129 Water damage · -4 MP · Removes the spell's effects
2-turn poison, then after 3 turns a big hit that removes 4 dodgeable MP. The reason to kill the Malephisto first.

Level 200
- 6,900 HP
- 16 AP
- 7 MP
- Resistances (%)
- Earth 10%
- Fire 17%
- Water -10%
- Air 25%
- Neutral -22%
It heals with Infernal Appetite and summons up to two copies of itself, which also heal and regenerate it when they are hit. Salammbô protects the monsters around it. Weak to Neutral and Water.
-
Infernal Appetite3 AP · 3 Range ·35 to 41 Water steal · 38 to 44 Fire heals
Steals life or heals an ally, up to four times per turn. Its copies cast it too.
 Salammbô
Shield and critical bonuses, 2 turns, for the Demoloch and the monsters 2 cells from it or its copies. Spread them out.
-
Sacrificial Fruit
Summons a copy of the Demoloch with 3,000 HP, two at most. It heals for a quarter of the damage they take: target the original.

Level 200
- 5,200 HP
- 16 AP
- 5 MP
- Resistances (%)
- Earth 16%
- Fire -12%
- Water -20%
- Air 18%
- Neutral 6%
It hits from very far away and pushes back with Demonic Tongue, which speeds up the return of Diabolic Torrent. Tissue of Lies puts you in Gravity. Weak to Water and Fire: it goes down fast.
 Demonic Tongue3 AP · 12 Range ·28 to 32 Water damage · Push Away 2 cells
Push Away 2 cells up to 12 Range and shortens the cooldown of Diabolic Torrent by one turn with each cast.
 Tissue of Lies2 AP · 9 Range ·40 to 46 Air damage · Gravity State
 Diabolic Torrent4 AP · 10 Range ·37 to 43 Fire damage · 37 to 43 Air damage · Diabolic Torrent: +40 Damage
Each pushback damage the target takes afterward costs it extra HP: do not get pushed against an obstacle.

Level 200
- 8,000 HP
- 16 AP
- 6 MP
- Resistances (%)
- Earth 22%
- Fire 5%
- Water 24%
- Air -13%
- Neutral -19%
Brutal Buckaray throws it into contact with you in a line, then Abyssal Uppercut hits harder the more wounded it is. Blazing Feast removes 2 MP and gives it a shield. Weak to Neutral and Air: finish it off at range.
 Blazing Feast2 AP · 2 Range ·31 to 37 Fire steal · -2 MP · Shield: 50% of level
Removes 2 MP, up to four times per turn, and gives a shield to Brutasmodan. Keep your distance.
 Abyssal Uppercut5 AP · melee ·46 to 54 Earth damage · 74 to 86 Earth damage · 102 to 118 Earth damage · 130 to 151 Earth damage · 157 to 183 Earth damage · Weakened State
The more wounded the Brutasmodan is, the harder it hits, and the target becomes Weakened. Do not finish it off in melee.
 Brutal Buckaray3 AP · 7 Range · Advance 6 cells · Steals 200 Strength ·44 to 52 Earth damage
It charges at you in a line, from 2 to 7 cells, steals Strength and hits around the target. Do not stay lined up with it.

Level 200
- 4,900 HP
- 16 AP
- 5 MP
- Resistances (%)
- Earth -21%
- Fire -15%
- Water 9%
- Air 22%
- Neutral 16%
It hits in a line up to 14 range with Scythurricane, which heals the monsters near its target, and steals MP from very far away. Under Tartar's Resistance, it reflects damage. Weak to Earth and Fire.
-
Scythurricane3 AP · 14 Range ·68 to 80 Water steal
Life steal in a line or diagonal up to 14 range, which heals the monsters around the target. Don't attack while standing next to a monster.
 Heretic's Gaze2 AP · 16 Range ·Steals 1 MP
Steals 1 MP from 3 to 16 range, up to four times per turn.
 Tartar's Resistance
Reflects the damage and makes it Unlockable for 2 turns. Avoid small hits while it is active.
Preparing your run through the Battle of the Crimson Dawn
An extreme dungeon for level 200 teams, more comfortable with six or eight characters than four, except for the First achievement. The Eternal Conflict can't be captured: you come for the achievements, the Eternal Conflict's Nightmarish Mask and the quest items.
How to enter the Battle of the Crimson Dawn
The entrance is in the Destroyers' Nightmare, at ; the nearest zaap is the War's Wounds one . The area only opens after The Weight of Its Gaze. The key ring doesn't work here, as with dimension dungeons: craft a Battle of the Crimson Dawn Key and come on foot.
Crafting the Battle of the Crimson Dawn Key
It is crafted at a handyman's workshop. Four ingredients drop from the dungeon's monsters, at 12%: Typhomet Horn, Brutasmodan's Jaw, Diabelial Tongue and Demoloch Tentacle, plus the Tasty Meat dropped by all the acolytes. Ink Snapper, Paper Tulip and Quisnoa complete the recipe.
| Ingredient | Quantity | Level |
|---|---|---|
 Typhomet Horn |
2 | 200 |
 Brutasmodan's Jaw |
2 | 200 |
 Diabelial Tongue |
2 | 200 |
 Demoloch Tentacle |
2 | 200 |
 Tasty Meat |
2 | 200 |
 Ink Snapper |
1 | 200 |
 Paper Tulip |
1 | 200 |
 Quisnoa |
1 | 200 |
Which team to bring against The Eternal Conflict
Six to eight characters. The boss is the real problem of the dungeon: a team of six to eight characters does better than a team of four. Outside the X state, its spells are single-target, so easier to absorb with several people.
MP removal, positioning and dispelling. MP removal hampers Brutasmodan and Malephisto, positioning limits Diabelial and Typhomet, dispelling removes poisons, invisibility and Unmovable. Keep a class able to protect the team.
Damage in a single turn. To kill the boss in its X state, you need 29,000 damage: its 20,000 HP plus 9,000 shield. Eliotrope Portal and Iop's Wrath, a Rogue bomb wall or a Sram network are capable of it.
The classes that do well here. The Pandawa stays useful without being essential here. Cra and Enutrof play at range and remove MP, the Feca protects, applies Gravity and plays at range in Water. The Eliotrope with an Iop, the Rogue or the Sram bring the one-turn kill.
The five achievements of the Battle of the Crimson Dawn
Each achievement gives 200,000,000 XP and 2 Eternal Conflict's Nightmarish Mask, Duo doubles the XP. Zombie is played with the base strategy; First and Special require a combo able to kill the boss in one or two turns.
| Achievements | Condition | Points | XP |
|---|---|---|---|
 Battle of the Crimson Dawn |
Defeat the Eternal Conflict in this boss's dungeon. | 10 | 200 000 000 |
| The Eternal Conflict (Zombie) |
Defeat The Eternal Conflict in its dungeon by completing the “Zombie” challenge. | 10 | 200 000 000 |
| The Eternal Conflict (First) |
Defeat The Eternal Conflict in its dungeon while completing the “First” challenge. | 10 | 200 000 000 |
| The Eternal Conflict (Duo) |
Defeat The Eternal Conflict in its dungeon by completing the “Duo” challenge. | 20 | 400 000 000 |
| The Eternal Conflict (Special) |
Defeat The Eternal Conflict in its dungeon by completing the “Until Dawn” challenge. | 10 | 200 000 000 |
Zombie
Use exactly one movement point each turn. Much easier with six or more, ideally eight, bringing healing, protection and damage. Kill the monsters quickly, Malephisto and Diabelial first, then put the boss into X state to lift its threshold, without letting it come into melee. One MP per turn, not zero and not two. If it survives X state, kill the Bontangel and finish it off from a distance.
First
The Eternal Conflict must be finished off first. Pandawa, Feca and Rogue, plus MP removal or positioning. Keep everyone at a distance while the Rogue builds a wall of three bombs out of line of sight, in Fire. Raise Wrath by hitting the Bontangel from a distance, Hatred later, since it gives it MP: the Pandawa hits the Brakimp twice and then throws it back. Before the X state, Bunker on the exposed bomb, Truce and vulnerabilities; then push it into the wall and blow everything up. A Sram (network on the right of the map, Chakra Concentration) or the Eliotrope and Iop duo (Wrath charged on turn 2, boss at 10 states at the end of turn 4, killed on turn 5) also work.
Duo
Two characters maximum, under 40 turns. With an Eliotrope and a big hitter: kill Malephisto and Diabelial first, keep the boss away with the portals, raise its states and prepare the longest possible redirection. With a Pandawa, Cra, Feca or Enutrof, equip a Nightmare Dofus and a Lavasmith Dofus. Kill the Bontangel in melee for 2 turns of damage, up to the 4,000 HP threshold, then put it into the X state, stall and start again: the number of turns is the real difficulty. The Pandawa stalls the X state with Prohibition and Stabilisation, the Sram with Mist.
Special: Until Dawn
Allies must not finish off the Bontangel or the Brakimp. Without killing an imp, the boss is only vulnerable in its X state, which happens only once per fight: 2 turns to remove 20,000 HP and 9,000 shield from it. First kill all the monsters, raise its two states to 10, then hit with an Eliotrope, Rogue or Sram combo. If you miss, you have to start the fight over.
Drops and loot of the Battle of the Crimson Dawn
Base in-game rate, before Prospecting bonuses. The Demoloch's Imp Toy is used for the quest A Rolling Pin Gathers No Moss.
On The Eternal Conflict
 Eternal Conflict's Nightmarish MaskCombat Resource12 %
 Nougat Rabmarac BarTreat6 %
 Bag of SaltContainer3 %
- Destroyer SpikeMiscellaneous Resource2 %
 Al Howin GobtubbyCeremonial pet1 %
 Paragon of PowerMain quests0,7 %
 Tasty CarrionMeat0,6 %
On the henchmen of The Eternal Conflict
- Brutasmodan's JawMiscellaneous Resource · Brutasmodan12 %
- Tasty MeatMeat · Brutasmodan12 %
- Diabelial TongueMiscellaneous Resource · Diabelial12 %
- Demoloch TentacleMiscellaneous Resource · Demoloch12 %
 Imp ToyDestroyers' Nightmare · Demoloch12 %
- Malephisto ShoulderMiscellaneous Resource · Malephisto12 %
- Typhomet HornBone · Typhomet12 %
 Demon BloodDestroyers' Nightmare · Brutasmodan3,6 %
- Destroyer SpikeMiscellaneous Resource · Brutasmodan2 %
- Bag of SaltContainer · Brutasmodan1 %
The Nightmare Dofus and the Lavasmith Dofus
The Soldier Ghosts
In the dungeon, a carrier of the Nightmare Dofus summons a Bontarian Soldier Ghost when gaining a shield, and a Brakmarian Soldier Ghost when casting a debuff spell, even on an empty cell. The first gives it 800 shield at level 200, the second 300 power; both last 2 turns, take a lot of damage and are resummoned as soon as they die, with only one of each kind on the field. Never summon both in the same turn: the carrier takes 10% more damage and the Nightmare appears.
The Lavasmith Dofus against pulling
Cycle of Violence pulls without dealing damage: The Eternal Conflict refuses to cast it on a Lavasmith Dofus bearer. Mostly useful in Duo, useless with a full team.
Where is the Battle of the Crimson Dawn?
In the Destroyers' Nightmare, at . The nearest zaap is War's Wounds ; access to the area requires the quest The Weight of Its Gaze.
At what level should you do the dungeon?
Minimum level 190, 200 recommended. The Eternal Conflict is level 220 and the dungeon is rated extreme: come with six or eight instead.
How do you beat The Eternal Conflict?
By lifting its invulnerabilities, then its 4,000 HP threshold. Killing the Bontangel makes it vulnerable at range, killing the Brakimp makes it vulnerable in melee; only X state, reached with 10 Wrath states and 10 Hatred states, removes the threshold.
Which monster should you target first in the Battle of the Crimson Dawn?
Malephisto first, then Demoloch if there are five or more of you. The first applies the most restrictive poisons, the second heals and summons copies. Diabelial and Brutasmodan follow.
Why do you have to end your turn in an enemy's line of sight?
To keep the Destroyers' Nightmare from appearing. As long as monsters are alive, a character who ends their turn with no enemy in sight makes it appear 2 cells away from them.
Should you kill the Destroyers' Nightmare?
No, let it disappear on its own. It then brings everyone back to their starting position and only heals enemies for 10%, which almost always works in your favor.
Can The Eternal Conflict be captured?
No, The Eternal Conflict cannot be captured. No Soul Stone is needed.
Does the key ring work for the Battle of the Crimson Dawn?
No, it does not work for this dungeon. Craft a Battle of the Crimson Dawn Key for each run and come on foot.
Can the Battle of the Crimson Dawn be done with two characters?
Yes, it's the Duo achievement, in fewer than 40 turns. An Eliotrope and a heavy hitter, or a Pandawa, a Cra, a Feca or an Enutrof equipped with the Nightmare Dofus and the Lavasmith Dofus.



Comments
No comments yet. A tip, or a detail about this page? Be the first.