 2 × Skt-Zo Leg
Quest Aerdala
Meanwhile, a Rebirth
Level 200 quest, started by Draconiros in front of the Dofus receptacle in [21,-33]: a voice lost in the meantime calls you, Allisterine's. All the steps, dialogue choices, the Divine Ram and the strategy against the four Horsemen.

What to prepare
Two fights to be done solo. Keep your Death Mask, obtained long ago in a quest, and the Spiritual Ambergris to enter the whale temple.
 1 × Death Maskto equip in the last room of Ilyzaelle's Lookout
 1 × Spiritual Ambergristo access the whale temple, in front of the Kabaal Ritual
Quest Resources, obtained along the way
 1 × Fallanster's medallionin the chest on the altar of the royal chapel of Feca
 1 × Relic Chestgiven by Allisterine; it takes you back to the fight map if you are defeated
The 17 quest steps
-
1Talk to Draconiros
Dialogue · Draconiros
In front of the Dofus receptacle, Draconiros mentions a paradox: during your crossing of the Sea of Dust, the whale heard a voice that does not exist yet. According to him, it was meant for you and comes from a soul lost between dream and nightmare.
Dofus Receptacle · [21,-33] -
2Go back to see the Spirit of Bakujikera
Dialogue · Spirit of Bakujikera
Go back to the Kabaal Ritual dungeon, in , and use the Spiritual Ambergris to access the whale temple. Click the eye on the pedestal to make Bakujikera appear, then talk to its spirit. The voice addresses you and knows you: it is Allisterine, a member of the council of last hope, of which Draconiros was the only survivor.
Dialogue
- “Mention the mysterious call the spirit heard”
-
3Read Pandora's notes
Go back to the sanctuary of last hope through the zaap in . In the center of the sanctuary, go right and click the book on the right corner of the stone table. Pandora's notes on Allisterine mention a medallion engraved with her family's coat of arms, which she always keeps on her: her only link to the world before the Eliocalypse.
-
4Communicate with Entropix
· Entropix
Entropix appears. He can't guide you to Allisterine, but the medallion could help you get there: start by going to see Fallanster.
-
5Go see Fallanster
Dialogue · Fallanster
In Astrub, talk to Fallanster about the medallion and make him understand that handing it over could change his descendant's destiny. This medallion is a gift for his daughter Allisteria, containing a lock of hair from a loved one: it is waiting to be blessed in the royal chapel of Feca.
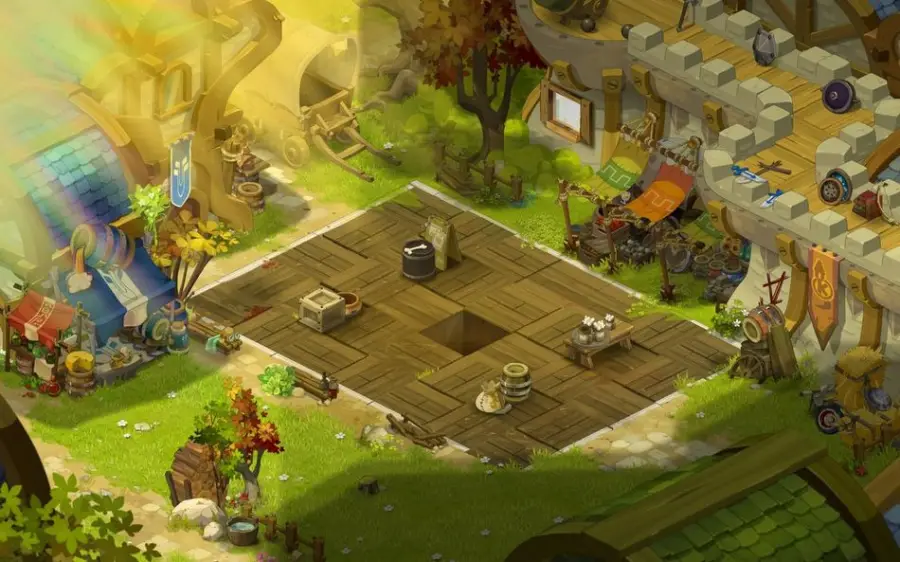
Fallanster · [4,-19] -
6Take the medallion from the altar
At Amakna Castle, go straight through the first three rooms to the throne room, then go right: you are in the Feca chapel. Click the chest on the altar to retrieve the medallion.
- Fallanster's medallionreceived
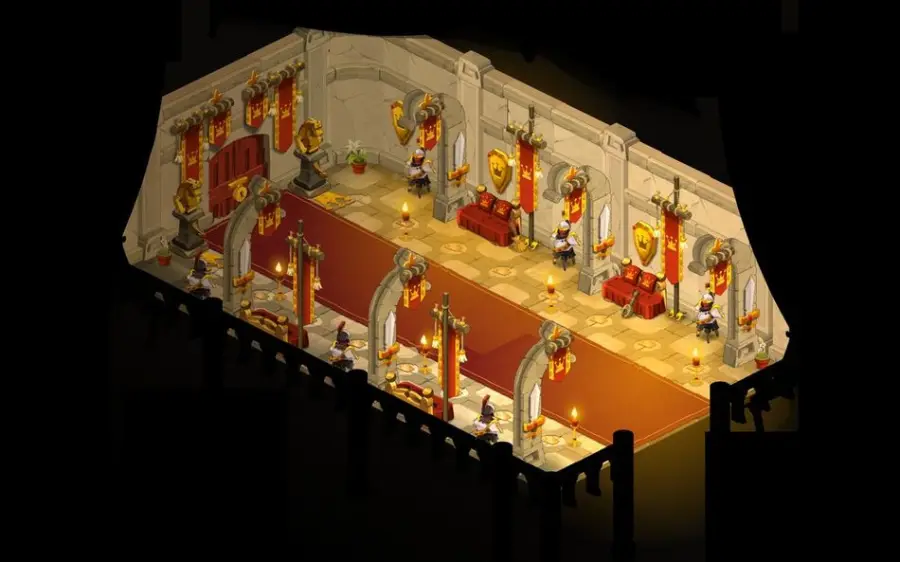
Amakna Castle · [4,-6] -
7Withstand the Divine Ram
Combat · Divine Ram
A Divine Ram appears to defend the object. The fight is solo.
Dialogue
- “Challenge the divine ram”
 Divine Ramfight · level 200 · 5,500 HP · 10 AP · 6 MP
-
8Talk to the goddess Feca
Dialogue · Goddess Feca
The goddess knows who you are and that you did not come to steal the offerings. She too hears Allisterine's call, lost in the meantime. The medallion will allow you to pull her out of the dusty waters and guide her to the gates of Onekros.
Dialogue
- “Prostrate yourself before the goddess Feca”
- “Laugh at your own naivety and humbly ask for her opinion”
-
9Join Externam
Movement · Guardian of the Day Without End
At Ilyzaelle's Lookout, in , talk to the Guardian of the Day Without End. In the last room of the Ilyzaelle's Lookout dungeon, equip your Death Mask, then go through the portal to Externam.
Dialogue
- “Say that you must get to Externam as soon as possible”
-
10Guide Allisterine
At the entrance to Externam, double-click Fallanster's medallion in your quest inventory. It shines like a beacon for souls lost in the sea of dust: Allisterine joins you.
-
11Talk to Allisterine
Dialogue · Allisterine
Allisterine thanks you for guiding her, and places her hopes in you against the Horsemen, in the present, the past and the future. To her, you don't need the Dofus to equal a god: you are the god of death. She has you touch the relic of the dead god, which reveals your true appearance: you become a giant for a few moments.
-
12Talk to Allisterine again
Dialogue · Allisterine
She wonders about the chest you are holding, entrusted to you long ago by Septangel or someone else depending on your choices in the primordial Dofus quests. It contains a bone identical to the relic: the two merge. You receive the Relic Chest, which teleports you to the map of the next fight, and brings you back there if you die.
- Relic Chestreceived
-
13Face the Horsemen
Combat · Entropix
You are teleported to the long Descent. Talk to Entropix, transformed: you will face Misery, Corruption, Servitude and War, solo, with the power of the relic. Entropix, who has a lot of HP, and a double of yourself fight alongside you. You don't kill the Horsemen: you neutralize them, and the fight ends when all four are neutralized.
Dialogue
- “Ask the transformed chronomorph why you are in the nightmare”
If you are defeated, return to the map with the Relic Chest in your inventory.
 Miseryfight · level 220 · 18,000 to 26,000 HP · 20 AP · 6 MP
-
14Hit with your main character
This is the reverse of the same fight in A Tormented Heritage: here, your main character carries the Relic of the Dead God and hits. The double, Unlockable, is useless: it is sacrificed by your main character, who absorbs its damage. Move in melee of the targeted Horseman: with each MP used, it steps back one cell and takes damage, which stacks across all your MP. At the end of the turn, you also hit the target in the Strategic Support state.
Your character hits only in your best element: preferably switch to Water, especially against Misery.
-
15Neutralize each Horseman
Bring the Horseman down to 10% of his max HP: he enters the Weakened Horseman state. Perform his own action three times (see the fights below): a colored number goes up from 1 to 3 above him, then he summons a cross-shaped glyph of size 1 of the same color, always in the same place. Place him in the center: he loses 100 AP and 100 MP, and becomes Unmovable and Rooted.
The numbers disappear after 3 turns: you then have to start over. Recommended order: Misery, Corruption, Servitude, then War.
-
16See Allisterine again
Dialogue · Allisterine
After the fight, Allisterine congratulates you: she can leave this world with no regrets. She asks you to hand the medallion to Allisteria, Fallanster's daughter, for whom it was meant.
-
17Give Allisteria the medallion
Items · Allisteria
In Astrub, at , greet Allisteria and hand her the medallion. She finds a lock of her mother's hair in it, whom she never knew, and dreams of a family united forever. Make her understand that she will have children and grandchildren. The quest ends.
Dialogue
- “Bow politely”
- 1 × Fallanster's medallionto hand over
The fights
Level 200
In the royal chapel of Feca, at Amakna Castle. Solo. He hits very hard in melee and heals himself.
-
Criobolium
Summons the Profane Gobball and pushes characters in line with it back 5 cells. 2-turn cooldown.
-
Horn of Mercy
Hits for 300 Fire and steals 1 MP for 2 turns. Up to 10 range.
-
Hypostase
Hits for 150 Water, 150 Air and 150 Earth. In a line, up to 6 range.
-
Psalm
Pushes the target back 5 cells. In a line, up to 3 range.
-
Profanation
Deals 600 Earth damage with life steal. In melee only.
-
Fleece
Heals about 800 HP. Up to 7 range, without line of sight.
Level 220
To be neutralized first: she gains 200 Power with each Balance Bane. In phase 1, she can remove 100 AP and 100 MP for 1 turn, at 2 range; around half her HP, she mounts her steed and becomes Invulnerable for 1 turn. Here, the constant attraction of her allies is removed, and she loses her attraction once neutralized. Yellow glyph.
-
Abundance
Its neutralization: give yourself shield points three times in melee with her. Example: at 10% of her HP, a first shield point in melee moves her yellow number to 1, a second to 2, and a third summons the yellow glyph; place her in the center.

Level 220
It gives itself the Kissiphrot Sipike effect, which only it has: it hits you back if you hit it while it has it; healing in melee with it removes the effect. It passes on one disease out of 9 when it hits or when you walk into its glyph. Neutralized, it keeps its glyph, but diseases disappear from the fight. Pink Glyph.
-
Cure
Its neutralization: heal yourself three times in melee with him. Since version 2.71, life steal counts too.

Level 220
It reflects damage if you don't have the Traitor state: you get it by ending your turn on one of its one-cell red glyphs (one glyph, one state, a single attack without reflection). Here, no healing or rewind in the last phase, and no Armiscreant. Blue glyph.
-
Freedom
Its neutralization: unlock it three times. The dodge the relic gives you when you take damage helps to unlock it.

Level 220
Invulnerable until the other three are neutralized. At each 20% HP threshold, she summons a weapon that hits hard in an area. Her Fearless state makes anyone who deals her the first line of damage Pacifist for 1 turn. Push Entropix against her to make her Pacifist for 1 turn. White glyph.
-
Peace
Its neutralization: it must deal no damage for three turns. This is much harder than in the other quest, because your main character takes the damage directly.
-
Tip: keep it from reaching you
Keep her from gaining MP and stay away from her so she doesn't hit you.
-
Tip: play on erosion
Lower your character to 1 HP while unlocking War each turn to gain 20,000 shield points. Leave one of her weapons alive for 1 turn so that it gains 100 Lock, so as not to unlock her at 100%. At 1 max HP, she can no longer deal you direct damage and her numbers go up as if she weren't hitting you; keep unlocking her for the shield points.

Level 200
Your ally against the Horsemen, with lots of HP; the Strategic Support state does not damage him. Below are the effects specific to this fight.
-
Relic of the Dead God
Effect on your main character, with no time limit: 60,015 Vitality, +400% final damage, 3 MP. At the start of the turn, it swaps places with the target in the Strategic Support state; at the end of the turn, it hits it. Each MP used hits and pushes adjacent enemies back one cell. An incomplete unlock gives it a shield; being pushed, pulled or transposed heals it and its allies within 2 cells or less; taking damage increases its dodge.
-
Strategic Support
Only one character can have it each turn, Horseman or Entropix. Your main character places it by hitting the target; a small gray 1 appears above it. Always put it on the targeted Horseman, or on Entropix to benefit from the position swap.
-
Entropix's Paradox
Push Entropix against War to make her Pacifist for 1 turn.
-
Tip: the states before weakening
The numbers can go up before the Weakened Horseman state, but they only last 3 turns: they only neutralize if the Horseman becomes Weakened in time. Since version 2.71, the Horsemen's glyphs do stay on the field for 3 turns.
The rewards
- XP3,150,000 experience points
 52,776 kamas
Related quests
The first quest of the new story arc after the Eliocalypse, it follows In the Course of a Lost Dream and unlocks Sleeping Beasty. It is part of the achievement Secret of the Dofus: Prologue, which covers three quests.
- Start
- Draconiros
- Start
- Draconiros

Achievements · World Quests
Secret of the Dofus: Prologue
Complete the following quests:
Counts toward the Sylvan Dofus
- In the Course of a Lost DreamLvl. 200
- Meanwhile, a RebirthLvl. 200
- Sleeping BeastyLvl. 200
Where does the Meanwhile, a Rebirth quest begin?
With Draconiros, in front of the Dofus receptacle in Pandala, in . You must be level 190, have completed the arc's previous quests and own the six primordial Dofus.
Where do you find Fallanster's medallion?
In the royal chapel of Feca, at Amakna Castle in . Cross the first three rooms to the throne, go right and click the chest on the altar.
How do you reach Externam?
Through Ilyzaelle's Lookout, in . In the last room, equip your Death Mask and go through the portal.
How do you hit the Horsemen?
With your main character, who carries the Relic of the Dead God. Move in melee of the targeted Horseman with each MP, and give it the Strategic Support state to hit it at the end of the turn.
How do you neutralize War without taking its damage?
By staying out of its reach, or through erosion. Lower your character to 1 HP while unlocking her each turn to gain shield points: she can no longer deal you direct damage.
What should I do if I lose against the Horsemen?
Use the Relic Chest in your inventory: it takes you back to the fight map.
Which quest follows Meanwhile, a Rebirth?
Sleeping Beasty, again with Draconiros.

Comments
No comments yet. A tip, or a detail about this page? Be the first.