 2 × Skt-Zo Leg
Dungeon Atoll of the Possessed
Kabaal Ritual
Level 200 dungeon on the Atoll of the Possessed, at [43,-57]: five rooms and an invulnerable boss, Kabaal, who can only be hurt by his own demonic arms. Quests to start, map of each room, strategy, monsters, achievements and loot.
Quests linked to the Kabaal Ritual
Two quests on the Atoll of the Possessed go through Kabaal: Pandamonium Sings, which ends by talking to him after the fight, and A Real Boy, which begins with his defeat. Accept them before entering: a fight won without the quest in progress doesn't count.
Don't leave without talking to Kabaal. After the Pandamonium tavern, enter the whale's carcass and beat Kabaal. Then stay in the dungeon, hand him the Spiced Pigzebub Beer and continue the dialogue: otherwise, you have to redo the dungeon.
- Start
- Gob'Li'Terate the Destroyed, Atoll of the Possessed
- Prerequisites
- Level 180 and Every Possession Dispossesses
 Demonic Appendix2 appendices and 60,000,000 XP
It starts with a victory over Kabaal. Getteppo, who awaits you in the last room, asks you to defeat him in a single fight, then talk to him again. The investigation into Nicchopio continues in Amakna and on the Atoll: bring a Big Cannonball for what follows.
- Start
- Getteppo, Kabaal Ritual
- Prerequisites
- Level 180
 Inferniripsa Wing5 wings and 50,000,000 XP
For later
Kabaal can give you the Totem of Surprise. Maimane asks for six emotion totems, each from a boss of your choice: for surprise, Kabaal, Catseye, Count Harebourg, the Chokao Priestess or the Queen of Thieves.
- Start
- Maimane, Destroyers' Nightmare
- Prerequisites
- Level 180
 Totem of Balanceonce the six totems are handed in
During events
- Tiwaapi Simulation
Tiwaapi can designate Kabaal as a guardian for you to defeat. Incarnam, .
Kabaal's Broken Sceptre, dropped by the boss and awarded by each achievement, is used in Survival of the Weakest: it draws the Black Sentinel near Sen'Tin'Hell.
The 5 rooms of the Kabaal Ritual
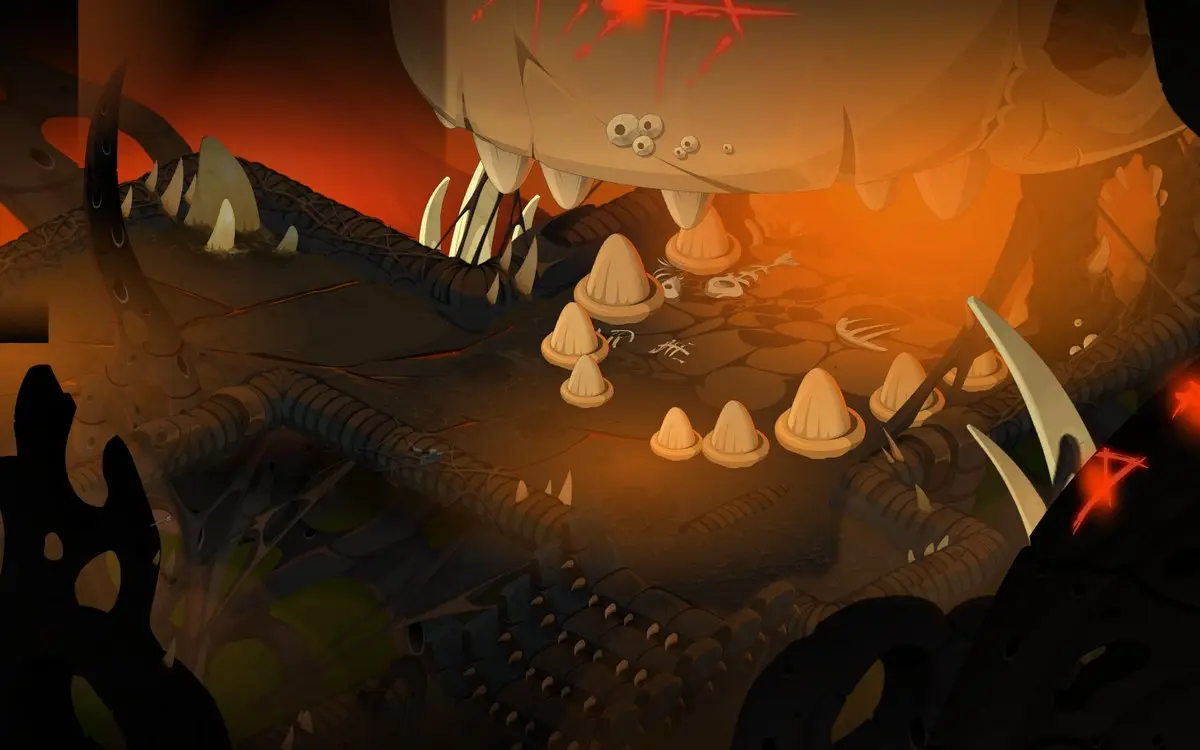
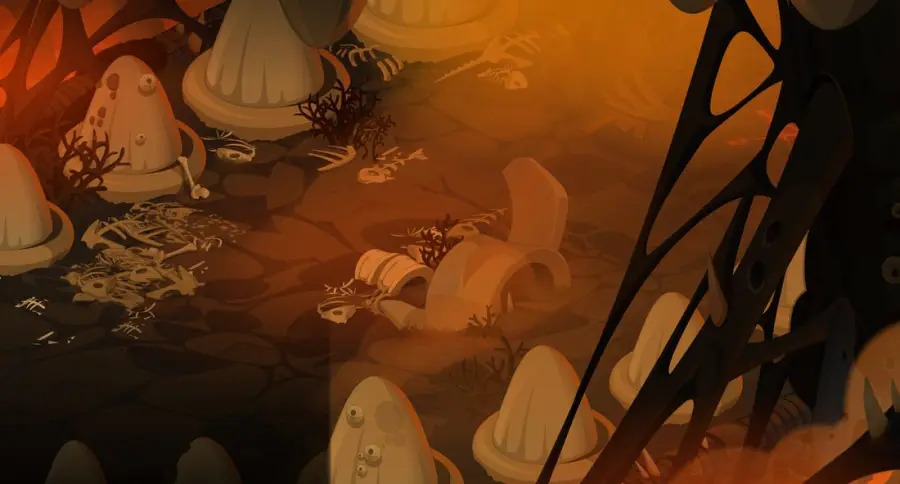
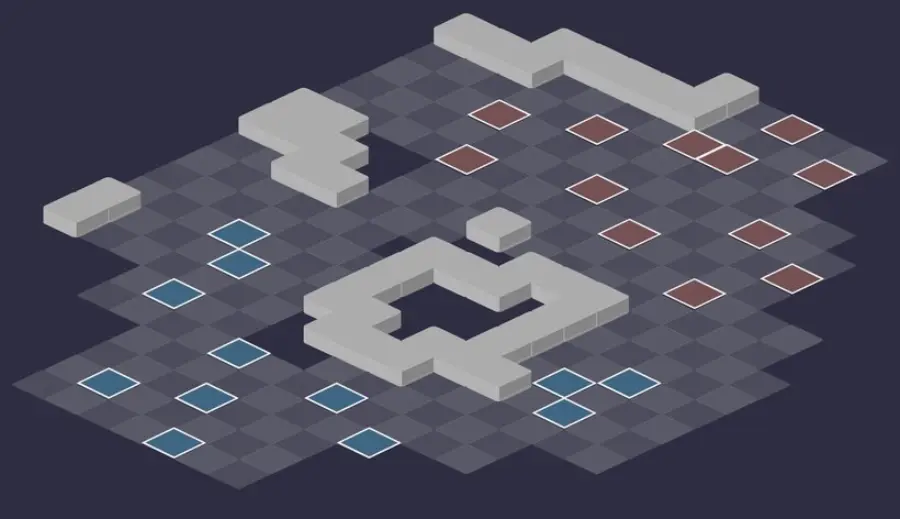
Five rooms. In each fight, the monsters place runes that become demonic arms: the mechanic, shared by the rooms and the boss, is detailed in the next section. For each room: the scenery, then the tactical view with the starting cells (blue: you, red: the monsters). Tap an image to enlarge it.
Room 1
Room 2
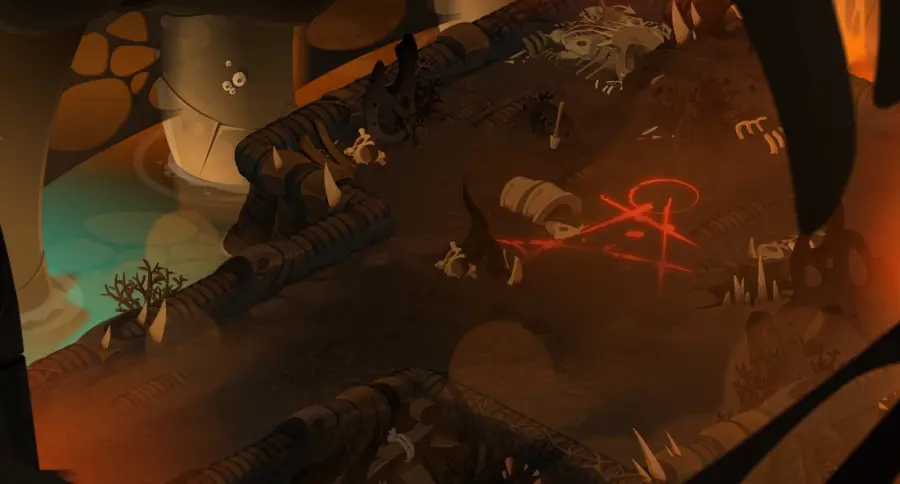
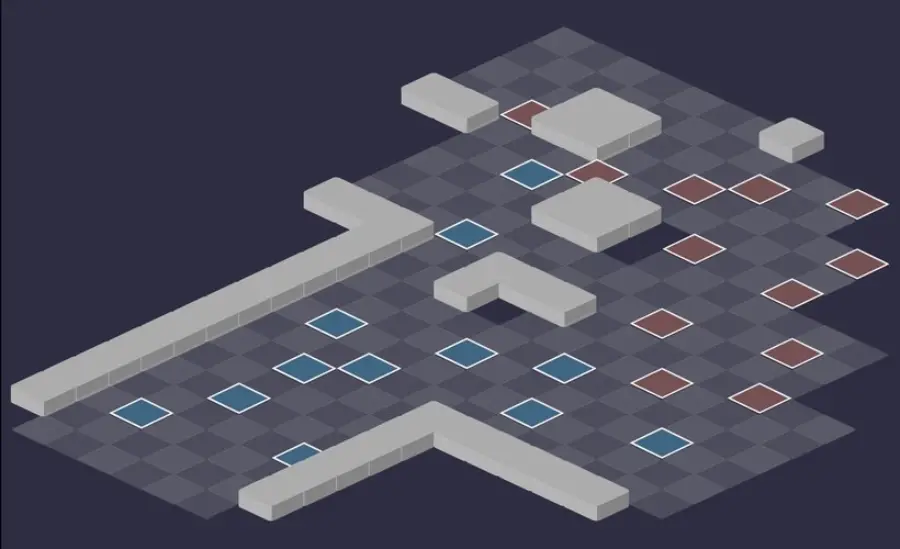
Room 3
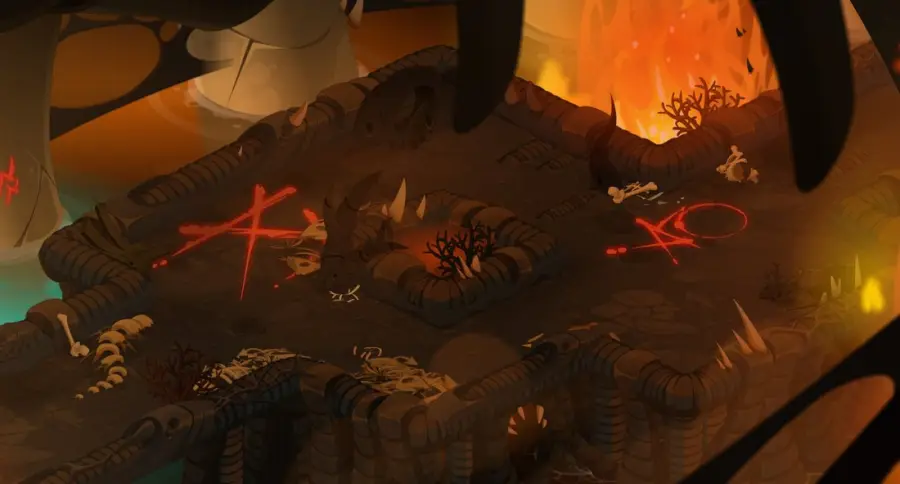
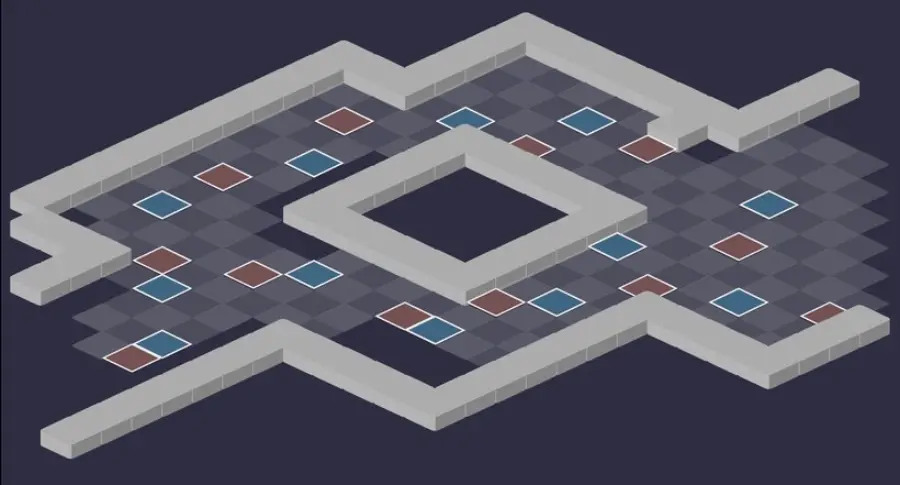
Room 4
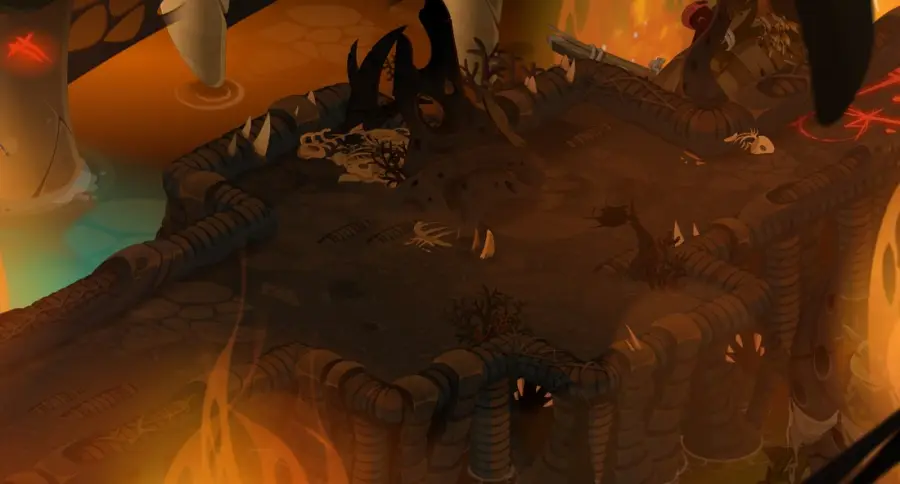
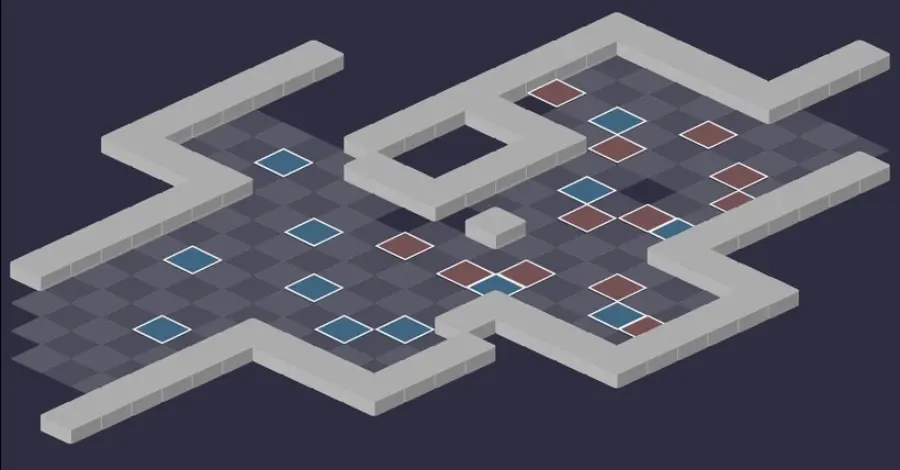
Room 5 — Kabaal
Kabaal's arena. Getteppo awaits you there for A Real Boy; after the victory, talk to Kabaal before leaving if you're following Pandamonium Sings.
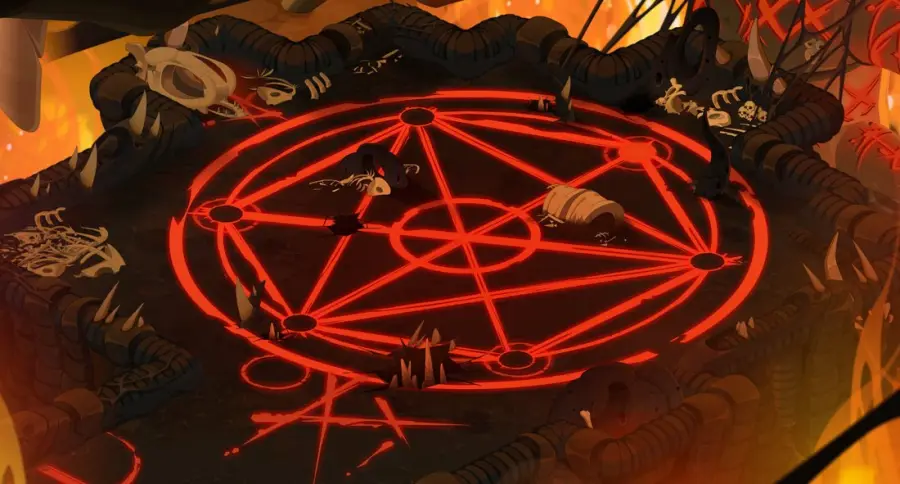
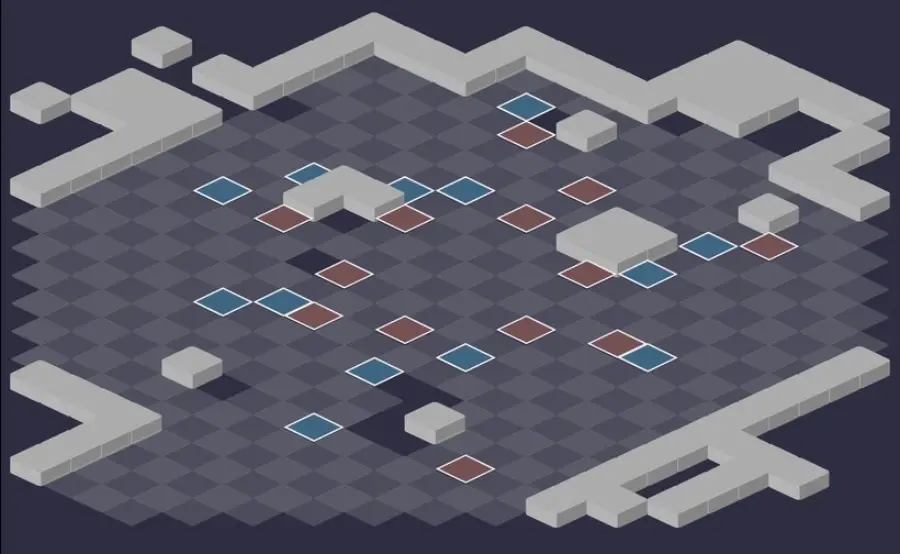
Defeat Kabaal
Five arms, and it's over
If Kabaal manages to summon his five demonic arms, he teleports to the top of the map on the next turn and summons the Incarnation of Ch'Tyx, who kills the whole team with Pentademonium. Put a character on the rune that would complete the five, or kill an arm before he plays again.
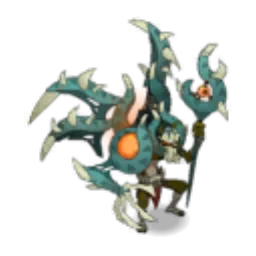
Level 220
 14,000 HP
 20 AP
 6 MP
- Resistances (%)
 Earth 50%
 Fire 50%
 Water 50%
 Air 50%
 Neutral 50%
Invulnerable for the whole fight, and this state can't be removed: only his demonic arms can hurt him. He gains 30% ranged damage on odd turns and 30% melee damage on even turns, and Offering to Chaos makes you unhealable on contact. 50% resistance across the board: hit him with Neutral, even at 0, to lower the one his arms target.
 Foul Ratafia4 AP · 12 RNG ·49 to 56 Air damage · Heals received x50% · Demonic Arm Target State
Air poison and healing received halved for 2 turns, can be dispelled. In line with an arm, you're pulled to its side.
 Offering to Chaos5 AP · melee ·34 to 39 Air life steal · 34 to 39 Fire damage · Unhealable State · Heals the attacker: 0% of damage · Removes the spell's effects · Demonic Arm Target State
His most dangerous spell, in melee: Air and Fire damage and the Unhealable state, impossible to dispel. The more arms in play, the harder he hits.
 Fiery Palm3 AP · 6 RNG ·47 to 55 Fire damage · -25% Critical · Demonic Arm Target State · Triggers: Infernal Proximity
Fire life steal in an area and -25% critical around the target. If he lands a critical hit, Kabaal gains 25% critical for one turn.
 Ferryman's Eye5 AP · melee · 6 Range · -6 Range ·-30 MP Parry · Heals: 10% of max HP · 200 Spell Power · Demonic Arm Target State · Triggers: Fiery Palm
From turn 2, it can be recast every 3 turns: -6 range and -30 MP dodge for all your characters in an infinite cone, +6 range for Kabaal and the monsters hit. It's cast in melee.
 Growing Threat
On monsters, places a rune that will become an arm, next to one of your characters; global cooldown of 3 turns. On Kabaal, 30% melee damage on even turns.
 Master Hand
30% ranged damage for Kabaal on odd turns, alternating with Growing Threat on even turns.
The five-step strategy against Kabaal
Target Kabaal from turn 1. He summons a first arm at the start of the fight, on one of five fixed cells chosen at random. Killing him takes many turns: bring him next to that arm from turn 1, without ever letting him reach your melee.
Even turns: one character on a rune. From turn 2, then every even turn, he places two arm runes and a third with a black sign, which summons nothing. Stay on one of them until his next turn: 300 Fire damage, but no new arm, and control of all the arms.
Odd turns: hit with the arms. Each controlled arm casts two spells, whereas its glyph only hits once. Place Kabaal 5 range from two arms: Demonic Flattening then Demonic Backhand push him toward the second, which hits twice again, if the arms play in the right initiative order.
The acolytes, with the arms. With no achievement in sight, kill the monsters quickly, using the arms when you control them: Inferniripsa first, Kraradia next, Bwarioch last. Never end in line with an arm or a rune: Foul Ratafia pulls you to its side.
Turn 5 onward: the reinforcements. From turn 5, then every two turns, two black runes make two monsters from the area appear, with 50% less HP. Kill them if you can; if Kabaal has lost half his HP by turn 5, ignore them and finish him, locked by a Pandawa near the arms, the rest of the team far behind.
Runes, arms and Dangerous Liaison
In the rooms, each monster places runes with Growing Threat, provided a character or summon is within 2 cells of the target cell. On that monster's next turn, an arm appears and places a glyph of radius 2: any entity that enters takes one of its three spells, about 600 Neutral damage with a push, a symmetric teleportation or an area. The cooldown is global: a single rune for all monsters every three turns.
To take control of the arms, put a character on a freshly placed rune and stay there until the start of its caster's turn. The arm doesn't appear, all the glyphs disappear during the control, and you play two spells from each arm. A brown effect above the head shows who controls them.
Against Kabaal, only the boss summons arms, which are stronger, with a glyph of radius 3. The character who controls them becomes Unlockable and gains 2 MP for 2 turns; he keeps control until the end or until another takes over, but the arms only have 3 range on even turns: go back to a rune every even turn.
Kabaal's Glyphs
The glyphs of his arms disappear at the start of his turn and come back at the end: if he's standing in them at that moment, the arm hits him, once per turn. After a turn of control, they come back at the start of his turn. And if you're in a glyph when the arm plays, it hits you several times.
A rune placed on an existing arm fully heals it and gives it 300 power on the next turn: this is Demonic Overload. A monster pushed onto an arm's rune dies at the start of Kabaal's turn, but the boss then loses 10 turns of enchantments and gains 10 MP, 500 power and 550 shield for 2 turns.
Neither monsters nor summons can block a rune: they die and the arm appears anyway. Only a character prevents the fifth arm. To keep an exit, cast Demonic Flattening on the useless arms when you control them: it will be easier to kill one in an emergency.
Chaotic Instability
Each line of damage removes 5% resistance from the monster in its element, and randomly gives it 5% in another element, 50 critical resistance or 50 pushback resistance. Critical Hits and pushback damage count too. Play the same element across the whole team, and avoid multi-element spells.
Kabaal is subject to it. On him, avoid spells of an element other than Neutral and pushback damage: they risk giving him Neutral resistance, the one the arms hit. A multi-line Neutral weapon is ideal, even if it hits at 0.
The monsters of the Kabaal Ritual
Five Possessed of level 200, all with Growing Threat and Chaotic Instability. Against Kabaal, they no longer place runes, but he makes two more appear every two turns from turn 6. The resistances in red are their starting weaknesses.
In which order to kill the monsters
- Inferniripsa — he heals his allies and gives 2 AP and 10% damage to his whole team.
- Kraradia — a runner, he hits from very far and removes MP: killing him early saves a lot of HP.
- Bellilith, then Pigzebub — they teleport, pull and push: start with the one who ruins your positioning the most.
- Bwarioch — dangerous only in melee: kept at a distance, he's harmless.
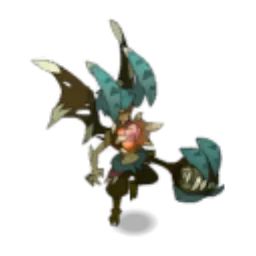
Level 200
- 6,000 HP
- 12 AP
- 5 MP
- Resistances (%)
- Earth 5%
- Fire 20%
- Water -15%
- Air 15%
- Neutral -15%
The most dangerous: Worrying Rumour gives all his allies 2 AP and 10% damage and heals him 20%. Wailing Wallop removes 3 AP in a line, without line of sight. Weak to Water and Neutral; Gravity prevents him from using his cooperation spell.
 Growing Threat
On monsters, places a rune that will become an arm, next to one of your characters; global cooldown of 3 turns. On Kabaal, 30% melee damage on even turns.
 Wailing Wallop4 AP · 8 RNG ·70 to 82 Water damage · -3 AP · 70 to 82 Fire healing · Demonic Arm Target State · Triggers: Infernal Proximity
Removes 3 dodgeable AP in a line, without line of sight, and heals the monsters caught in the area.
 Twisted Parabola4 AP · 6 RNG ·61 to 71 Fire healing · 2 MP · 61 to 71 Earth damage · 5 Water damage for 1 MP used · Switches positions
Poison that hits for each MP used for 2 turns, cast without line of sight: move as little as possible.
 Worrying Rumour5 AP · on himself ·2 AP · 10% Final Damage · Heals: 20% of max HP
2 AP and 10% damage for all of Inferniripsa's allies on the map, and 20% of his HP restored: the reason to kill him first.
 Frightful Sermon3 AP · 3 Range ·59 to 69 Earth steal · Push Away 2 cells

Level 200
- 5,500 HP
- 12 AP
- 5 MP
- Resistances (%)
- Earth -20%
- Fire 5%
- Water 20%
- Air -15%
- Neutral 15%
Fleeing AI and very long range: Corrupted Stinger removes 2 MP and poisons up to 14 range, without line of sight. Devastating Shot pushes back 4 cells, and Diabolical Flurry punishes forced movement and MP removal. Weak to Earth and Air.
-
Growing Threat
On monsters, places a rune that will become an arm, next to one of your characters; global cooldown of 3 turns. On Kabaal, 30% melee damage on even turns.
 Diabolical Flurry4 AP · 12 RNG ·28 to 33 Fire damage · 28 to 33 Water damage
Double poison for 2 turns: it hits when you're moved or pushed, and on every attempt to remove your MP.
 Corrupted Stinger3 AP · 14 RNG ·41 to 47 Fire damage · 16 to 20 Fire damage · -2 MP · Demonic Arm Target State · Triggers: Infernal Proximity
Removes 2 dodgeable MP and poisons for 2 turns, up to 14 range without line of sight, twice per turn: there's no hiding from it.
 Devastating Shot3 AP · 8 RNG ·67 to 77 Water damage · -40 Damage · Pushes back 4 cells
Pushes back 4 cells and reduces your flat damage: watch out for arm glyphs behind you.

Level 200
- 6,000 HP
- 12 AP
- 6 MP
- Resistances (%)
- Earth 15%
- Fire -20%
- Water 5%
- Air 20%
- Neutral -15%
In melee, Furious Compression erodes and hits harder with each use; Terrifying Exaltation pushes back 2 cells. Tormented Plunge teleports her, hits around her arrival cell and pulls enemies in there. Weak to Fire and Neutral.
-
Growing Threat
On monsters, places a rune that will become an arm, next to one of your characters; global cooldown of 3 turns. On Kabaal, 30% melee damage on even turns.
 Furious Compression3 AP · melee · 15% Erosion ·57 to 67 Air damage · Demonic Arm Target State · Triggers: Infernal Proximity
Erosion on contact, twice per turn, and damage that rises with each use: don't stay stuck to Bellilith.
 Tormented Plunge5 AP · 5 RNG · Teleports to the targeted cell ·70 to 82 Water damage · Pulls 2 cells
Teleportation without line of sight, hits an area and pulls enemies around the arrival cell. Don't stay grouped.
 Terrifying Exaltation2 AP · 2 Range ·38 to 44 Air damage · Pushes back 2 cells

Level 200
- 6,500 HP
- 12 AP
- 6 MP
- Resistances (%)
- Earth 20%
- Fire -15%
- Water 15%
- Air -20%
- Neutral 5%
Nefarious Rush throws him onto his target, pushes it back 4 cells, then makes him step back: don't let him reach your back line. Demonic Connivance gives him, and an ally, flight, pushback damage and a shield. Weak to Air and Fire.
-
Growing Threat
On monsters, places a rune that will become an arm, next to one of your characters; global cooldown of 3 turns. On Kabaal, 30% melee damage on even turns.
 Deadly Skewering4 AP · melee · -20 Lock ·68 to 80 Neutral damage · Pushes back 2 cells · Demonic Arm Target State
 Demonic Connivance
Flight, pushback damage and a shield for Pigzebub and an ally for 2 turns.
 Nefarious Rush3 AP · 6 RNG · Advances 5 cells ·57 to 67 Air damage · Pushes back 4 cells · Steps back 2 cells
Pigzebub pulls himself onto his target, pushes it back 4 cells then steps back 2, twice per turn.

Level 200
- 7,500 HP
- 12 AP
- 5 MP
- Resistances (%)
- Earth -15%
- Fire 15%
- Water -20%
- Air 5%
- Neutral 20%
Abyssal Claw pulls 4 cells and removes 4 MP, in a line: that's his only ranged threat. In melee, Infernal Roar applies Gravity over a large area and Devastating Spout poisons around him. Weak to Water and Earth; a tank Pandawa can also lock him in melee while you kill him.
-
Growing Threat
On monsters, places a rune that will become an arm, next to one of your characters; global cooldown of 3 turns. On Kabaal, 30% melee damage on even turns.
 Abyssal Claw3 AP · 5 RNG · Pulls 4 cells ·50 to 58 Neutral damage · -4 MP
Pulls 4 cells and removes 4 dodgeable MP, in a line, twice per turn: stay out of the Bwarioch's lines.
 Infernal Roar5 AP · on himself ·86 to 100 Fire damage · Gravity State · 20 Lock · 10% Melee Damage · Demonic Arm Target State
Gravity over a wide area around the Bwarioch, which also boosts his allies' lock and melee damage. Cooldown of 3 turns.
 Devastating Spout4 AP · on himself ·62 to 72 Earth damage · 42 to 48 Fire damage
Preparing your run through the Kabaal Ritual
A dungeon for teams of level 190 to 200 who know how to move a boss and take a beating for a long time: Kabaal can only be hurt by his own arms. You come here for the Atoll of the Possessed quests, the Totem of Surprise and the achievements. Kabaal can't be captured.
How to enter the Kabaal Ritual
The entrance is in the Pandamonium, on the Atoll of the Possessed, at : it's the whale's carcass. The nearest zaap is the one at Mount Tombs . Three ways to open it: a Kabaal Ritual Key (consumed), the keyring if it's registered there, or the automatic group search.
Crafting the Kabaal Ritual Key
It's crafted at a handyman's. Five ingredients drop from the dungeon's monsters, at 12%: Kraradia Spaulder, Bellilith Diadem, Bwarioch Scalp, Pigzebub Snout and Tasty Meat. Ink Snapper (fishing), Paper Tulip and Quisnoa (harvesting) complete the recipe.
| Ingredient | Quantity | Level |
|---|---|---|
 Kraradia Spaulder |
2 | 200 |
 Bellilith Diadem |
2 | 200 |
 Bwarioch Scalp |
2 | 200 |
 Pigzebub Snout |
2 | 200 |
 Tasty Meat |
2 | 200 |
 Ink Snapper |
1 | 200 |
 Paper Tulip |
1 | 200 |
 Quisnoa |
1 | 200 |
Which team to bring against Kabaal
At least one positioning class. Kabaal only takes damage near his arms: you have to bring him there and keep him there. Pandawa, Eliotrope or Xelor are strongly recommended, Pandawa first, who can also lock him in the right spot, at 5 range from two arms.
Survival before damage. Melee map, poisons everywhere and a long fight: vitality and resistances first. Masqueraider, Feca or Eniripsa make the dungeon much calmer, and heavy hitters are less essential than elsewhere. A single damage element for the whole team, because of Chaotic Instability.
MP removal and vulnerabilities. Enutrof, Sadida or Cra aren't mandatory, but a Kabaal with no MP stays near the arms and does less. Boost the arms (Iop's Power) and increase the damage he takes: Pandawa's Vulnerability, Iop's Jump, Ouginak's Doggedness.
Comfortable classes. The Pandawa places and locks Kabaal near the arms; the Eliotrope and the Xelor move him too. Masqueraider, Feca and Eniripsa protect or heal, Enutrof, Sadida and Cra remove MP. A class able to dispel helps against the poisons and the healing reduction of Foul Ratafia.
The five achievements of the Kabaal Ritual
Each achievement awards 200,000,000 XP and 2 Kabaal's Broken Sceptre, the Duo doubles the XP. Clean Hands plays almost like the base fight, since the arms don't make it fail.
| Achievements | Condition | Points | XP |
|---|---|---|---|
 Kabaal Ritual |
Defeat Kabaal in this boss's dungeon. | 10 | 200 000 000 |
| Kabaal (Impertinence) |
Defeat Kabaal in his dungeon by completing the “Impertinence” challenge. | 10 | 200 000 000 |
| Kabaal (Clean Hands) |
Defeat Kabaal in his dungeon by completing the “Clean Hands” challenge. | 10 | 200 000 000 |
| Kabaal (Duo) |
Defeat Kabaal in his dungeon by completing the “Duo” challenge. | 20 | 400 000 000 |
| Kabaal (Special) |
Defeat Kabaal in his dungeon by completing the “Right to Bear Arms” challenge. | 10 | 200 000 000 |
Impertinence
Each ally must end their turn on a cell adjacent to an enemy. Keep the Bwarioch alive: he doesn't flee and stays in melee. Failing that, a character who applies Gravity every turn can do the same with Inferniripsa. Place Kabaal near the arms as usual, without failing the challenge by repositioning him. Impertinence can be combined with Score 200, thanks to the Muta idol, but is simpler without.
Clean Hands
Finish off enemies without direct damage: traps, glyphs, poisons, pushback, reflected damage and summons are allowed. Relatively simple: the demonic arms don't make the achievement fail, use them to finish off monsters and the boss. Just be careful not to directly kill either a Kabaal summon or an arm.
Special: Right to Bear Arms
Enemies must be finished off only by the demonic arms. Wear the monsters down, then push them into the arms' glyphs, which hit for roughly 700 to 800 Neutral once per turn. When you control the arms, keep the monsters within 5 range of an arm. Ideally: Kabaal between two arms from turn 2, with control. From turn 5, only kill summons with an arm. A Pandawa is recommended.
Duo
Two characters maximum, fewer than 40 turns. The turn limit isn't the problem: surviving until then is. A positioning class is nearly mandatory: Pandawa in tank gear, or Xelor, with a second resilient character even at the cost of damage. Hit Kabaal from turn 1 with all your vulnerabilities, to kill him by turn 7 at the latest, before the second wave of summons. One or two monsters will remain to finish without the arms: play it safe.
Drops and loot of the Kabaal Ritual
Base in-game rates, before Prospecting bonuses.
On Kabaal
 Sign of the PossessedAtoll of the Possessed15 %
 Kabaal's Broken SceptreCombat Resource12 %
 Nougat Rabmarac BarTreat6 %
 Bag of SaltContainer3 %
- Demonic AppendixBone2 %
 Al Howin GobtubbyCeremonial pet1 %
 Paragon of PowerMain quests0,7 %
 Tasty CarrionMeat0,6 %
On the henchmen of Kabaal
- Sign of the PossessedAtoll of the Possessed · Bellilith15 %
- Bellilith DiademCombat Resource · Bellilith12 %
- Tasty MeatMeat · Bellilith12 %
- Bwarioch ScalpMiscellaneous Resource · Bwarioch12 %
- Inferniripsa WingWing · Inferniripsa12 %
- Kraradia SpaulderCombat Resource · Kraradia12 %
- Pigzebub SnoutMiscellaneous Resource · Pigzebub12 %
 Blood of the PossessedAtoll of the Possessed · Bellilith6 %
- Demonic AppendixBone · Bellilith2 %
- Bag of SaltContainer · Bellilith1 %
Where is the Kabaal Ritual?
In the Pandamonium, on the Atoll of the Possessed, at . The entrance is the whale's carcass; the nearest zaap is the one at Mount Tombs .
At what level should you do the Kabaal Ritual?
Level 190 minimum, 200 recommended. Kabaal is level 220, with 14,000 HP and 50% resistance in every element.
Which quest should you do at the Kabaal Ritual?
Pandamonium Sings and A Real Boy, from level 180. For the former, talk to Kabaal after your victory, before leaving the dungeon.
How do you beat Kabaal?
With his own demonic arms: he's invulnerable to everything else. Place him in their glyphs and take control of them by staying on a rune until his next turn.
How do you take control of the demonic arms?
Stay on a freshly placed rune until the start of its caster's turn. You take 300 Fire damage, the arm doesn't appear, the glyphs disappear and you play two spells from each arm.
What happens if Kabaal summons five arms?
He summons the Incarnation of Ch'Tyx, who kills the whole team. Place a character, not a summon, on the rune that would complete the five, or kill an arm before his turn.
Which monster should you target first in the Kabaal Ritual?
Inferniripsa, who heals his allies and gives them 2 AP. Kraradia next if you can catch him, Bwarioch last: he's only dangerous in melee.
Can Kabaal be captured?
No, Kabaal can't be captured. No soul stone is needed for this dungeon.
Can you do the Kabaal Ritual with two characters?
Yes, it's even an achievement, in under 40 turns. A tank Pandawa or a Xelor to position Kabaal, a second resilient character, and the boss dead before the second wave of summons.




Comments
No comments yet. A tip, or a detail about this page? Be the first.