 2 × Skt-Zo Leg
Dungeon The Horsemen's Dimension
Blood Throne
Level 200 dungeon in War's Wounds, at [4,-3]: five rooms and a boss who stays invulnerable as long as her Warmongers live, then summons a giant weapon at each threshold. Quests to start, map of each room, strategy, monsters, achievements and loot.
Quests linked to the Blood Throne
The dungeon quest, The Longest Day, ends by defeating War in a single fight and talking to her again: arrive at the Blood Throne with the quest in progress. It then opens the rest of the series with War.
It ends on War. Investigate the disappearance of Trois-Ruisseaux with Filco Norse, protect Grita Hamson in the anomaly and defeat War's Generals. Finally defeat War in a single fight, then talk to her again.
- Start
- Bloody Grave, War's Wounds
- Prerequisites
- Level 180
 Sharp Blade3, with 3 Armour Fragment and 50,000,000 XP
For later
War can give you the Totem of Anger. Maimane asks for six emotion totems, each from a boss of your choice: for anger, Dazahk Freezammer, War, Missiz Freezz, Solar or Tal Kasha.
- Start
- Maimane, Destroyers' Nightmare
- Prerequisites
- Level 180
 Totem of Balanceonce the six totems are handed in
During events
- Tiwotokar Simulation
Tiwotokar can designate War as the guardian to defeat. Astrub, .
The series continues with War, outside the dungeon: Beyond Glory, which has you look for an immortal warrior able to stand up to her, then Journey to the End of Externam, as far as Externam.
The 5 rooms of the Blood Throne
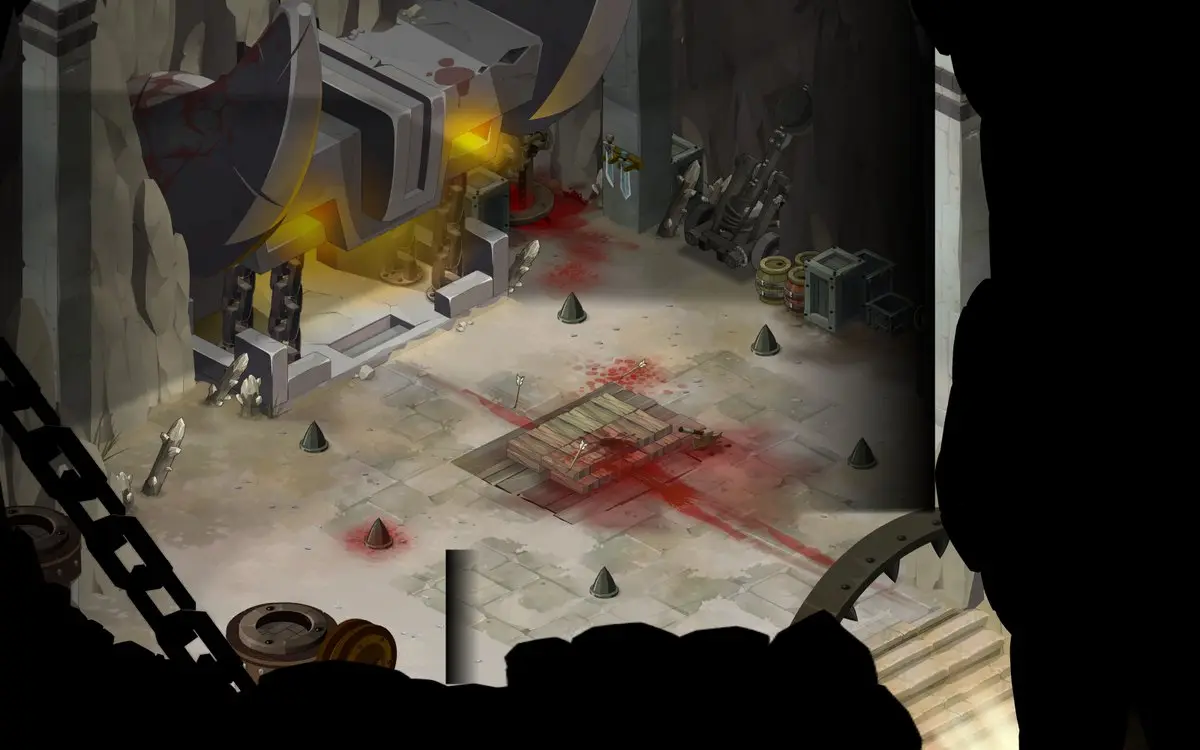
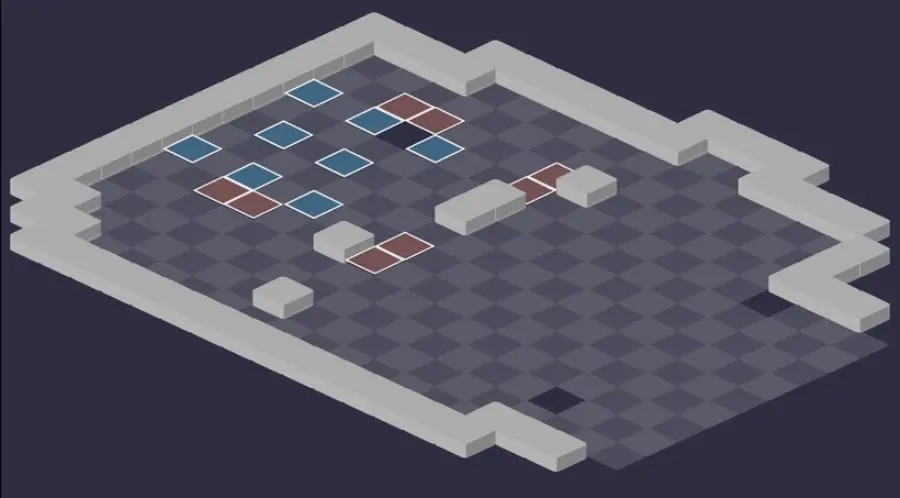
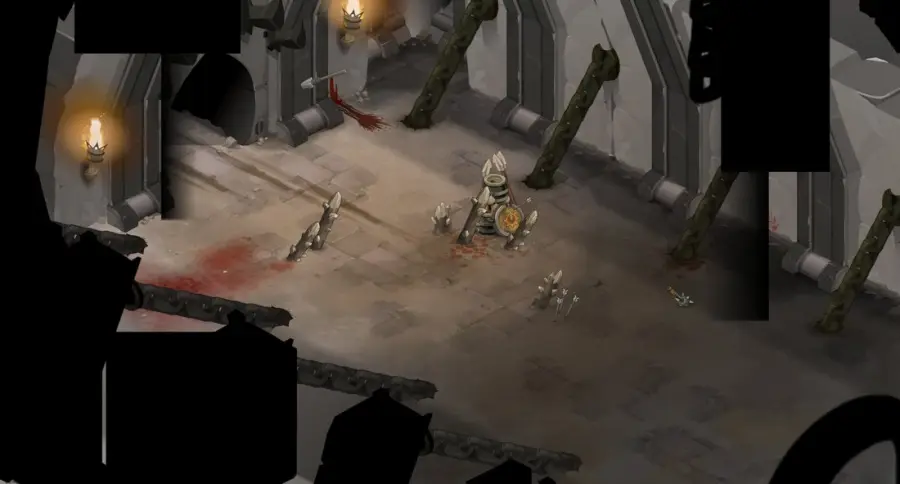
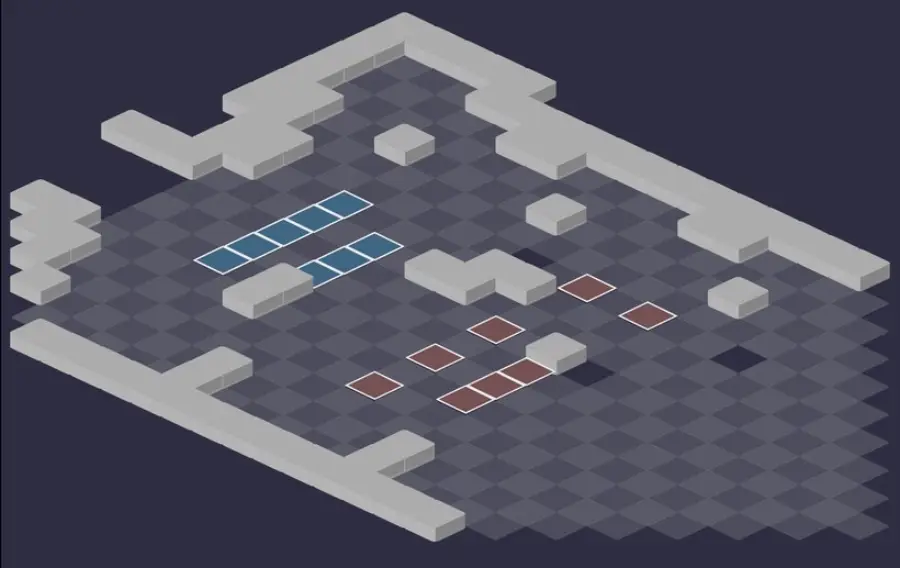
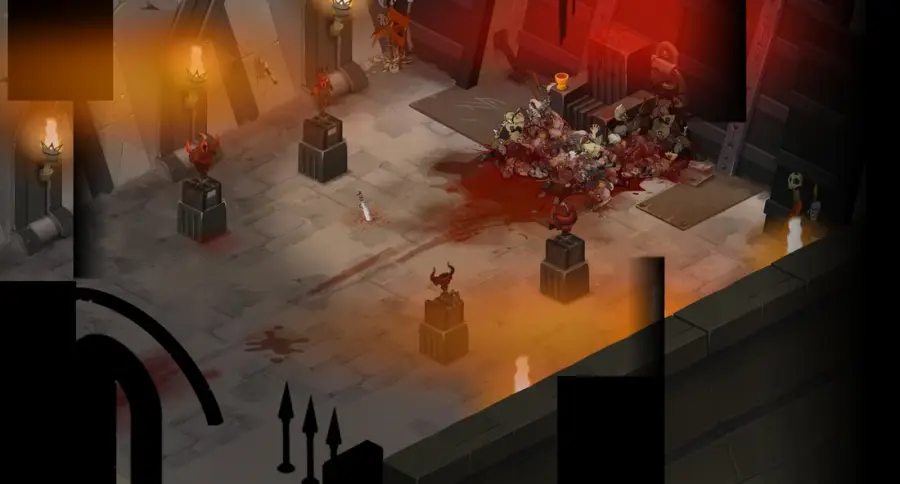
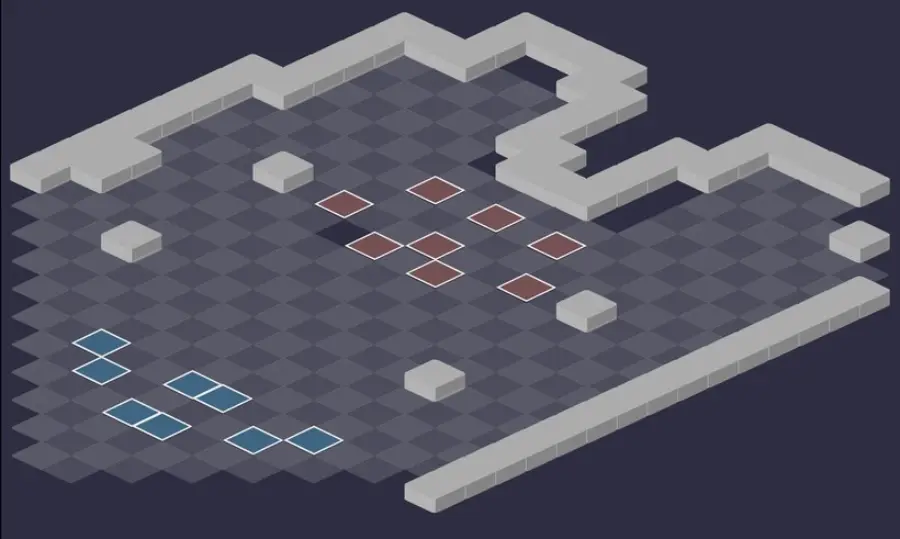
Five fights against War's Warmongers, the last one against War herself. For each room: the scenery, then the tactical view with the starting cells (blue: you, red: the monsters). Tap an image to enlarge it.
Room 1

Room 2
Room 3
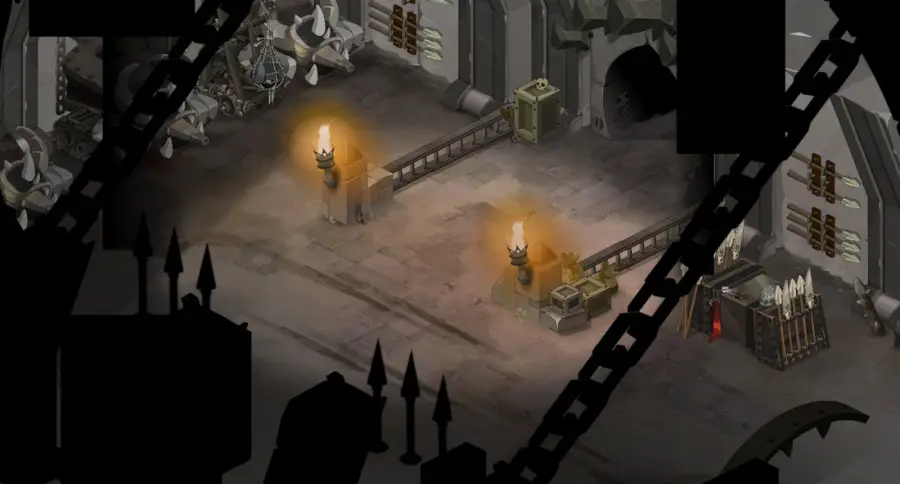
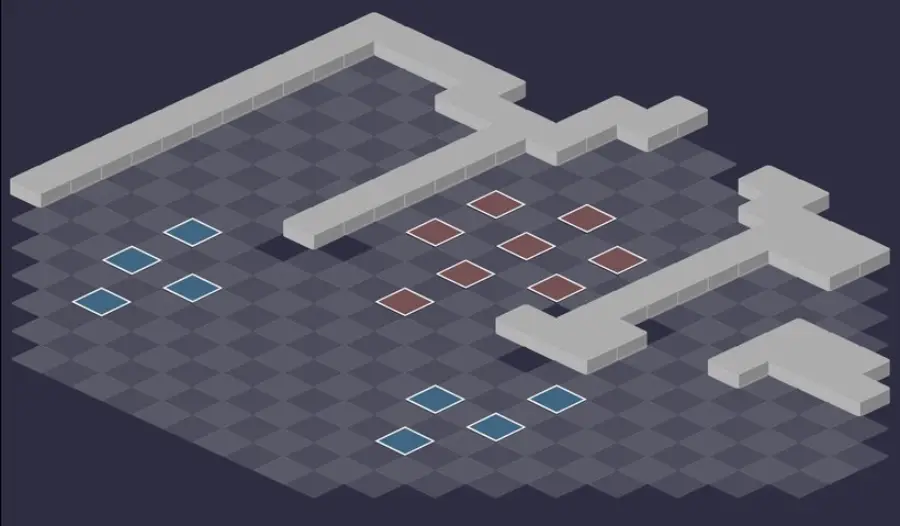
Room 4
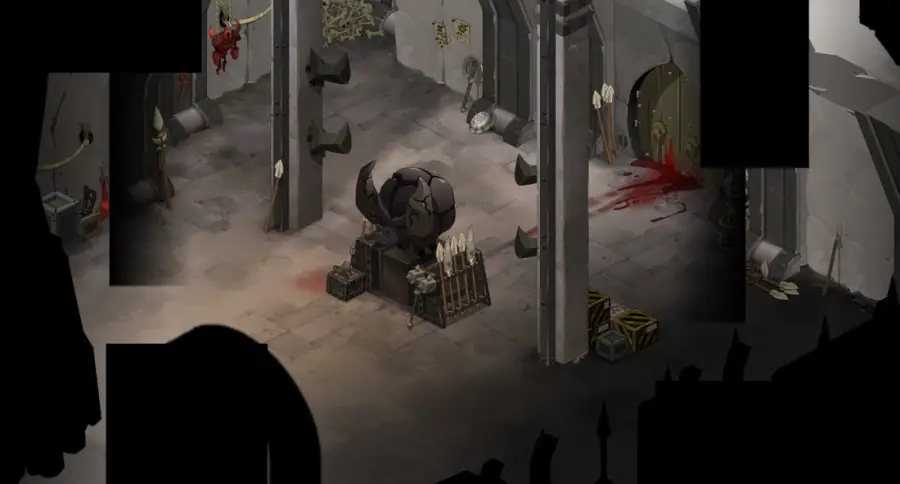
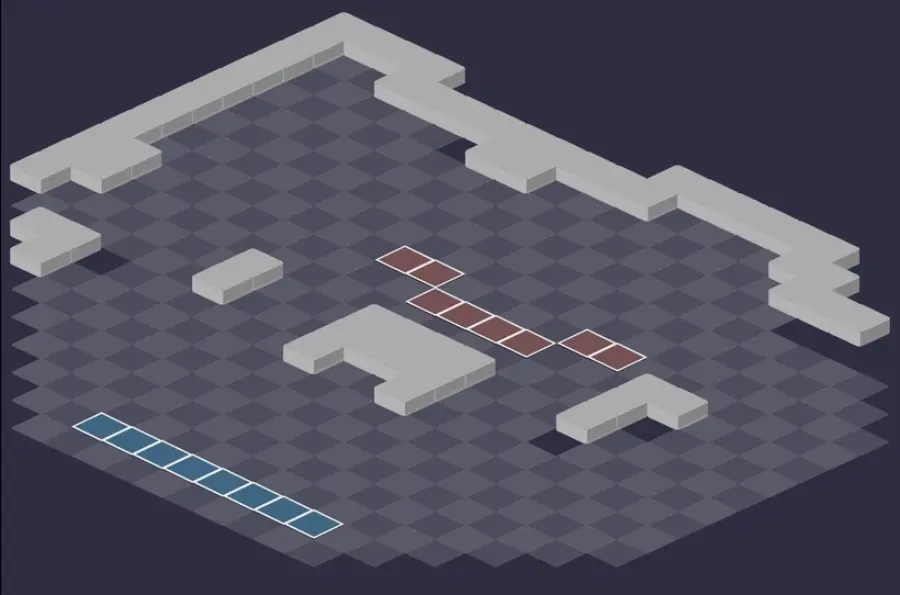
Room 5 — War
War, with the Slashmaster, the Olgoth and the Soul-Swallower. She stays invulnerable as long as they are alive: the strategy is detailed just below.
Defeat War
A living weapon on War's turn
A weapon still alive at the start of War's turn gives her a bonus for that turn. Worse: killed afterward, the weapon gives her resistances and MP for the whole fight, and heals her. Kill each weapon before War plays again, or don't kill it at all.

Level 220
 22,000 HP
 12 AP
 6 MP
- Resistances (%)
 Earth 35%
 Fire 35%
 Water 25%
 Air 25%
 Neutral 30%
Invulnerable and unmovable as long as her monsters live, she then only hits with Magmalediction in an area and Martyr in melee. Everything changes when the last monster dies: she becomes vulnerable, designates a Fearless character and summons a weapon every 20% of HP. Little MP dodge; her lowest resistances are Air and Water, at 25%.
 Valour3 AP · 3 range · Fearless State · 200 Lock · 200 Flight ·2 MP · Gravity State · Unhealable State
Designates War's only target for 2 turns, up to 3 range without line of sight. This character can hit War without limit, the others become Pacifist after one hit.
 Impact5 AP · 3 range · 20% Erosion ·71 to 85 Fire damage
Reserved for the Fearless target: erosion for 2 turns. Dispel it as soon as possible.
 Execution3 AP · melee ·71 to 85 Fire damage
In melee, only on the Fearless target.
 Magmalediction5 AP · 6 range ·61 to 70 Fire steal
Area of radius 2 up to 6 range; life steal once War is vulnerable. Never in the Fearless state.
-
Magmalediction5 AP · 6 range ·61 to 70 Fire steal
Area of radius 2 up to 6 range; life steal once War is vulnerable. Never in the Fearless state.
 Velocity
Swaps places with a weapon and with a character, one turn out of three: the weapon hits, and a burning glyph surrounds the displaced character.
-
Velocity
Swaps places with a weapon and with a character, one turn out of three: the weapon hits, and a burning glyph surrounds the displaced character.
 Martyr3 AP · melee ·71 to 80 Fire steal
Her melee hit, with life steal once she is vulnerable. Never in the Fearless state.
-
Martyr3 AP · melee ·71 to 80 Fire steal
Her melee hit, with life steal once she is vulnerable. Never in the Fearless state.
The five-step strategy against War
The monsters first. War is invulnerable and not very dangerous as long as a monster remains. Kill the Slashmaster first, which teleports onto you, then the Olgoth: half its HP at range, the other half in melee. Finish with the Soul-Swallower. Avoid contact with War: unmovable, she locks you down.
Before the last monster. Position the team for what follows. If possible, get out of Valour's range (3 range, without line of sight) or remove her MP: with no target, she doesn't cast the Fearless state and you gain a turn of damage.
The Fearless character. The next turn, she mounts her steed, becomes vulnerable and puts a character in the Fearless state for 2 turns: she only hits that one. Only that character can hit her several times per turn, the others become Pacifist after one hit. Dispel its Unhealable to heal it.
One threshold, one weapon. Every 20% of HP, she summons a weapon 2 range above her, and her life locks at the threshold for the current attack. Before each threshold, get everyone out of the next weapon's area, then kill the weapon before War's turn. No need to kill the last one, the Giant Morning Star: finish War.
Or let the weapons live. Another method: push each weapon away from the team, since War only uses them one turn out of three, outside the Fearless state. At the end of the Fearless state, move away from her and the weapons; the next turn, come back toward her while moving the weapons aside, and she puts a character back in Fearless. Repeat until she dies.
War's Arsenal
The weapons arrive at every 20% loss of her base vitality: with four players, at 17,600, 13,200, 8,800 then 4,400 HP. They appear 2 range above War, or on the next free cell clockwise. They hit an area when they appear, on their turn and when War swaps places with them.
Giant Sword: star-shaped area of size 5, Fire. Giant Hammer: circle of radius 3, Earth. Giant Axe: four triangles starting from its contact cells, Air. Giant Morning Star: grid of size 5, Water.
Alive at the start of War's turn, the last weapon summoned gives her, for one turn: 2 MP and 100 Flight (Sword), 10% final damage and 100 Lock (Hammer), 10% resistances and 1,000 shield points (Axe), 3 AP and a heal of 5% of her HP (Morning Star). The boosts given when a weapon dies, on the other hand, stack for the whole fight.
Valour and Velocity
The Fearless state lasts 2 turns, cannot be dispelled, and Valour is recast every 3 turns. War gains 200 Lock, 200 Flight and 2 MP in it; her target gets Gravity and Unhealable, which can be dispelled. On leaving the Fearless state, she gains 2 MP and 100 Flight for one turn.
Velocity never starts in the Fearless state, so only one turn out of three. On that turn, she can swap places with a weapon, which then triggers its attack, and with a character, around whom she leaves a red cross-shaped glyph that burns anyone who crosses it. Spread the team out on that turn.
A Pandawa carrying a non-Fearless ally lets that ally hit War without becoming Pacifist. Watch out for Cawwots: if War starts her turn on a Cawwot's glyph, she hits its owner.
The monsters of the Blood Throne
Five level 200 Warmongers, with 5,500 HP. In War's room: the Slashmaster, the Olgoth and the Soul-Swallower. None has a weakness, but all resist Water better: prefer Fire or Neutral.
In which order to kill the monsters
- Slashmaster — it teleports next to you with Catacomb and hits everything around its landing cell.
- Olgoth — invulnerable in melee above half its HP, then at range: bring it down from afar, then finish it in melee.
- Soul-Swallower — last, and in one go: each hit received brings its next Cardinal Strike closer.

Level 200
- 5,500 HP
- 10 AP
- 5 MP
- Resistances (%)
- Earth 22%
- Fire 17%
- Water 30%
- Air 19%
- Neutral 18%
Catacomb teleports him into melee with a character, at infinite range, and hits everyone around. Raging Drill teleports him next to an ally and gives nearby monsters 30% final damage. Deflesh, in melee, reduces your critical hits.
 Raging Drill
30% final damage to the monsters around the Slashmaster: one more reason to kill it first.
 Catacomb
Once per turn, infinite range without line of sight: no one is safe. Don't stay grouped.
 Deflesh3 AP · melee ·61 to 70 Fire damage · -20% Critical

Level 200
- 5,500 HP
- 12 AP
- 5 MP
- Resistances (%)
- Earth 10%
- Fire 5%
- Water 20%
- Air 10%
- Neutral 5%
From the start of the fight, Armour Mutation makes him invulnerable in melee as long as he has more than half his HP, then invulnerable at range. The hit that crosses the halfway mark is capped: no overflow. Quake hits in an inverted circle, so the characters far away; Pressure steals 1 MP in melee.
 Olgofist3 AP · 7 range ·46 to 60 Fire damage
Halves its target's damage against the Olgoths for one turn.
 Pressure3 AP · melee ·61 to 75 Fire damage · Steals 1 MP
-
Quake5 AP · on self ·61 to 75 Earth damage
Inverted circle: it's the characters far from the Olgoth that take damage.

Level 200
- 5,500 HP
- 10 AP
- 5 MP
- Resistances (%)
- Earth 25%
- Fire 20%
- Water 35%
- Air 25%
- Neutral 20%
Cardinal Strike hits at infinite range up to four visible characters, each in a different element. Each hit it receives reduces this spell's cooldown: kill it in one go. Psyclops removes 2 range from shooters, Hail of Blades steals Flight in melee.
-
Cardinal Strike
Infinite range, 2-turn cooldown shortened with each hit received. Without line of sight, everything falls on the nearest one.
 Psyclops3 AP · 7 range ·56 to 70 Water damage · -2 Range
Removes 2 range for one turn, from 2 to 7 range. Annoying for shooters.
 Hail of Blades3 AP · melee ·66 to 80 Fire damage · -30 Flight · 30 Flight

Level 200
- 5,500 HP
- 12 AP
- 5 MP
- Resistances (%)
- Earth 10%
- Fire 5%
- Water 20%
- Air 10%
- Neutral 5%
Destructive Spirit gives 2 AP to the monsters in a large circle around it. Cerebrutal hits in a star and pulls the target's nearby allies toward it: don't group up. Mortification lowers your resistances in melee.
 Destructive Spirit3 AP · on self ·2 AP
-
Cerebrutal5 AP · 7 Range ·51 to 60 Air damage
Hits in a star and gathers the target's allies around it.
 Mortification3 AP · melee ·51 to 70 Fire damage · -10% Resistance

Level 200
- 5,500 HP
- 10 AP
- 6 MP
- Resistances (%)
- Earth 10%
- Fire 5%
- Water 20%
- Air 10%
- Neutral 5%
Timber hits the nearest enemy, at infinite range and without line of sight. Attraxe-tive pulls 2 cells, then Cutting hits in a circle around it and pushes back. Keep your characters spread out.
-
Cutting3 AP · on self ·61 to 75 Air damage · Pushes back 2 cells
-
Timber
Always targets the nearest enemy, without line of sight.
-
Attraxe-tive3 AP · 3 range · Pulls 2 cells ·81 to 95 Fire damage
Preparing your run through the Blood Throne
A dungeon for teams of level 190 to 200 able to take the hits of a single target and handle the health thresholds. You come here for the Eliocalypse series, the Totem of Anger, the achievements and War's Cap: War cannot be captured.
How to enter the Blood Throne
The zones of the four Horsemen are reached through the Vili Ark zaap , reached through the rift in the Dyna Mine . The Blood Throne is then at , in War's Wounds. There are three ways to open it: a Blood Throne Key (consumed), the keyring if it is registered there, or the automatic group finder.
Crafting the Blood Throne Key
It is crafted at a handyman's workshop. Five ingredients drop from the Warmongers, at 12%: Bloody Fabric (Soul-Swallower), Coagulated Blood (Plaguonid), Slicing Canine (Slashmaster), Linothorax (Murderjack) and Tasty Meat. Icefish, Snowdrop and Frosteez complete the recipe.
| Ingredient | Quantity | Level |
|---|---|---|
 Bloody Fabric |
2 | 200 |
 Coagulated Blood |
2 | 200 |
 Slicing Canine |
2 | 200 |
 Linothorax |
2 | 200 |
 Tasty Meat |
2 | 200 |
 Icefish |
1 | 200 |
 Snowdrop |
1 | 200 |
 Frosteez |
1 | 200 |
Which team to bring against War
Enough to hold the Fearless target. For 2 turns, War hits a single character, who is Unhealable and under erosion. Plan for dispelling the Unhealable and the erosion, then heals. A tank Pandawa with Prohibition takes it very well.
MP removal. War has little MP dodge: putting her at 0 or 1 MP each turn limits her swaps and approaches, especially on turns when she isn't Fearless.
One big hit rather than ten small ones. Non-Fearless characters only get one hit before becoming Pacifist: favor spells with a single big damage line. A Rogue's summons and bombs hit even when you are Pacifist.
The classes that fit well. The Pandawa carries an ally to spare them from Pacifist, protects himself with Prohibition and keeps the weapons away with Pandiniuras and Stabilisation. The Iop saves his Wrath to kill a weapon in one hit, the Rogue hits with his bombs even when Pacifist, and classes with MP removal pin War down.
The five achievements of the Blood Throne
Each achievement gives 200,000,000 XP and 2 War's Cap, Duo doubles the XP. Misanthrope is played with the basic strategy; Zombie and Total Arsenal require a separate plan.
| Achievements | Condition | Points | XP |
|---|---|---|---|
 War (Special) |
Defeat War in her dungeon by completing the “Total Arsenal” challenge. | 10 | 200 000 000 |
| Blood Throne |
Defeat War in this boss's dungeon. | 10 | 200 000 000 |
| War (Zombie) |
Defeat War in her dungeon by completing the “Zombie” challenge. | 10 | 200 000 000 |
| War (Misanthrope) |
Defeat War as a team in her dungeon by completing the “Misanthrope” challenge. | 10 | 200 000 000 |
| War (Duo) |
Defeat War in her dungeon by completing the “Duo” challenge. | 20 | 400 000 000 |
Zombie
Use exactly one MP per turn. The monsters' phase is no problem. Since War is unmovable, she will end up in melee with you: aim for 80 to 90 Flight to unlock from her with one MP, even in the Fearless state, or plan teleports. The weapons are impossible to avoid: bring War down to about 500 HP above the threshold, get out of the weapon's range, buff yourself (an Iop Wrath ready) and kill the weapon before it plays. At the last threshold, finish War. With MP removal, playing at range is simpler.
Misanthrope
No ally may end their turn on a cell adjacent to another ally. No extra difficulty: never end next to an ally or a summon, and beware of the Slashmaster's teleports and Velocity's swaps.
Special: Total Arsenal
None of War's weapons may be killed or moved by an ally. War can still swap places with her weapons, you can't. Spread the team out on the turns when she isn't Fearless, and get out of the areas before each threshold. Before the last monster, get out of Valour's range to gain a turn, and prepare a big turn that passes several thresholds at once. With the weapons still alive, War gets the bonus of the last one summoned every turn.
Duo
Two characters maximum, fewer than 40 turns. The simplest: a tank Pandawa with Prohibition, invulnerable in melee one turn out of three, and a full-damage character that he carries. Kill the Slashmaster, then the Olgoth (half at range) and the Soul-Swallower. After that, either you stay in melee killing the weapons, fleeing one turn out of three or under Prohibition; or you stay at range without killing them, with Pandiniuras and Stabilisation, carrying your ally at each end of turn. Variant: a class with MP removal that summons a lot, so that War swaps places with the summons.
Drops and loot of the Blood Throne
Base in-game rates, before Prospecting bonuses.
On War
 War's CapGarment12 %
 Nougat Rabmarac BarTreat6 %
 Barrel of Scurvion BloodContainer3 %
- Sharp BladeCombat Resource2 %
 Al Howin GobtubbyCeremonial pet1 %
 Paragon of PowerMain quests0,7 %
 Tasty CarrionMeat0,6 %
On the henchmen of War
- Coagulated BloodMiscellaneous Resource · Plaguonid12 %
- Tasty MeatMeat · Plaguonid12 %
- LinothoraxMiscellaneous Resource · Murderjack12 %
 Armour FragmentMiscellaneous Resource · Olgoth12 %
- Bloody FabricFabric · Soul-Swallower12 %
- Slicing CanineBone · Slashmaster12 %
- Sharp BladeCombat Resource · Plaguonid2 %
- Barrel of Scurvion BloodContainer · Plaguonid1 %
The Blood Throne as a guild Expedition
The Blood Throne exists in two guild Expeditions, Audacious and Valour. The monsters' phase stays the same, everything changes at the first weapon:
- Audacious: the weapons are invulnerable for one turn after appearing, and each character swaps places with the nearest weapon at the end of their turn. Move the weapon away from War, use the swap to move away, and send the weapons into the corners with the last character in initiative;
- in Audacious, killing them is not necessary and strengthens War; if you do, summon the weapon on the turn War goes Fearless, with a character who plays early, then kill it on the next turn before War;
- Valour: the weapons are unmovable and invulnerable for the whole fight, but War can still swap with them. Same plan as the Total Arsenal achievement: spread out on the turns without Fearless, gain a turn before the last monster, and use spells with a single big damage line.
Where is the Blood Throne?
In War's Wounds, at , in the Horsemen's Dimension. You get there through the Vili Ark zaap , itself reached through the rift in the Dyna Mine .
At what level should you do the Blood Throne?
Level 190 minimum, 200 recommended. War is level 220, with 22,000 HP with four players.
Which quest should I do at the Blood Throne?
The Longest Day, which starts at the Bloody Grave and ends by defeating War in a single fight, then talking to her again.
When does War become vulnerable?
The turn after the last monster dies. She then mounts her steed and immediately puts a character in the Fearless state: set up your positions before finishing off that monster.
Which monster should you kill first in the Blood Throne?
The Slashmaster, then the Olgoth, then the Soul-Swallower. The Olgoth is brought down halfway at range, then finished in melee.
Should you kill War's weapons?
Yes, if you can kill them before War's turn. Killed afterward, a weapon gives her resistances and MP for the whole fight, and heals her. Otherwise, push them far away and let them live.
Why am I Pacifist when hitting War?
Because another character is in the Fearless state. Only that one can hit War several times per turn; an ally carried by a Pandawa also escapes it.
Can War be captured?
No, War cannot be captured. No soul stone is needed for this dungeon.
Can the Blood Throne be done with two characters?
Yes, it is even an achievement: Duo, in under 40 turns. The simplest duo pairs a tank Pandawa with Prohibition and a full-damage character.




Comments
No comments yet. A tip, or a detail about this page? Be the first.