 2 × Skt-Zo Leg
Dungeon The Horsemen's Dimension
Shackles of Tyranny
Level 200 dungeon in Servitude's Galley, at [4,-3]: five rooms and a boss that reflects damage and relentlessly summons, Servitude. Quests to start, map of each room, strategy, monsters, achievements and loot.
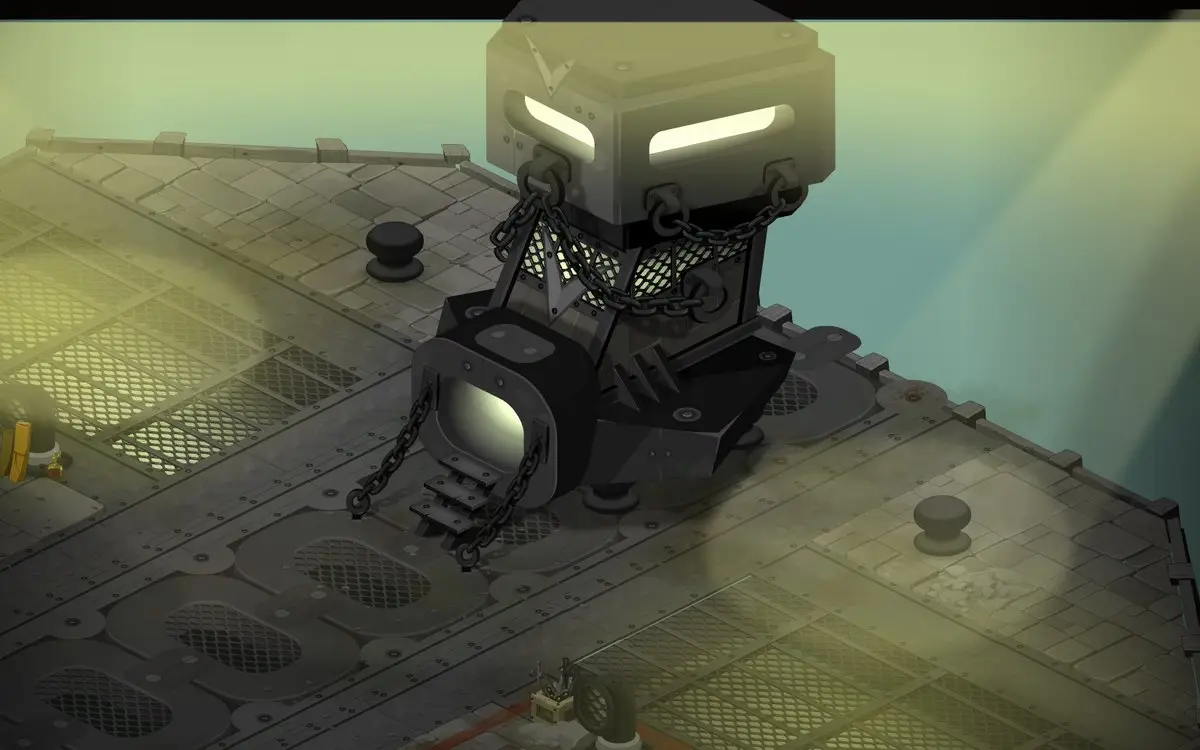
Quests linked to the Shackles of Tyranny
The dungeon quest, Break One's Chains, closes the investigation begun with The Slave Ship in the Galley: its last major step is to defeat Servitude in a single fight. Arrive at the dungeon with the quest in progress, otherwise the fight doesn't count.
It is completed on Servitude. Free Draconiros's soul by breaking Servitude's five chains, one of which is fought and another requires a hammer reinforced by Volkaragnar, then defeat Servitude in a single fight.
- Start
- Chained Artefact, in the figurehead of Servitude's Galley
- Prerequisites
- The Slave Ship, started by the Feathered Slave
 Ballasted Kanonball5 Ballasted Kanonball, 5 Worn Oar Wood and 50,000,000 XP
For later
With Draconiros freed, Servitude must be countered. Travel back to Pandora with Martalo, get a Shackles Key from the Galley's monsters, then lure Servitude into the past and overcome its five chains.
- Start
- Weakened Draconiros, Servitude's Galley
- Prerequisites
- Break One's Chains
 Slave Necklace3 necklaces, 3 Armiscreant Hood and 50,000,000 XP
Servitude can give you the Totem of Joy. Maimane asks for six emotion totems, each from a boss of your choice: for joy, Servitude, Klime, Merkator, King Imagami or King Nidas.
- Start
- Maimane, Destroyers' Nightmare
- Prerequisites
- Level 180
 Totem of Balanceonce the six totems are handed in
During events
- Tiwagrum Simulation
Tiwagrum can assign you Servitude as a guardian to defeat. Amakna Village, .
The 5 rooms of the Shackles of Tyranny
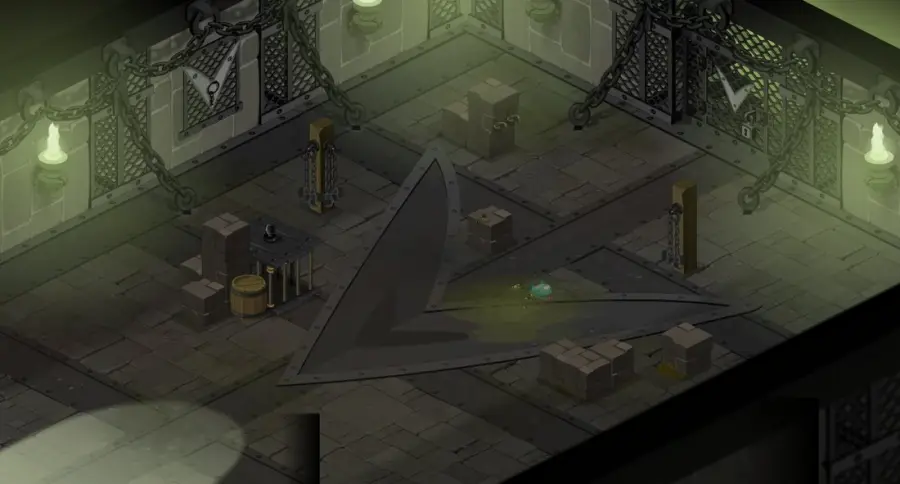
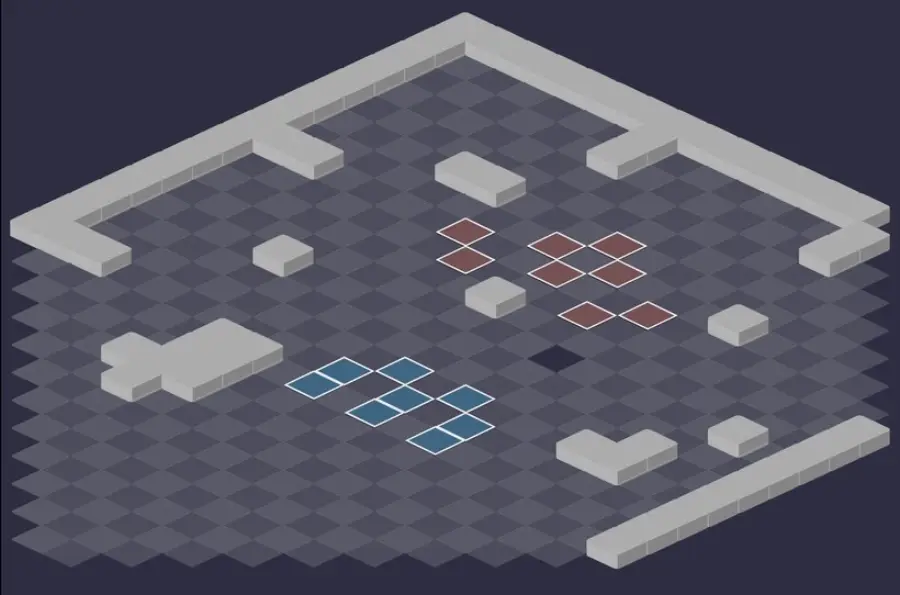
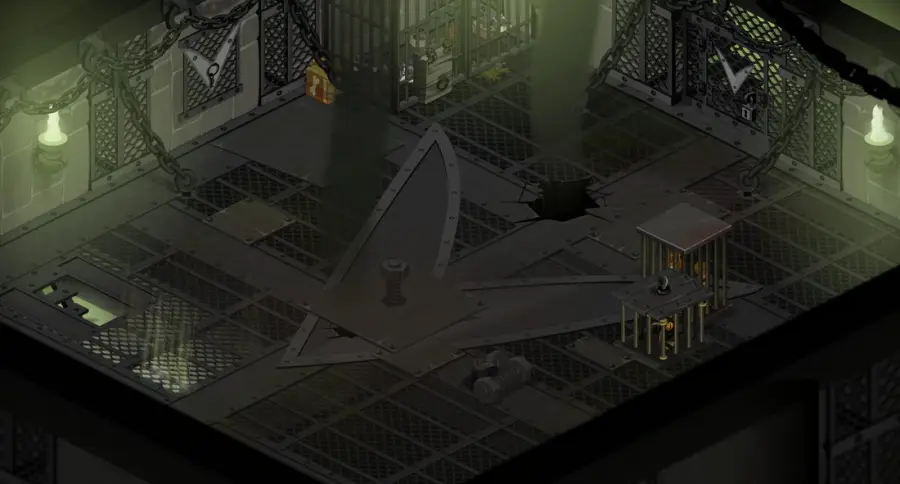
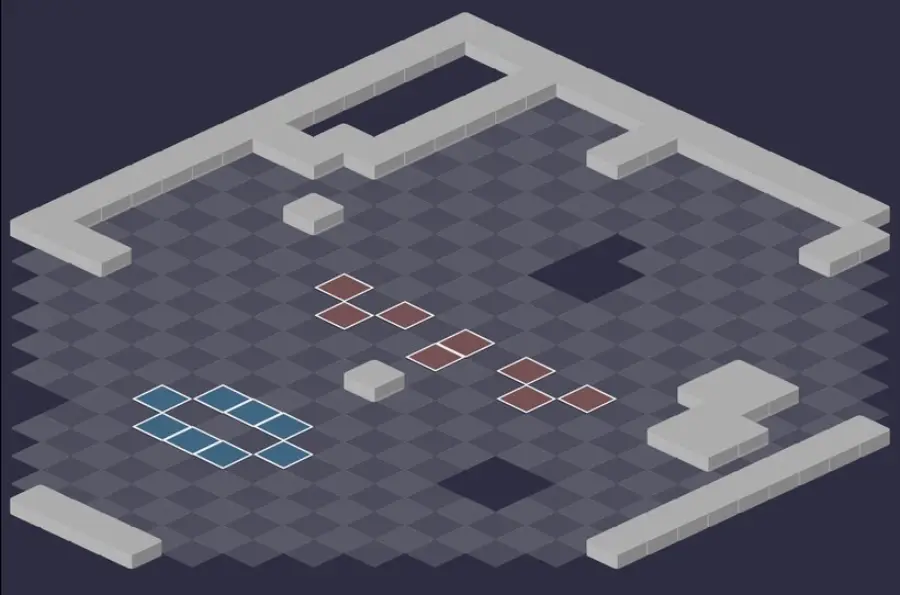
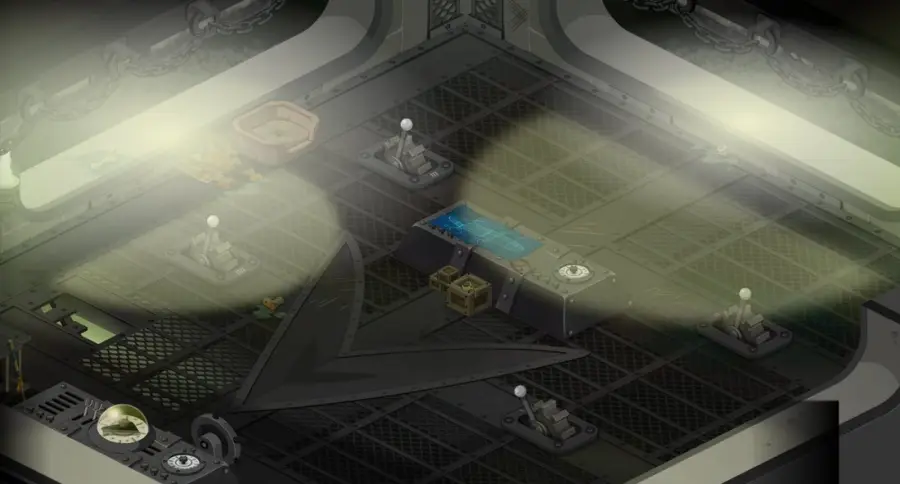
Five rooms, Servitude waits in the last one. For each room: the scenery, then the tactical view with the starting cells (blue: you, red: the monsters). Tap an image to enlarge it.
Room 1
Room 2
Room 3
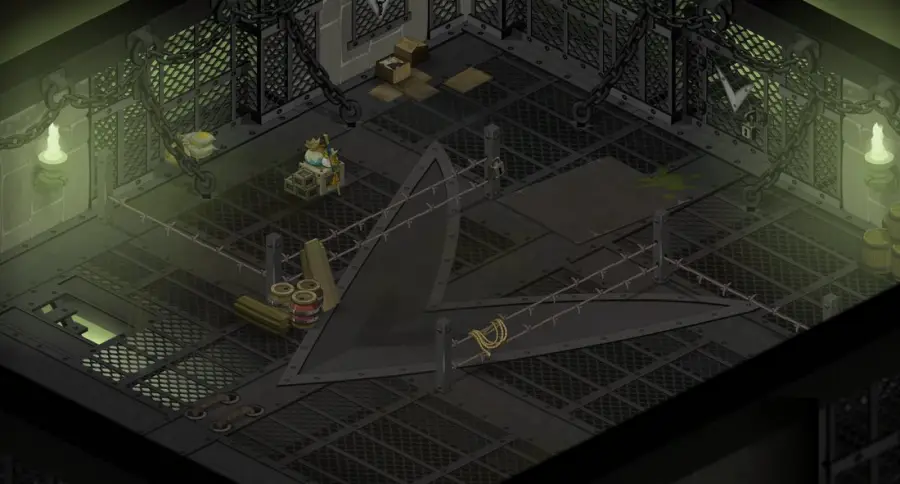
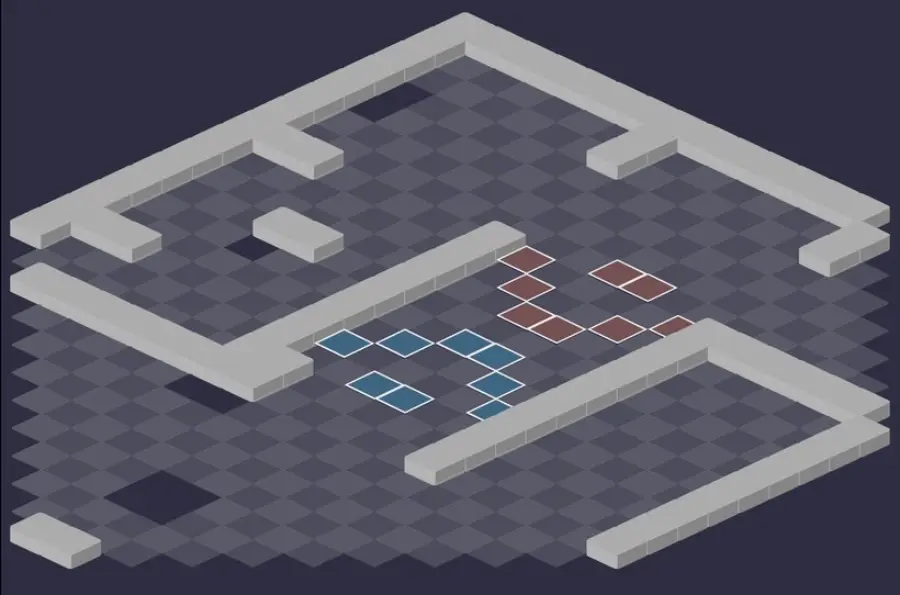
Room 4
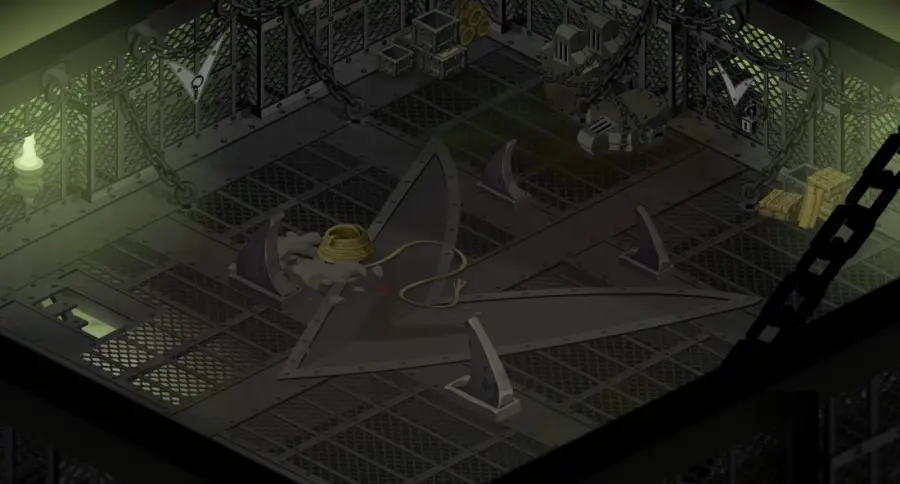
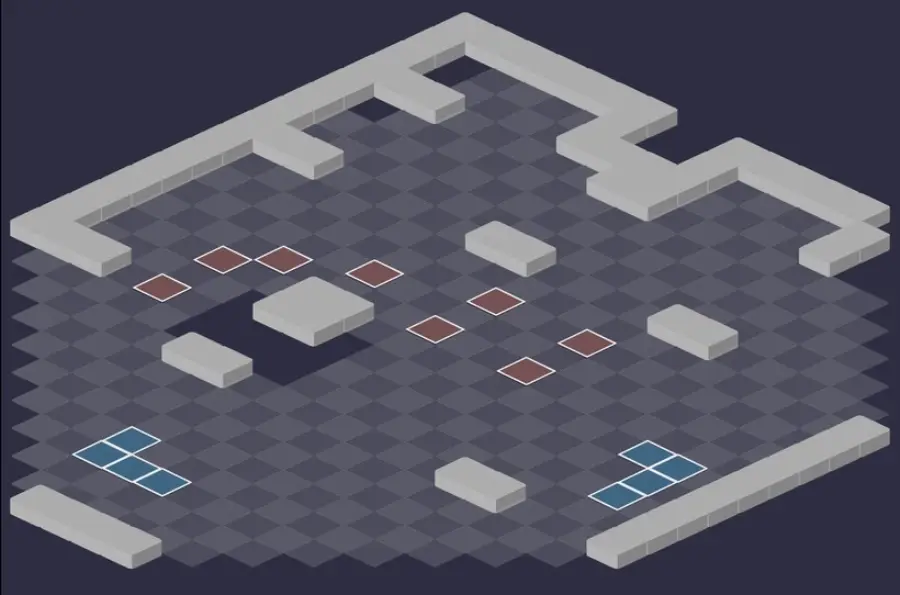
Room 5 — Servitude
Servitude, the Galley's monsters and, from turn 1, the first Armiscreant. Don't hit the boss before you have the Traitor state or a Feca protection: the strategy is detailed right below.

Defeat Servitude
The 200% reflection
Servitude reflects 200% of the damage you deal to it, except poisons. To hit it safely, you need the Traitor state or a protection like Bastion, Barricade, Prohibition or Ataraxia. Each line of damage on it consumes one Traitor state.

Level 220
 26,000 HP
 11 AP
 7 MP
- Resistances (%)
 Earth 15%
 Fire 30%
 Water 25%
 Air 25%
 Neutral 20%
It reflects your damage, summons an Armiscreant every odd turn starting on turn 1, and goes through three phases, the last one healing it for 25% of its HP. Subjugation pulls from afar and Betrayal turns your characters against their allies. Weak Point: Earth, at 15%.
-
Betrayal
Only targets characters in the Traitor state, across the whole map: it pulls you in and makes you hit your nearest ally, in a random element. In phase 2, it casts it on all Traitors.
 Subjugation2 AP · 10 Range · 100 Lock · Pulls 9 cells ·Steals 1 MP · 71 to 80 Air damage
Pulls in a line up to contact with it, then it gains lock for one turn, a bit less if you were far away. Don't end up lined up with it.
 Protective Thrall3 AP · 5 Range ·76 to 85 Water damage · 1000 Shield · 1 MP
Gives 1,000 shield and 1 MP to the monster closest to the targeted character, which can change your target. In phase 2, Servitude benefits as well.
 Tyranny5 AP · on self ·101 to 110 Water damage · Steals 1 AP
Hits and removes 1 AP around it, once per turn. In phase 2, it can also swap an Armiscreant with the character closest to it.
-
Subjugation2 AP · 10 Range · 100 Lock · Pulls 9 cells ·Steals 1 MP · 71 to 80 Air damage
Pulls in a line up to contact with it, then it gains lock for one turn, a bit less if you were far away. Don't end up lined up with it.
-
Protective Thrall3 AP · 5 Range ·76 to 85 Water damage · 1000 Shield · 1 MP
Gives 1,000 shield and 1 MP to the monster closest to the targeted character, which can change your target. In phase 2, Servitude benefits as well.
-
Betrayal
Only targets characters in the Traitor state, across the whole map: it pulls you in and makes you hit your nearest ally, in a random element. In phase 2, it casts it on all Traitors.
-
Betrayal
Only targets characters in the Traitor state, across the whole map: it pulls you in and makes you hit your nearest ally, in a random element. In phase 2, it casts it on all Traitors.
-
Betrayal
Only targets characters in the Traitor state, across the whole map: it pulls you in and makes you hit your nearest ally, in a random element. In phase 2, it casts it on all Traitors.
-
Betrayal
Only targets characters in the Traitor state, across the whole map: it pulls you in and makes you hit your nearest ally, in a random element. In phase 2, it casts it on all Traitors.
-
Betrayal
Only targets characters in the Traitor state, across the whole map: it pulls you in and makes you hit your nearest ally, in a random element. In phase 2, it casts it on all Traitors.
-
Tyranny5 AP · on self ·101 to 110 Water damage · Steals 1 AP
Hits and removes 1 AP around it, once per turn. In phase 2, it can also swap an Armiscreant with the character closest to it.
The five-step strategy against Servitude
The Armiscreants first. They appear 2 RNG from Servitude, up to six on the field. Kill each Armiscreant as soon as it is summoned. If that is not possible, hit all of them at least once per turn: otherwise, each one summons an Ioppressed.
The monsters, in order. Between two Armiscreants, attack the monsters: the Ecaptive before its turn 4, then the Tyranice and the Ballackey, keeping them at a distance. If Reinfortifice protects your target, hit the Ballackey three times and resume. The Bangcutioner goes last, and fast.
Charging the Traitor state. Without a Feca, your hitting characters end their turn on a white glyph to get Traitor 1. They then hit an ally with cheap, low-power spells: one damage line, one more state, up to 5.
Focusing Servitude. Hit him without ever spending your last Traitor state, and recharge on an ally when only one is left. Poisons go through without a state. At 50% HP, he mounts his steed: same instructions, with 1,000 shield that he can gain every turn.
Lock down the last phase. When you're sure to bring it to 1 HP, apply the Unhealable state and a poison to it, Ebony for example. It brings everyone back to their starting cell without healing, then dies at the start of its turn. Without Unhealable, it recovers 25% of its HP and you have to start over.
The Traitor state
Ending your turn on a white Servitude glyph gives Traitor 1, but the glyph only grants the first state: ending on it again doesn't raise it. To climb up to 5, the character must hit their allies. Without a starting state, hitting an ally does nothing.
The state only wears down by hitting Servitude, one damage line at a time: at Traitor 3, the fourth line is reflected again. In exchange, Betrayal targets Traitor characters anywhere on the map, pulls them in and forces them to hit their nearest ally. In phase 2, all the Traitors go through it.
The three phases
Up to 50% HP, Servitude fights on foot. From 50% to 1% HP, he mounts his steed: Subjugation steals 1 MP and hits Air, Protective Thrall also gives him the shield and MP, and Tyranny can swap an Armiscreant with the character closest to him, at any distance.
At 1 HP, it puts all entities back at their starting positions and heals for 25% of its HP. The Unhealable state cancels this heal: the Pandawa's Prohibition or the Masqueraider's Ardour, for example. Without a poison, any damage spell then finishes it off.
The return of Taming
Armiscreant's Taming brings you back to your turn-start cell at the end of your next turn. Use it: advance fearlessly into the enemy lines to hit or position, you'll return to safety. To cancel the effect, a dispel or the Gravity, Rooted and Unmovable states are enough: Ataraxia, Gravitational Glyph or Inertia from the Feca, Stabilisation or Brewing from the Pandawa.
The monsters of the Shackles of Tyranny
Five level 200 monsters, including the Armiscreant that Servitude relentlessly summons; the Tyranice doesn't appear in four-player fights. Resistances in red are their weaknesses.
In which order to kill the monsters
- Armiscreant — at each summon, before they pile up and call Ioppressed.
- Ecaptive — on turn 4, it gains 3 MP and 100% final damage, with a lot of erosion.
- Tyranice, then Ballackey — the first hits hard and heals, the second protects your targets with Reinfortifice.
- Bangcutioner — the more HP it loses, the more it boosts its allies: ignore it, then kill it in one go.

Level 200
- 5,500 HP
- 10 AP
- 6 MP
- Resistances (%)
- Earth 30%
- Fire 30%
- Water 15%
- Air 20%
- Neutral 20%
Summoned every odd turn with 20% less HP, level 200 with four and 212 with eight. Skirmich makes it summon an Ioppressed if it takes no direct damage before its turn. Only 15% Water resistance: a Water character finishes it quickly.
 Skirmich
The Armiscreant switches to Call for Reinforcements at the end of its turn. One line of direct damage before its next turn prevents the Ioppressed; it never keeps more than two.
-
Repulsive Anchor4 AP · 2 Range · Pulls 1 cell ·61 to 70 Earth damage · Pushes back 3 cells
Pushes back 3 cells, after pulling one cell if you were at 2 range. In a straight line only.
 Taming4 AP · 10 Range ·61 to 70 Fire damage · Teleports the target to the cell where they started their turn
At the end of your next turn, you return to your turn-start cell. Advance fearlessly, or cancel the effect with a dispel or a Gravity state.
Level 200
- 7,700 HP
- 8 AP
- 4 MP
- Resistances (%)
- Earth 20%
- Fire 25%
- Water 30%
- Air 30%
- Neutral 25%
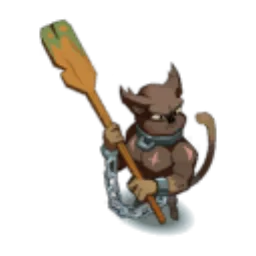
Breakers erodes in contact, and from turn 4, Aerial Mayhem makes it far more dangerous. Kill it first among the monsters, or keep as much distance as possible. Its weakness: Earth.
 Breakers4 AP · melee ·66 to 85 Water damage · 30% Erosion
Erosion in a line on contact, twice per turn: your heals lose effectiveness. Don't stay in melee.
 Aerial Mayhem4 AP · on itself · Size: +50% ·4 AP · 3 MP · 100% Final Damage
Only cast starting from turn 4: the Ecaptive gains AP, MP and final damage. It must be dead before then.
-
Paddling Mad4 AP · melee ·41 to 60 Air damage · No additional effects

Level 200
- 6,600 HP
- 11 AP
- 5 MP
- Resistances (%)
- Earth 25%
- Fire 20%
- Water 20%
- Air 30%
- Neutral 30%
The second most dangerous monster when it is there: Rhythmic Whip hits up to 7 RNG and Palliative Whip heals an ally, with lock and flight as a bonus. To be eliminated right after the Ecaptive.
 Palliative Whip3 AP · 7 Range ·61 to 90 Fire heals · 30 Lock · 30 Flight
Heals an ally and gives them lock and flight for 2 turns. One more reason to kill the Tyranice early.
-
Rhythmic Whip4 AP · 7 RNG ·41 to 50 Neutral damage
 Boosting Whip5 AP · melee ·61 to 80 Fire damage

Level 200
- 8,800 HP
- 10 AP
- 6 MP
- Resistances (%)
- Earth 30%
- Fire 30%
- Water 20%
- Air 20%
- Neutral 30%
It hits hard in contact and steals resistances with Compression. Above all, Reinfortifice protects the monster with the fewest HP, up to 10 RNG without line of sight: you have to hit the Ballackey three times to lift the effect. Keep it at a distance.
 Reinfortifice
Protects the monster with the fewest HP. Three hits on the Ballackey lift the effect: do it before your big turn.
 Compression3 AP · 3 Range ·61 to 70 Earth damage · 5% Resistance · -5% Resistance
 Penitence3 AP · melee ·41 to 50 Neutral damage · 61 to 70 Fire damage · -50 Flight

Level 200
- 7,100 HP
- 9 AP
- 4 MP
- Resistances (%)
- Earth 25%
- Fire 15%
- Water 20%
- Air 25%
- Neutral 20%
Decadance boosts its allies, all the stronger the more HP it has lost: MP, range, final damage and critical. Don't damage it as long as the other monsters are alive, then kill it as fast as possible so it doesn't boost Servitude.
 Decadance
Its bonuses to allies grow as the Bangcutioner loses HP. Only hit it to finish it off.
 Crosswand3 AP · 6 Range ·61 to 70 Air damage · -2 Range
 Drum Beating3 AP · melee ·51 to 60 Earth steal · -30% Critical
Preparing your run through the Shackles of Tyranny
The hardest of the four Horsemen of the Eliocalypse, for teams of level 190 to 200 who know how to handle a flood of summons. People come here for Break One's Chains, the achievements, the Totem of Joy and Servitude's Lock: Servitude cannot be captured.
How to enter the Shackles of Tyranny
The entrance is in Servitude's Galley, at . The four Horsemen's zones are reached through the Vili's Arch zaap , reached through the rift in the Dyna Mine . Three ways to open it: a Shackles of Tyranny Key (consumed), the key ring if it's registered there, or the automatic group search.
Crafting the Shackles of Tyranny Key
It is crafted at a handyman. Five ingredients drop from the dungeon's monsters: Rhythmic Wand (Bangcutioner), Worn Oar Wood (Ecaptive), Whip Handle (Tyranice), Ballasted Kanonball (Ballackey) and Tasty Meat. Icefish (fishing), Snowdrop and Frosteez (harvesting) complete the recipe.
| Ingredient | Quantity | Level |
|---|---|---|
 Rhythmic Wand |
2 | 200 |
 Worn Oar Wood |
2 | 200 |
 Whip Handle |
2 | 200 |
| Ballasted Kanonball |
2 | 200 |
 Tasty Meat |
2 | 200 |
 Icefish |
1 | 200 |
 Snowdrop |
1 | 200 |
 Frosteez |
1 | 200 |
Which team to bring against Servitude
As many as possible. Servitude summons the same number of Armiscreants whether you are four or eight. With six or more, the fight becomes much easier: more characters to take them down, and more characters to hit the boss on the same turn.
Something to finish off the Armiscreants. A Cloudy Dofus helps a lot to finish them off over the odd turns. Failing that, one or two Water characters take them down fast, thanks to their 15% resistance in that element.
One Unhealable and one poison. Without the Unhealable state, the last phase restores 25% of its HP to Servitude. The Pandawa's Prohibition or the Masqueraider's Ardour prevent that, and a poison like the one from the Ebony Dofus finishes it off by itself at the start of its turn.
The classes that fit well. The Pandawa positions, applies Unhealable and Gravity, and stabilizes against the return of Taming. The Feca hits Servitude without the Traitor state thanks to Bastion, Barricade and Ataraxia. The Eliotrope positions and concentrates damage with its portals, ideal with an Iop and its Wrath. None is mandatory, but they make the fight and its achievements much easier.
The five achievements of the Shackles of Tyranny
Each achievement grants 200,000,000 XP and 2 Servitude's Lock, and Duo doubles the XP. Versatile is played with the basic strategy, and Focus requires a team capable of big damage turns.
| Achievements | Condition | Points | XP |
|---|---|---|---|
 Servitude (Focus) |
Defeat Servitude in its dungeon by completing the “Focus” challenge. | 10 | 200 000 000 |
| Servitude (Versatile) |
Defeat Servitude in its dungeon by completing the “Versatile” challenge. | 10 | 200 000 000 |
| Servitude (Duo) |
Defeat Servitude in its dungeon by completing the “Duo” challenge. | 20 | 400 000 000 |
| Servitude (Special) |
Defeat Servitude in its dungeon by completing the “Walkabout” challenge. | 10 | 200 000 000 |
| Shackles of Tyranny |
Defeat Servitude in this boss's dungeon. | 10 | 200 000 000 |
Focus
An attacked enemy must be finished off before another one is attacked. The whole difficulty: once Servitude is damaged, you can no longer hit the Armiscreants, nor prevent their Ioppressed. Alternate one Armiscreant, one monster (Ecaptive before turn 4, Tyranice, Ballackey, Bangcutioner), the next one, then finish off the last ones. Keep the Ballackey more than 10 range away from the monsters to avoid Reinfortifice. Then aim to kill Servitude on an even turn, with no summons: Eliotrope and Iop with a Feca, Wrath charged on the odd turn, Unhealable and poison before phase 3, several characters in Traitor 5. No Wrath near the 50% threshold. Without an Eliotrope, come with six or more.
Versatile
Each ally may use the same action only once during their turn. The basic strategy doesn't change. Take a Feca or Pandawa tank, two characters who hit and a healer. The Feca, tank or Water, protects so you can hit Servitude fast. A Pandawa can no longer cast Karcham twice or Boozer for its MP: position with Waterfall, Vertigo, Eau de vie or Propulsion.
Special: Walkabout
The summoned Armiscreants must not be finished off. Still hit each Armiscreant every turn, against the Ioppressed, and kill Servitude fast: ideally between turn 5 and turn 8, before you get overwhelmed. It's easier with six or more; with four, you need enough to kill it in one or two turns, with an Unhealable. Eliotrope, Rogue or Sram fit the job, preferably Earth. During your boosts, kill the Ecaptives and the Ballackeys, which can protect Servitude.
Duo
Two characters maximum, fewer than 40 turns. The simplest: a network Earth Sram and a tank Feca. The Sram (Domakuro, Cloudy Dofus, Jahash Jurgen's cape) doesn't hit before turn 5 and weaves a network of traps on one side of the map, while the Feca pushes everything back with Tension and stalls with Truce. On turn 7, Bastion on the Sram, Chakra Concentration and Shakedown on Servitude, then push it into the network: it goes through its three phases and dies. Finish off the monsters, Ecaptive first. The other route, Eliotrope and Iop, requires timing the Wraths on turns 4, 7 and 10 while killing the Armiscreants in between.
Drops and loot of the Shackles of Tyranny
Base in-game rates, before Prospecting bonuses.
On Servitude
 Servitude's LockMiscellaneous Resource12 %
 Nougat Rabmarac BarTreat6 %
 Bag of Temporal PowderContainer3 %
- Slave NecklaceMiscellaneous Resource2 %
 Al Howin GobtubbyCeremonial pet1 %
 Paragon of PowerMain quests0,7 %
 Tasty CarrionMeat0,6 %
On the henchmen of Servitude
 Piece of Thrall ChainEliocalypse · Ballackey15 %
 Armiscreant HoodGarment · Armiscreant12 %
 Shackles KeyEliocalypse · Armiscreant12 %
- Tasty MeatMeat · Armiscreant12 %
- Ballasted KanonballMiscellaneous Resource · Ballackey12 %
- Worn Oar WoodWood · Ecaptive12 %
- Whip HandleMiscellaneous Resource · Tyranice12 %
- Rhythmic WandMiscellaneous Resource · Bangcutioner12 %
- Slave NecklaceMiscellaneous Resource · Armiscreant2 %
- Bag of Temporal PowderContainer · Armiscreant1 %
Where is Shackles of Tyranny located?
In Servitude's Galley, at , in the Horsemen's Dimension. You get there through the Vili Ark zaap , reached through the rift in the Dyna Mine .
What level should you be to do Shackles of Tyranny?
Minimum level 190, 200 recommended. Servitude is level 220, and by far the hardest of the four Horsemen.
Which quest should you do at Shackles of Tyranny?
Break One's Chains, which ends with Servitude in a single fight. It follows The Slave Ship, started by the Feathered Slave in the Galley .
How do you hit Servitude without taking the reflection?
With the Traitor state, or under Bastion, Barricade or Ataraxia. End a turn on a white glyph, then hit an ally to climb up to 5: each line on Servitude consumes one state.
Which monster should you target first in the Shackles of Tyranny?
Each Armiscreant as soon as it's summoned, then the Ecaptive before its turn 4. Save the Bangcutioner for last, and kill it in one go.
How do you stop Servitude from healing to 1 HP?
Apply the Unhealable state to it before bringing it to 1 HP. Add a poison: after repositioning everyone, it dies at the start of its turn.
Can Servitude be captured?
No, Servitude can't be captured. No soul stone is needed for this dungeon.
Is it better to come with four or eight?
With eight, the fight is much simpler. Servitude summons the same number of Armiscreants regardless of how many you are: the more of you, the faster they fall.
Can Shackles of Tyranny be done with two players?
Yes, it's even an achievement: two characters, fewer than 40 turns. The simplest is a network Sram and a Feca, who kill Servitude first in the trap network.




Comments
No comments yet. A tip, or a detail about this page? Be the first.