 2 × Skt-Zo Leg
Dungeon Frigost Island
King Dazahk's Brewery
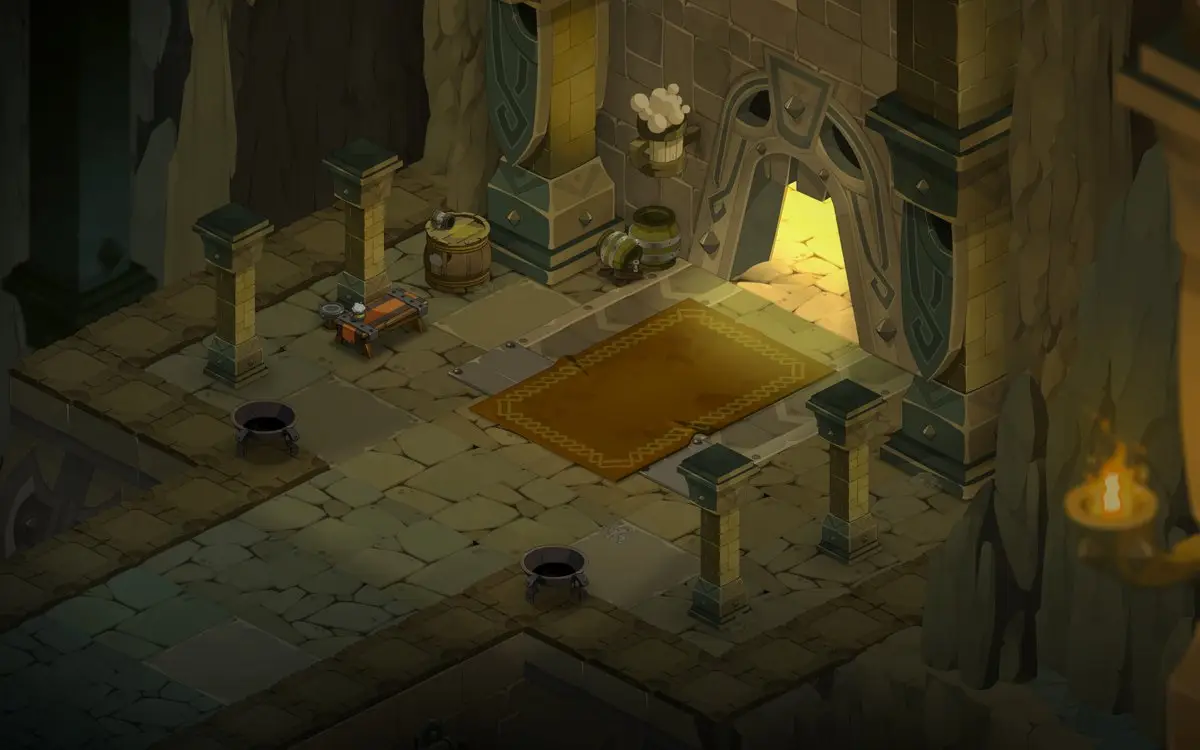
Level 200 dungeon on Frigost island, in [-62,-70]: five rooms under the Stubbygerness state and a boss with more than 100% resistance everywhere, Dazahk Freezammer. Quests to start, map of each room, strategy, monsters, achievements and loot.
Quests linked to King Dazahk's Brewery
The Kingdom of Freezammer stays closed until Tap, Friend, and Enter is completed. The dungeon quest, Brikkr-a-Brokkr, is then played on Dazahk Freezammer: accept it before entering, and don't leave the Brewery after the victory.
Without it, no access to the kingdom. The Coldiron Gate refuses to open: talk to Deol Dbear, defeat 2 Stubbyob Icebreakers in , pay for a round at the Bateau ivre, then try the door again.
- Start
- Deol Dbear, Coldiron Gate
- Prerequisites
- Level 50 and Epic Beard, Man
It ends in the Brewery, facing the king. After Brikkr's hammer has been repaired at Brokke's, enter with Blunderette and defeat Dazahk Freezammer. Stay in the dungeon: talk to him, give him the hammer, and click the book to his right.
- Start
- Pleni Potential, Petrified Forest
- Prerequisites
- Level 180 and Tap, Friend, and Enter
 Tankanvil Armour3 copies, 2 Beer Tankard, 5 Ice Kama, and 50,000,000 XP
For later
It opens with the King's Bible, after his defeat. Settle three affronts of the Freezammer clan: the Town, Sylargh and his Mechaniacs, then Ystrion Bannisterr. The return to the entrance map triggers a fight against three monsters, without redoing the dungeon.
- Start
- Dazahk Freezammer's Bible, in the Brewery
 Gobyob Sling5 copies, 3 Ice Kama and 50,000,000 XP
Dazahk Freezammer guards the portal of the Stubbyobs. On the trail of Grougalorasalar, you have to talk to the king after showing him you're not his enemy, then cross the Devouring Jungle.
- Start
- Meriana, Koalak Mountain
- Prerequisites
- A Painful Separation
 Beer Tankard3 copies and 60,000,000 XP
Dazahk Freezammer can give you the totem of wrath. Maimane asks for six emotion totems, each from a boss of your choice: for wrath, Dazahk Freezammer, War, Missiz Freezz, Solar or Tal Kasha.
- Start
- Maimane, Destroyers' Nightmare
- Prerequisites
- Level 180
 Totem of Balanceonce the six totems are handed in
During events
- Tiwotokar Simulation
Tiwotokar can designate Dazahk Freezammer as a guardian to defeat in a single fight. Astrub, .
The 5 rooms of King Dazahk's Brewery
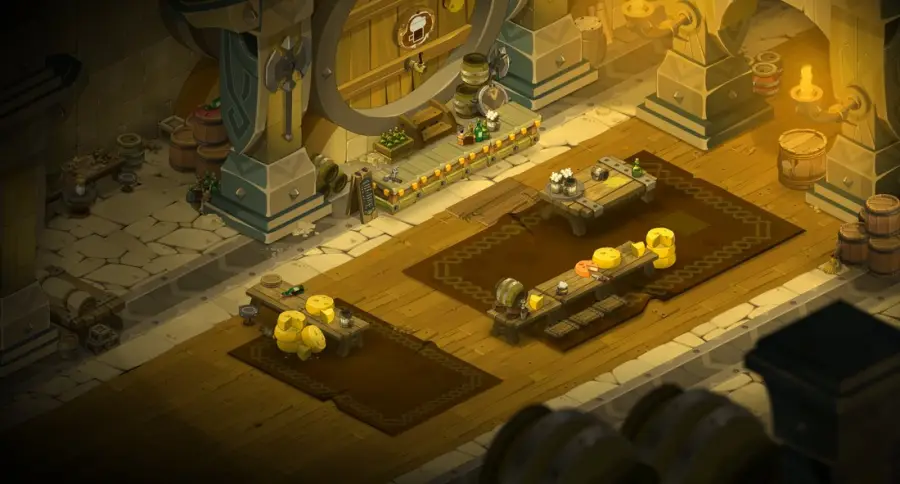
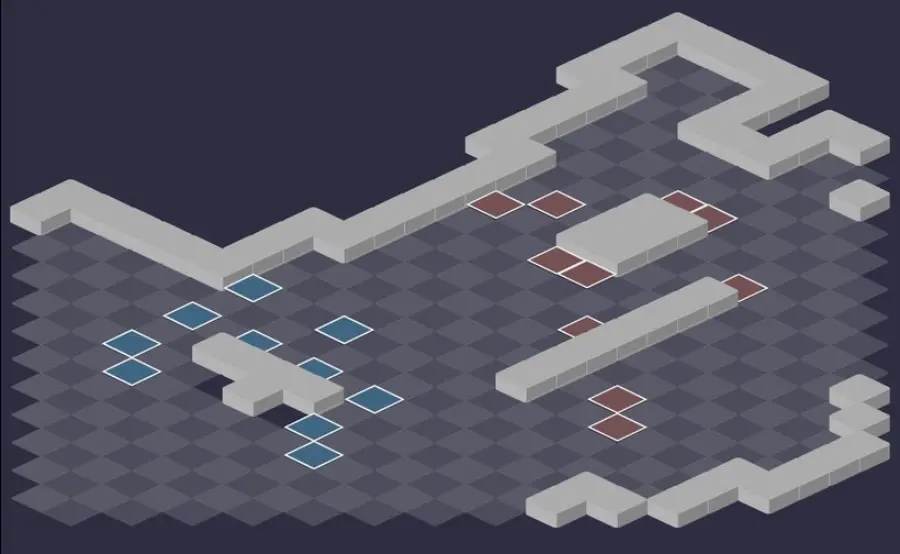
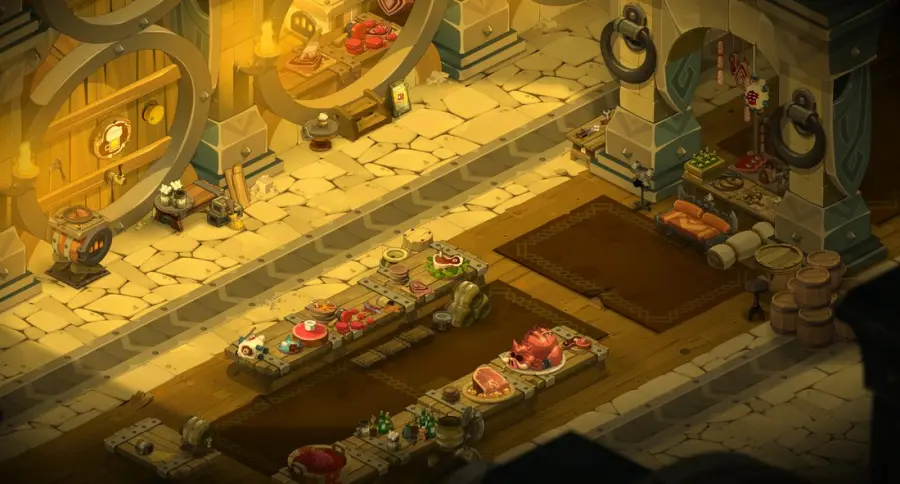
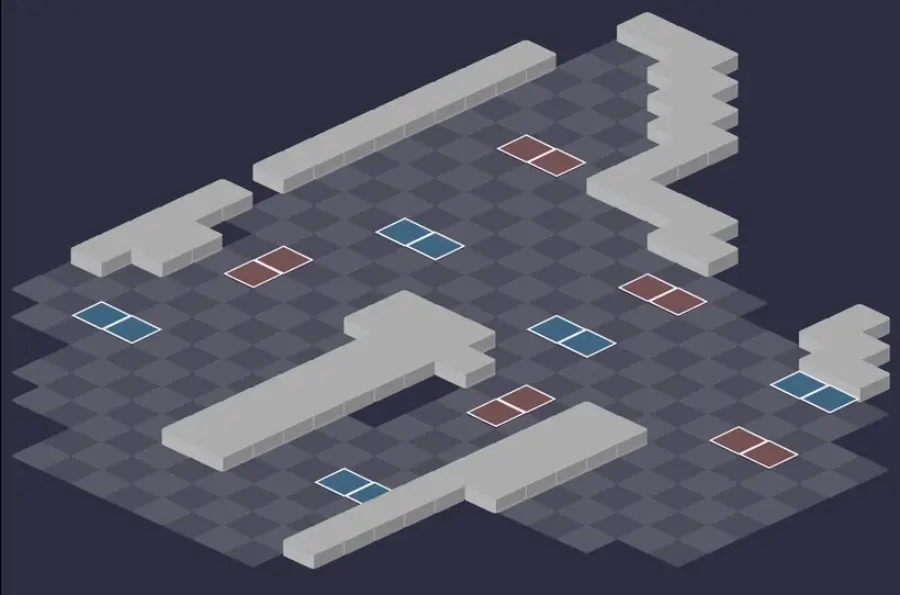
Five fights, on maps full of obstacles. Everywhere, a monster that does not hit a character goes up one level of Stubbygerness: the mechanic is detailed in the boss section. For each room: the scenery, then the tactical view with the starting cells (blue: you, red: the monsters). Tap an image to enlarge it.
Room 1
Room 2
Room 3
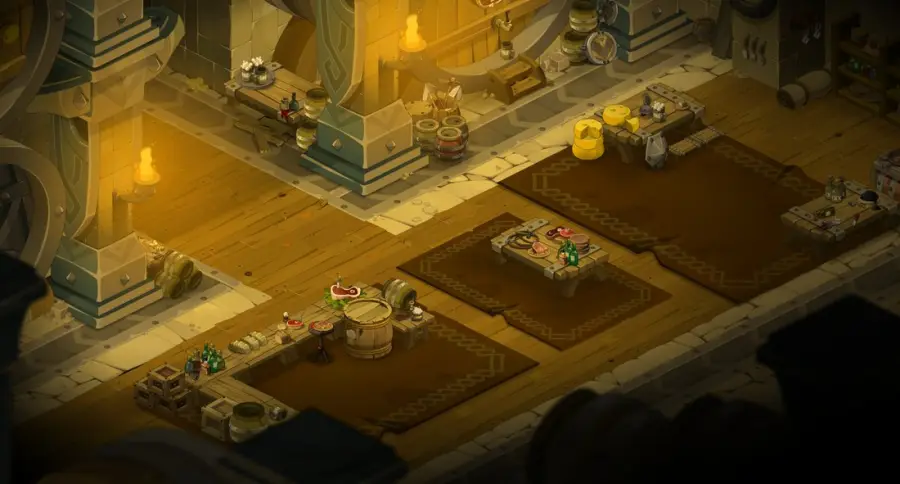
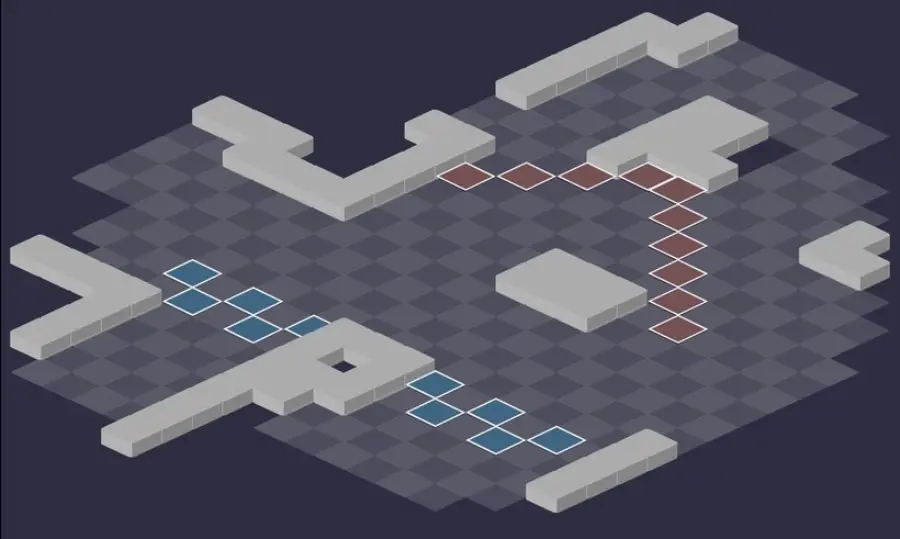
Room 4
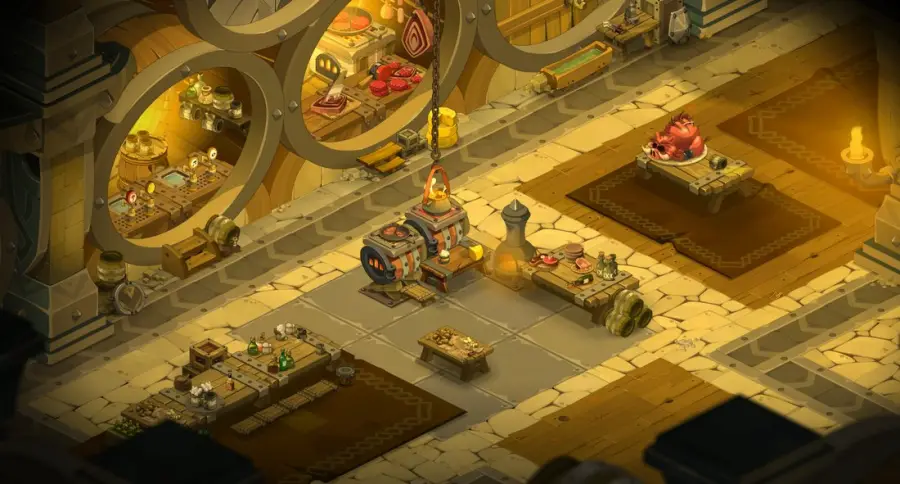
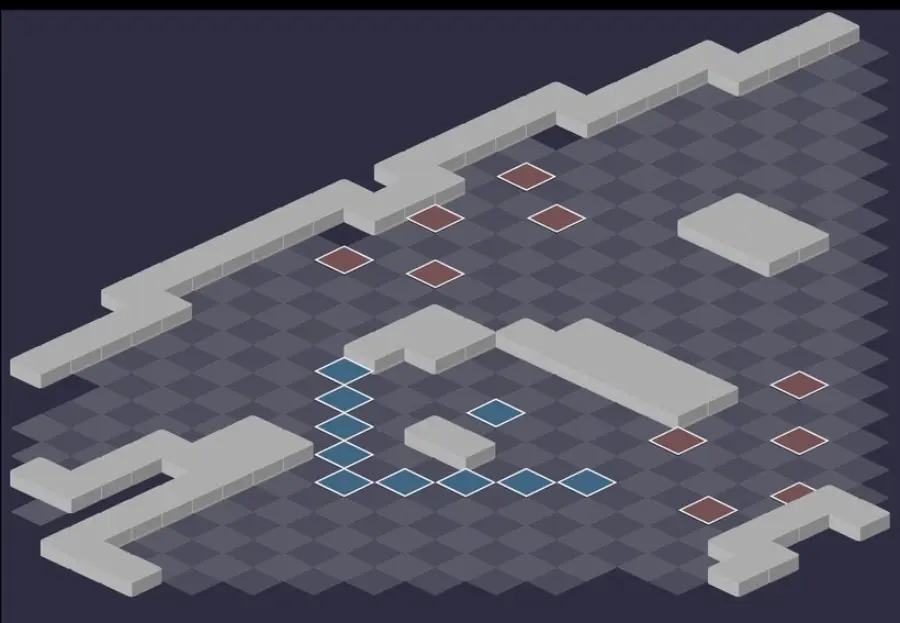
Room 5
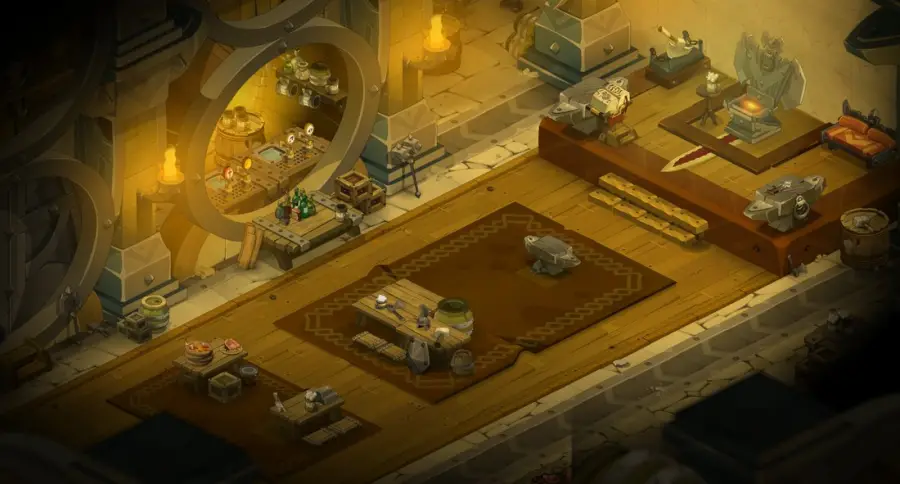
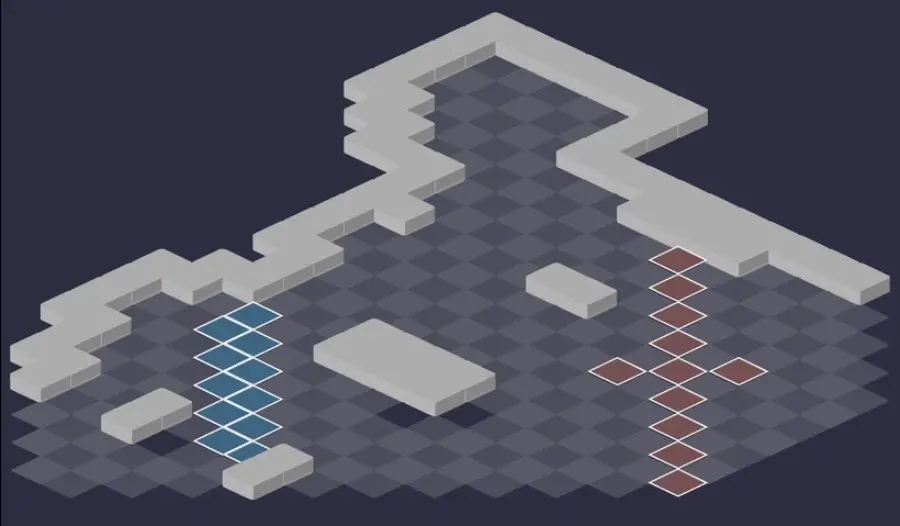
Defeat Dazahk Freezammer
The Tankanvil in Stubbygerness III
On the turn after its Stubbygerness III, the Tankanvil casts Yinfluence: it teleports the four nearest enemies next to it and becomes unmovable for one turn. Kill it before this threshold; if it's at Stubbygerness II and you can't finish it, let it hit a character.
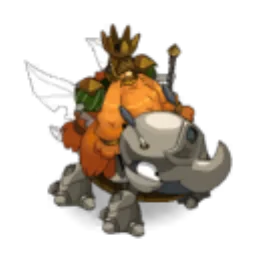
Level 220
 18,000 HP
 20 AP
 6 MP
- Resistances (%)
 Earth 140%
 Fire 120%
 Water 105%
 Air 130%
 Neutral 110%
He has more than 100% resistance in each element: he only loses resistances during the two turns after his Stubbygerness III, 5% per push or pull. Royal Impalement erodes and removes 10% resistances with no duration limit, and Yobfiltration makes him leap 5 cells. Water is the element he handles the worst.
 Royal Impalement4 AP · melee ·101 to 120 Neutral damage · 40% Erosion · -10% Resistance · Triggers: Stubbygerness
In melee only, twice per turn: erosion and -10% resistances that don't wear off. Each hit taken makes the rest of the fight harder.
 Yobfiltration4 AP · 5 range · Teleports to the targeted cell ·81 to 100 Air damage · -4 MP
Jump of 5 cells in a line with 4 MP removal around the landing cell, every other turn starting on turn 2. A Tactical Beacon placed 2 range from it draws in its jump.
 Yobtrepidity4 AP · on itself ·2 MP · 1500 Shield
From turn 3 and then every two turns: 2 MP and a shield for all its allies for one turn. It can be dispelled.
The five-step strategy against Dazahk Freezammer
Tankanvil first. Focus the Tankanvil from the start. Let it use Yobarmour on the other monsters: it then intercepts their damage, and you hit it in an area or on the weaknesses of the protected ally, bypassing the damage reduction from its Stubbygerness.
Always keep Dazahk far away. In melee, he hits extremely hard and removes resistances from you for the whole fight. Push him back, remove his MP, finish out of his range. On turns 2, 4, 6, 8 and onward, add 5 cells of margin: that's when he can cast Yobfiltration.
Dispel Yobtrepidity. On turns 3, 5, 7, 9 and onward, it gives 2 MP and a shield to all its allies for one turn. Dispel at least the monster you're focusing, with a Stain or a Ghostly Shovel, especially if your MP removal isn't enough.
Rokrusher and Gobyob. Once the Tankanvil is dead, eliminate the other two in whichever order suits you, always at a good distance from Dazahk. Never line up with the Gobyob: Slingshot only fires in a line, but does enormous damage.
Bringing down the king. Alone, Dazahk is handled at range: let him reach Stubbygerness III, then push and pull him as much as possible during the next two turns. Repeat until you can kill him: he keeps the resistances lost from one cycle to the next.
The Stubbygerness state
All the dungeon's monsters, Dazahk included, have three levels of Stubbygerness. Each turn a monster hits no character, it goes up a level; hitting a summon doesn't count. Levels gained are kept, even if it then hits you.
Each level strengthens it, and these bonuses stack. On the turn after level III, it gains a spell or an enhanced effect: if it can cast it, it drops back to zero, otherwise it stays at level III until it can.
Beardrammer and Rokrusher gain 1 MP per level, Warmonbeer 3 range, Gobyob 50% final damage, and the Tankanvil reduces the damage it takes by 25%. Dazahk gains 50% final damage and 1 MP per level, then 3 MP and 150% final damage for two turns in Stubbygerness III.
Removing its resistances
During the two turns after his Stubbygerness III, Dazahk no longer gains Stubbygerness and loses 5% resistance in all elements with each push or pull. He doesn't regain them afterward: each cycle brings you closer to the kill.
Beware of push damage against an obstacle: it gives him back 10% resistances. The Iop's Friction and Coup par coup spells, on the other hand, count as so many movements: an Iop can overdo them during those two turns.
Neutralizing the Gobyob
Its only attack spell, Slingshot, is cast in a line at 3 range minimum. Lock it against a wall: it can no longer hit, and since it can't back away, it doesn't use Yobdurate to break free. There is no need to have an obstacle behind your character.
Failing that, cut its lines behind the obstacles on the map. Warning: its AI is evasive after striking: to tackle it, go after it, or hide your lines from it to force it forward.
The monsters of King Dazahk's Brewery
Five monsters of the Freezammer clan, level 200 and subject to Stubbygerness. Against Dazahk, they are the Tankanvil, the Rokrusher and the Gobyob: kill the Tankanvil before its Stubbygerness III. Resistances in red are their weaknesses.
In which order to kill the monsters
- Tankanvil — it intercepts its allies' damage and, at Stubbygerness III, teleports four characters next to it.
- Rokrusher — it pushes away and pulls itself in on contact, then removes AP in an area around it.
- Gobyob — it hits very hard in a line, but can't do anything once it's tackled against a wall.
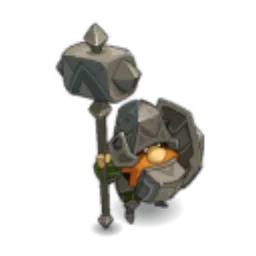
Level 200
- 6,600 HP
- 12 AP
- 4 MP
- Resistances (%)
- Earth 26%
- Fire 6%
- Water 21%
- Air 16%
- Neutral -9%
Yobarmour swaps places with an ally and intercepts its damage, with a shield as a bonus. Each level of Stubbygerness reduces the damage it takes, then Yinfluence brings the four nearest enemies next to it. Weak to Neutral, it only hits in that element: a bit of Neutral resistance helps to tank it.
 Tripple Attack4 AP · 2 range ·121 to 130 Neutral damage · -50 Flight · Triggers: Stubbygerness
Perpendicular line area, in a line up to 2 range, with -50 escape for two turns: hard to break free afterward.
 Yobarmour
Trades places with an ally, in a line up to 3 range and without line of sight, then intercepts its damage. Then hit the protected ally: the damage goes back to the Tankanvil.
 Yinfluence
Stubbygerness III spell: the four nearest enemies are teleported next to the Tankanvil, which becomes unmovable for one turn.
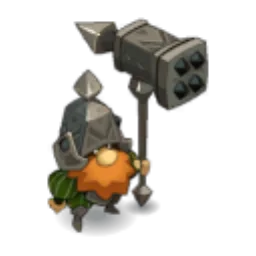
Level 200
- 6,000 HP
- 12 AP
- 5 MP
- Resistances (%)
- Earth 21%
- Fire 16%
- Water -9%
- Air 26%
- Neutral 6%
Yobpulsion sticks it to its target while pushing it back, then Steamammer removes 4 AP in an area around it. At Stubbygerness III, the removal goes up to 7 AP, the damage doubles and the area grows. Weak to Water.
 Steamammer5 AP · on self ·101 to 110 Water damage · -4 AP · -7 AP · 201 to 210 Water damage · Triggers: Stubbygerness
Hits in a circle around the Rokrusher and removes 4 dodgeable AP, once per turn. At Stubbygerness III: 7 AP and a wider area.
 Yobpulsion
In melee: pushes back 4 cells, then the Rokrusher pulls itself to its target, with -50% critical for two turns.

Level 200
- 6,000 HP
- 12 AP
- 5 MP
- Resistances (%)
- Earth 6%
- Fire 21%
- Water 16%
- Air -9%
- Neutral 26%
Slingshot strikes in a line, from 3 to 12 range; in Stubbygerness III, it doubles its damage and makes you Pacifist for one turn. Yobdurate removes 4 MP, pushes you back and makes it step back. Weak to Air, it goes down fast once blocked.
 Slingshot4 AP · 12 Range ·141 to 150 Air damage · 301 to 310 Air damage · Pacifist State · Triggers: Stubbygerness
In a line only, from 3 to 12 range, three times per turn. Cut its lines or tackle the Gobyob against a wall.
-
Yobdurate4 AP · 2 Range · Moves back 2 cells · Push Away 2 cells ·-4 MP
Removes 4 dodgeable MP, pushes back 2 cells and makes the Gobyob back away 2 cells, diagonals included. It doesn't cast it if it can't back away.
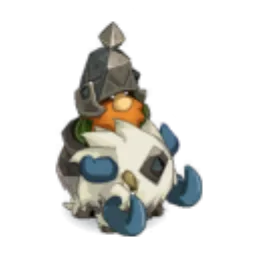
Level 200
- 6,000 HP
- 12 AP
- 6 MP
- Resistances (%)
- Earth -9%
- Fire 26%
- Water 6%
- Air 21%
- Neutral 16%
Ram makes it charge in a line to its target and gives it a shield, then Horn Butt erodes on contact. In Stubbygerness III, it hits twice as hard and takes about a quarter of your vitality. Weak to Earth.
 Horn Butt4 AP · melee · 20% Erosion ·151 to 170 Fire damage · 301 to 320 Fire damage · -25% Vitality · Triggers: Stubbygerness
In melee, three times per turn, with 20% erosion for two turns. At Stubbygerness III, it also removes about 25% vitality, with no duration limit.
 Ram
The Beardrammer charges in a line up to 6 range toward its target and gains a shield. Don't stay lined up with it.
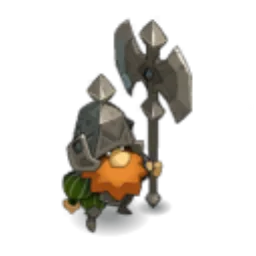
Level 200
- 6,000 HP
- 12 AP
- 6 MP
- Resistances (%)
- Earth 16%
- Fire -9%
- Water 26%
- Air 6%
- Neutral 21%
Hash strikes in a cross pattern and removes 6 range, Gigantiosity puts you in Gravity. Each level of Stubbygerness adds 3 range to it, then Yobplantation removes all MP from its enemies for one turn. Weak to Fire.
 Hash4 AP · 8 Range ·101 to 110 Earth damage · -6 Range · Triggers: Stubbygerness
Cross of size 3, cast from 3 to 8 range, with -6 range for one turn: ranged characters are hit the hardest.
 Yobplantation4 AP · on self · Removes the spell's effects ·-100 MP
Stubbygerness III spell: all of the Warmonbeer's enemies lose their MP for one turn. Kill it first, or let it hit a character.
 Gigantiosity
Gravity State for one turn, in a line up to 8 range. Its range grows with the Warmonbeer's Stubbygerness: 3 more range per level.
Preparing your run through King Dazahk's Brewery
A dungeon for teams of level 190 to 200 who know how to push, keep their distance, and strike on the right turn. People come here for Brikkr-a-Brokkr, the achievements, and Dazahk Freezammer's Shoulder Pad, and to capture him with a Soul Stone for Gigantic Souls (captures up to level 220).
How to enter King Dazahk's Brewery
The entrance is in the Kingdom of Freezammer, on Frigost Island, at ; the nearest zaap is the one at Alma's Cradle . The kingdom only opens after Tap, Friend, and Enter. Three ways to enter afterward: a King Dazahk's Brewery Key (consumed), the key ring if it is registered there, or the automatic group search.
Crafting the King Dazahk's Brewery Key
It is crafted at a handyman's. Five ingredients drop from the dungeon's monsters, at 12%: Rokrusher Leggings, Warmonbeer Tooth, Gobyob Sling, Beardrammer Beard Hair and Tasty Meat. Icefish (fishing), Snowdrop and Frosteez (harvesting) complete the recipe.
| Ingredient | Quantity | Level |
|---|---|---|
 Rokrusher Leggings |
2 | 200 |
 Warmonbeer Tooth |
2 | 200 |
| Gobyob Sling |
2 | 200 |
 Beardrammer Beard Hair |
2 | 200 |
 Tasty Meat |
2 | 200 |
 Icefish |
1 | 200 |
 Snowdrop |
1 | 200 |
 Frosteez |
1 | 200 |
Which team to bring against Dazahk Freezammer
Pushes above all. Pushing and pulling Dazahk is the only way to bring down his resistances, and the best way to keep him away. MP removal is appreciated but not required. A Cra, who pushes and strikes from a distance, is very strong in this dungeon.
Dispel it. Yobtrepidity gives 2 MP and a shield to all monsters every other turn. A Pandawa, an Enutrof, or a Sadida removes this boost and speeds up the fight.
Someone to take the Tankanvil's hits. Letting the Tankanvil hit a character blocks its Stubbygerness. A bit of healing or protection is enough, no tank gear needed: mostly bring Neutral resistance, its only element.
The classes that do well here. The Cra pushes Dazahk back every turn and diverts Yobfiltration with his Balise tactique; the Iop removes resistances with Friction and Coup par coup; the Pandawa positions, dispels and locks; the Enutrof removes MP and dispels. For the Duo, Eliotrope or Sram pairs with any class also succeed.
The six achievements of King Dazahk's Brewery
Each achievement gives 200,000,000 XP and 2 Dazahk Freezammer's Shoulder Pad, and Duo doubles the XP; the Sidekick gives 75,000,000 XP. With a Cra and a tank, First, Freedom, and Duo can all be done in the same fight: the method is detailed under Duo.
| Achievements | Condition | Points | XP |
|---|---|---|---|
 Dazahk Freezammer (First) |
Defeat Dazahk Freezammer in his dungeon while completing the “First” challenge. | 10 | 200 000 000 |
| Dazahk Freezammer (Freedom) |
Defeat Dazahk Freezammer in his dungeon while completing the “Freedom” challenge. | 10 | 200 000 000 |
| Dazahk Freezammer (Duo) |
Defeat Dazahk Freezammer in his dungeon while completing the “Duo” challenge. | 20 | 400 000 000 |
| Dazahk Freezammer (Special) |
Defeat Dazahk Freezammer in his dungeon by completing the “Unstubbygerness” challenge. | 10 | 200 000 000 |
| Dazahk Freezammer (Sidekick) |
Defeat Dazahk Freezammer in his dungeon by completing the “Tormented Knights” challenge | 5 | 75 000 000 |
| King Dazahk's Brewery |
Defeat Dazahk Freezammer in this boss's dungeon. | 10 | 200 000 000 |
First
Dazahk Freezammer must be finished off first. Three methods. A tank keeps the monsters in melee range while the others kill Dazahk. Or a character with strong MP removal holds the monsters on one side of the map, with Dazahk in another corner: the Tankanvil in particular must stay far from Dazahk, so it does not intercept his damage. Finally, an Iop casts Vitality on each monster and brings its HP below the bonus: the monster dies when the effect ends, on the Iop's turn, without failing the achievement. Fully dispelling Vitality, however, makes it fail.
Freedom
Do not try to remove MP or range from your opponents. Take the variants of all your removal spells. The fight then plays like the normal one: the Tankanvil first, with Dazahk pushed back as far as possible. Without a Cra, push him back however you can and circle around the map: it takes several of his hits to kill a character.
Special: Unstubbygerness
Enemies must only be finished off while they are in the Stubbygerness III state. Keep each monster from hitting you three turns in a row, then kill it before it casts its empowered spell on you: if it casts it, its state drops back. Dazahk must also die in Stubbygerness III. Watch out for the Tankanvil, which can sacrifice an ally at the wrong moment. MP reduction, pushes, or a tank that blocks the monsters all help.
Duo
Two characters maximum, fewer than 40 turns. A multi-element Cra with Balise tactique, and a tank (5,500 to 6,000 HP, 45 to 50% resistances, 120 to 150 lock, Ivory Dofus and Emerald) that blocks the three monsters in melee. The Gobyob stuck against a wall, the Tankanvil never in front of him, and always a monster opposite the Rokrusher so it doesn't push the tank. The Cra pushes Dazahk back every turn and places a Balise tactique 2 range from him on turns 2, 4, 6, 8. After Dazahk, kill the Rokrusher and the Tankanvil: the locked Gobyob does nothing. Another option: an Agility Pandawa and a damage character, both with Ivory Dofus and Abyssal; you focus the Tankanvil, then the Pandawa keeps Dazahk at a distance alone.
Sidekick: Tormented Knights
Four characters minimum, including an allowed companion: Flame, Drop, Cloud, Paper or Darkness. The basic strategy applies. Keep the companion alive until victory, and keep it out of Dazahk's reach like your characters.
Drops and loot of King Dazahk's Brewery
Base in-game rate, before Prospecting bonuses. Dazahk Freezammer's Shoulder Pad drops at 12% from the boss, and each achievement gives two.
On Dazahk Freezammer
 Dazahk Freezammer's Shoulder PadGarment12 %
 Nougat Rabmarac BarTreat6 %
- Beer TankardMiscellaneous Resource2 %
 Al Howin GobtubbyCeremonial pet1 %
 Wa Odanowth's CwownCeremonial hat0,95 %
 Queen Odasouth ShieldCeremonial shield0,95 %
 Wa Odanowth ShieldCeremonial shield0,95 %
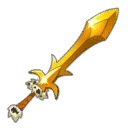 Wa Odanowth's SwordCeremonial weapon0,95 %
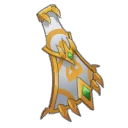 Queen Odasouth CloakCeremonial cape0,95 %
 Wa Odanowth's CloakCeremonial cape0,95 %
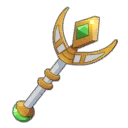 Queen Odasouth WandCeremonial weapon0,95 %
 Queen Odasouth CrownCeremonial hat0,95 %
 Paragon of PowerMain quests0,7 %
 Tasty CarrionMeat0,6 %
On the henchmen of Dazahk Freezammer
- Beardrammer Beard HairHair · Beardrammer12 %
- Tasty MeatMeat · Beardrammer12 %
- Gobyob SlingStone · Gobyob12 %
- Rokrusher LeggingsGarment · Rokrusher12 %
- Tankanvil ArmourGarment · Tankanvil12 %
- Warmonbeer ToothBone · Warmonbeer12 %
- Beer TankardMiscellaneous Resource · Beardrammer2 %
Capturing the soul of Dazahk Freezammer
 Dazahk Freezammer is level 220: you need a Soul Stone for Gigantic Souls (captures up to level 220). Throw it once his resistances have dropped and his acolytes are dead.
| Stone ingredient | Quantity |
|---|---|
 Pandawushu Artefact |
2 |
 Supreme Soul Splinter |
10 |
 Drawing Board |
2 |
King Dazahk's Brewery as a guild Expedition
The Brewery exists in two guild Expeditions, Audacious and Valour, each with its own modifier:
- Audacious: when an enemy goes up a level of Stubbygerness, it gains a one-turn bonus: 3 MP at level I, 3 AP at level II, 300 power at level III;
- by hitting a monster, your character gains the bonus tied to that monster's state for one turn, only one bonus at a time: take advantage of it by going back to the usual strategy;
- a monster that stays in the same state doesn't regain its bonus: letting yourself be hit can make it keep a bonus that suits you. The most troublesome, if it benefits from it, is the +3 MP of level I;
- Valour: each time a monster takes damage, Dazahk swaps places with it, even under Gravity or Rooted;
- keep Dazahk in your line of sight to keep hitting the target once he has taken its place, and have your last character hit the farthest monster: Dazahk ends up far away before he plays;
- use the swaps to position the monsters, and focus them before Dazahk: alone, he plays as usual.
Where is King Dazahk's Brewery?
In the Kingdom of Freezammer, on Frigost island, in . The nearest zaap is the one at Alma's Cradle .
How do you enter the Kingdom of Freezammer?
By finishing the quest Tap, Friend, and Enter, with Deol Dbear in front of the Coldiron Gate . You must defeat two Stubbyob Icebreakers and pay for a round at the Bateau ivre.
At what level should you do King Dazahk's Brewery?
Minimum level 190, 200 recommended. Dazahk Freezammer is level 220, with 18,000 HP and more than 100% resistance in each element.
Which quest should you do in King Dazahk's Brewery?
Brikkr-a-Brokkr, at Pleni Potential . Defeat Dazahk, then stay in the dungeon to talk to him and click the book to his right, which starts The Bible of Grudges.
How do you lower Dazahk Freezammer's resistances?
Push or pull it during the two turns after its Stubbygerness III. It loses 5% resistances with each movement, but regains 10% if it takes push damage.
Which monster should you kill first in King Dazahk's Brewery?
The Tankanvil, before its Stubbygerness III. On the next turn, Yinfluence teleports four characters next to it. Use its Yobarmour to hit it through its allies.
How does the Stubbygerness state work?
A monster that hits no character during its turn goes up a level. At level III, it gains a spell or an enhanced effect. Hitting a summon doesn't stop it.
Which stone should you use to capture Dazahk Freezammer?
A Soul Stone for Gigantic Souls (captures up to level 220). Dazahk Freezammer is level 220.
Can you do King Dazahk's Brewery with two players?
Yes, it's the Duo achievement, in fewer than 40 turns. The safest method: a tank that blocks the three monsters and a Cra that pushes Dazahk back every turn.
Comments
No comments yet. A tip, or a detail about this page? Be the first.