 2 × Skt-Zo Leg
Dungeon Alma's Cradle
Nileza's Laboratory
Level 200 dungeon in the Winter Gardens of Frigost, at [-59,-74]: five rooms and a boss that swaps places with whoever hits him from a distance, Nileza. Quests to start, map of each room, strategy, monsters, achievements and loot.

Quests linked to Nileza's Laboratory
Yver Cutter, in front of the entrance, offers two quests that are completed by beating Nileza then reaching the laboratory exit. Saving Gus in Private also goes through the fight. Accept them before entering: a fight won without the quest in progress doesn't count.
The laboratory quest. Yver Cutter asks you to go in, face Nileza and come out alive: it is completed by discovering the dungeon exit.
- Start
- Yver Cutter, Winter Gardens
Nileza is the first of the four master craftsmen. Beat him in a single fight and discover the exit, then do the same with Sylargh, Klime and Missiz Freezz, in the four Frigost 3 dungeons.
- Start
- Yver Cutter, Winter Gardens
- Prerequisites
- Level 50 and The Frozen Peak
On the trail of Gus Bump. Look for his passage through the laboratory, explain to Nileza “by force of arms” that you come in peace, talk to him, then continue the investigation to the bastion of the cold legions.
- Start
- Hazieff Taroun, Water Clock Tower
- Prerequisites
- Level 180 and Recalled to Life
 Nileza's Embroidery2 embroideries, 6 Ice Kama and 50,000,000 XP
For later
Nileza can give you the Totem of Disgust. Maimane asks for six emotion totems, each from a boss of your choice: for disgust, Bethel Akarna, Corruption, Dantinea, Nileza or the Protoz'orror.
- Start
- Maimane, Destroyers' Nightmare
- Prerequisites
- Level 180
 Totem of Balanceonce the six totems are handed in
During events
- Tiwaapi Simulation
Tiwaapi can designate Nileza as the guardian to defeat. Incarnam, .
The rest of the Frigost story brings you back to Nileza: Hot 'n' Cold, All Is Not Frost and The 1001-Day Countdown. A Crystal-Clear Voice also has you meet him, and rewards a Nileza's Buttonhole.
The 5 rooms of Nileza's Laboratory
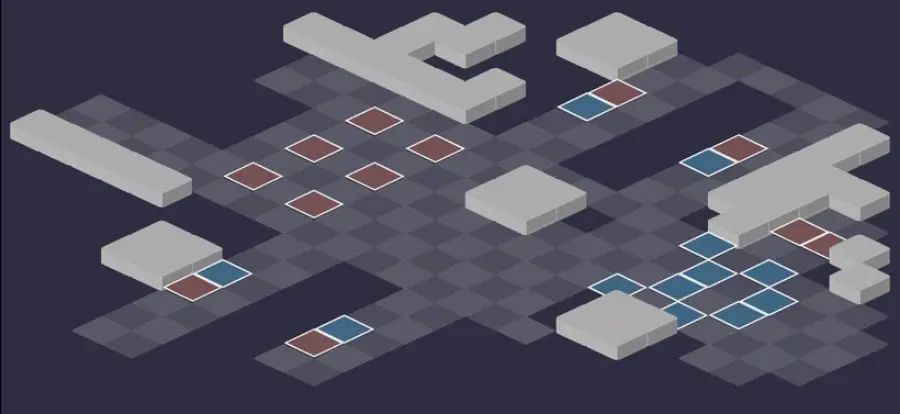
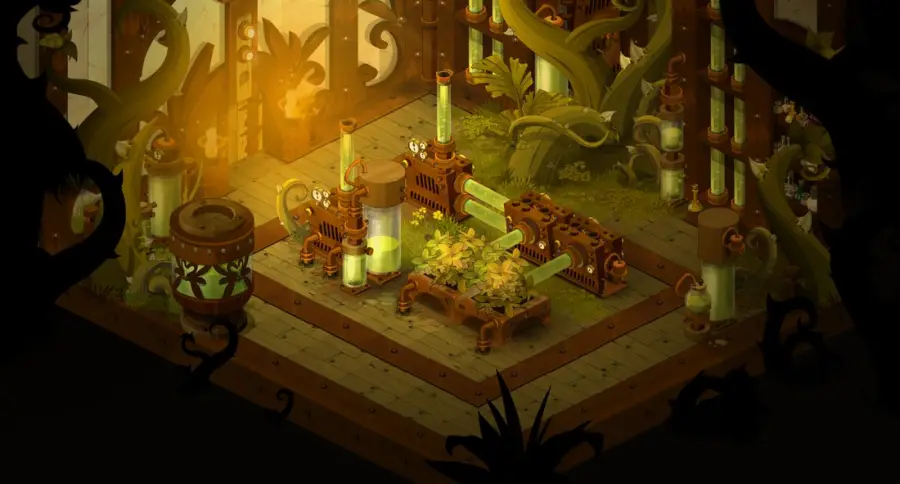
Five fights against the Frigost Alchimeras. In Nileza's fight, never end your turn next to an ally: the rule is detailed just below. For each room: the scenery, then the tactical view with the starting cells (blue: you, red: the monsters). Tap an image to enlarge it.
Room 1

Room 2

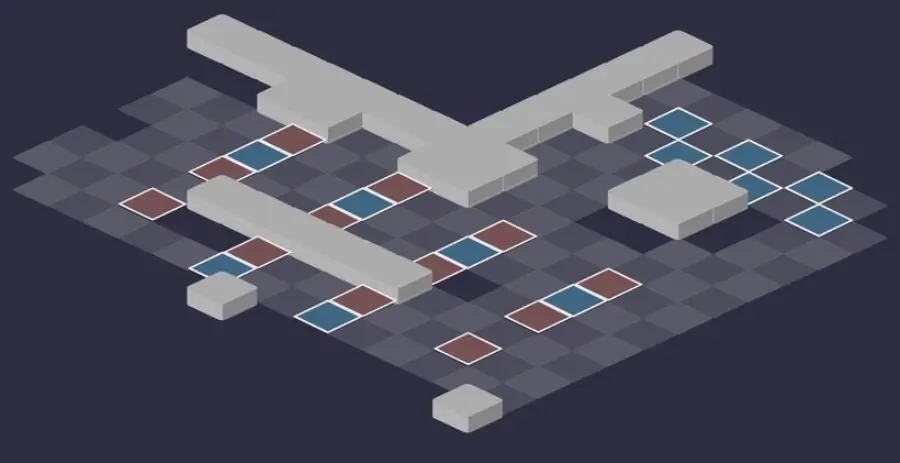
Room 3


Room 4
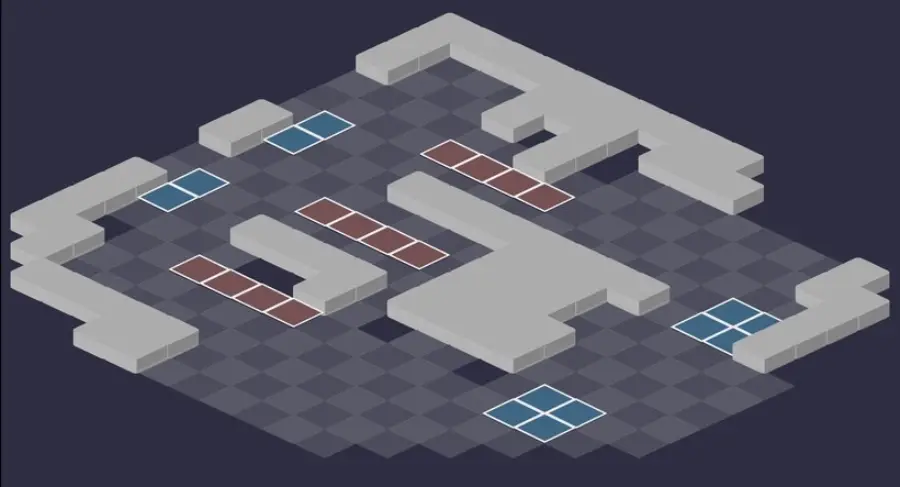
Room 5 — Nileza

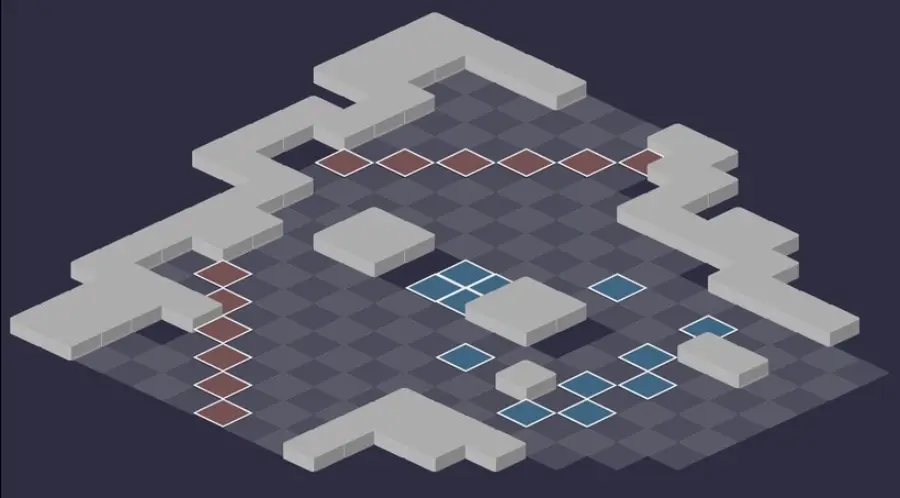
Defeat Nileza
Alchaline Solution: never next to an ally
Throughout the fight, a character who ends their turn in contact with another character kills them on the spot; summons don't count. Never end your turn next to an ally, and check your arrival cell after every place swap with Nileza.

Level 220
 13,000 HP
 20 AP
 7 MP
- Resistances (%)
 Earth 15%
 Fire 16%
 Water 32%
 Air 25%
 Neutral 14%
It has no invulnerable state: it is the easiest boss on Frigost 3. When hit from a distance, it swaps places with its attacker and reflects the damage around it. The more HP it loses, the more Molar Fraction hurts. Weak Point: Neutral; Water is what it takes best.
-
Molar Fraction5 AP · 12 RNG ·51 to 70 Water damage · Earth Damage: 10% erosion of the caster's missing HP · Pushes 3 cells
In a line only, up to 12 adjustable RNG: the more HP Nileza has lost, the harder he hits. Remove RNG from him and get out of his lines, he has 7 MP.
-
Dry Ice5 AP · 2 RNG · Switches positions ·71 to 90 Fire steal
Swaps places with its target, without line of sight up to 2 RNG, and strikes in a cross around its arrival cell; the target is hit even outside the area.
 Failing Solution
Cast on turn 1 then every 3 turns, active 2 turns: each hit in melee heals him and gives him damage. In melee, only hit him on turns 3, 6, 9.
The four-step strategy against Nileza
Positioning. From the preparation phase, no character stuck to another, and keep this rule until the end. Bring MP removal and mobility: the Snowdew, the Thermite and Nileza's swaps constantly move your team around.
The monsters, through his reflect. Position yourself within 2 RNG or less of the monsters, then hit Nileza from a distance: he takes your place and reflects 200% of the damage as Air around him. Group the monsters together to hit several targets, and never be within 2 RNG of an ally when you strike.
Staying within his reach. From turn 3, on every odd turn, he makes characters too far from him Pacifist. Move closer during even turns; if he has fled, hit him to swap places and bring him back toward the team.
Finishing Nileza. Once the monsters are dead, he has already lost a lot, especially if the reflect hit monsters under Drako. Finish him quickly, out of his lines, by removing RNG from him, and in melee only on turns 3, 6, 9.
Place swap and reflect
For every line of ranged damage, Nileza swaps places with the attacker, who leaves a pink glyph under their arrival cell: damage based on their eroded HP, -100 dodge and -100 lock, stackable. Then he applies 40% erosion and reflects 200% of the damage within 2 RNG around him, allies and enemies alike. The reflect always happens after the swap.
If the Snowdew has applied Clockwork Spore-ange to Nileza, you are pushed back before the swap: anticipate this knockback. If the Nessil has applied Drako to him, every line reflects damage back to you. Conversely, monsters under Drako caught in its reflect hurt Nileza in return.
The Pacifist on odd turns
At the start of its turn, from turn 3 then every 2 turns, Nileza makes characters that are too far away Pacifist for 2 turns: more than 11 RNG on turn 3, 9 on turn 5, 7 on turn 7, then more than 5 RNG from turn 9. A Pacifist character no longer benefits from the reflect.
Each threshold adds an effect to the whole team: -200 dodge on turn 3, -200 lock on turn 5, Gravity on turn 7, Unhealable from turn 9, with no dispel possible. Its fleeing AI makes it step back after these spells: swapping places remains the way to bring him closer.
Unstable Mixture
At the start of its turn, it applies an effect to everyone depending on its HP. Above 75%, Acid: each attack gives 1% final damage but removes 2% resistances. From 40 to 75%, Bitter: each heal received deals damage. Below 40%, Sour: +30% critical, but each critical hit removes 1 MP for 2 turns.
The monsters of Nileza's Laboratory
Five level 200 Alchimeras, each very weak to one element. Most of them are killed by Nileza's reflect rather than by your own hits. The resistances in red are their weaknesses.
In which order to kill the monsters
- Snowdew, then Nessil — the most dangerous: one pushes you back when you hit a protected monster, the other reflects your ranged damage.

Level 200
- 6,000 HP
- 12 AP
- 4 MP
- Resistances (%)
- Earth 16%
- Fire 5%
- Water 19%
- Air -36%
- Neutral 40%
Whomp pushes the attacker back from its nearby allies by 2 cells per line of damage, enough to break your reflect zones. Quagmire steals 4 MP in a line up to 10 RNG. Fleeing AI, very weak to Air.
 Quagmire4 AP · 10 Range ·51 to 70 Neutral damage · Steals 4 MP
In a line up to 10 RNG, twice per turn: steals 4 MP. Don't stay lined up with the Snowdew.
-
Scrapevine4 AP · on self ·51 to 70 Earth steal · Pushes back 2 cells
Life steal in a cross from 2 to 4 cells around the Snowdew, which pushes back 2 cells.
 Whomp
Clockwork Spore-ange for 2 turns, can't be dispelled: every line of damage on a protected monster pushes you back 2 cells (4 on a critical hit).

Level 200
- 6,000 HP
- 12 AP
- 4 MP
- Resistances (%)
- Earth 41%
- Fire -26%
- Water 15%
- Air 12%
- Neutral 13%
Drako reflects damage on every line received from a distance, on itself and its neighbors; the spell can be dispelled. Guzzle pulls then pushes back 6 cells, without line of sight. Fleeing AI, weak to Fire.
 Loch4 AP · melee ·61 to 80 Earth damage · Damage taken x140%
On contact: +40% damage taken for one turn.
 Guzzle4 AP · 8 RNG ·51 to 70 Water steal · Pulls 6 cells · Pushes back 6 cells
In a line up to 8 RNG, without line of sight: pulls 6 cells then pushes back 6.
 Drako
Ranged damage reflect for the Nessil and its neighbors, 2 turns. Dispel it if it is on Nileza.

Level 200
- 6,000 HP
- 12 AP
- 5 MP
- Resistances (%)
- Earth 13%
- Fire 37%
- Water -35%
- Air 14%
- Neutral 9%
It teleports up to 3 RNG with Plungeon and erodes on contact with Dodon't. Under Featherwet, hitting it gives a shield to everyone lined up with it within 4 RNG or less, you included. Very weak to Water.
 Dodon't4 AP · melee · 30% Erosion ·71 to 90 Fire damage
On contact: 30% erosion for one turn.
 Plungeon4 AP · 3 RNG · Teleports to the targeted cell ·61 to 80 Fire damage · -1000 Heals
Teleportation up to 3 RNG without line of sight, then a heal reduction in a cross around it. Cooldown 2 turns.
 Down Time
Shield and Heavy state for the Dodox, then Featherwet for 2 turns: hitting it gives a shield to the entities lined up with it, on both sides.

Level 200
- 6,000 HP
- 12 AP
- 5 MP
- Resistances (%)
- Earth -40%
- Fire 4%
- Water 36%
- Air 15%
- Neutral 10%
Don't move it while under Icy Pelt: its nearby allies gain 200 damage, and you get Gravity. Self-Harm hits harder as it loses HP. Very weak to Earth.
 Whelp Yelp4 AP · melee ·71 to 90 Earth steal · -50 Flight
Life steal on contact and -50 dodge for one turn.
-
Self-Harm4 AP · 5 RNG ·Water Damage: 20% erosion of the caster's missing HP · Pulls 1 cell
In a line up to 5 RNG, pulls one cell; its damage depends on the HP lost by the Krackal.
 Icy Pelt
For 2 turns, moving the Krackal gives 200 damage to the monsters around it, and Gravity to the characters in the area.

Level 200
- 6,000 HP
- 12 AP
- 4 MP
- Resistances (%)
- Earth 10%
- Fire 20%
- Water 5%
- Air 35%
- Neutral -32%
Glustick makes you pay for every MP spent for one turn. Under Handymite, it hits and removes 3 AP from whoever attacks it in melee: hit it from a distance. Very weak to Neutral.
-
Termostat4 AP · melee ·71 to 90 Air steal · -2 MP
Life steal on contact and removal of 2 MP.
 Glustick4 AP · 6 RNG ·20 Neutral damage for 1 MP used
End-of-turn Poison, in a line up to 6 RNG: each MP used that turn costs HP. It can be dispelled.
 Handymite
+100 lock and, for 2 turns, retaliates with damage and removal of 3 AP on every hit received on contact.
Preparing your run through Nileza's Laboratory
The most accessible level 200 dungeon, and the easiest boss on Frigost 3: Nileza has no invulnerability, but every end of turn must be positioned carefully. You come here for the Frigost quests, the achievements, Nileza's Embroidery and the capture with a Soul Stone for Gigantic Souls.
How to enter Nileza's Laboratory
The entrance is in the Winter Gardens, on Frigost Island, at ; the nearest zaap is the one at Alma's Cradle . You must have defeated the Celestial Bearbarian to access the zone. Three ways to open it: a Nileza's Laboratory Key (consumed), the key ring if it is registered there, or the automatic group search.
Crafting the Nileza's Laboratory Key
It is crafted at a handyman. Four ingredients drop from the dungeon's monsters, at 12%: Nessil Slobber, Krackal Canine, Dodox Feather and Snowdew Bract, like the Tasty Meat. Icefish (fishing), Snowdrop and Frosteez (harvesting) complete the recipe.
| Ingredient | Quantity | Level |
|---|---|---|
 Nessil Slobber |
2 | 200 |
 Krackal Canine |
2 | 200 |
 Dodox Feather |
2 | 200 |
 Snowdew Bract |
2 | 200 |
 Tasty Meat |
2 | 200 |
 Icefish |
1 | 200 |
 Snowdrop |
1 | 200 |
 Frosteez |
1 | 200 |
Which team to bring against Nileza
Ranged damage. Nileza's reflect, which kills his monsters, only triggers at range. Strike from afar, never within 2 RNG of an ally, and keep melee for turns 3, 6 and 9.
Positioning and removal. Mobility and MP removal answer the Snowdew, the Thermite and Nileza's swaps. Removing RNG from Nileza shortens the range of Molar Fraction, his most dangerous spell late in the fight.
The six achievements of Nileza's Laboratory
Each achievement gives 200,000,000 XP and 2 Nileza's Embroidery; Duo doubles the XP; Sidekick, with Mirh, Stroy Zemol, Tracon or Logram in a team of four, gives 75,000,000 XP. Cautious, Last, Special and Duo are completed in a single fight, as long as you hold Nileza without stalling.
| Achievements | Condition | Points | XP |
|---|---|---|---|
 Nileza (Sidekick) |
Defeat Nileza in his dungeon while completing the “The Pandalans” challenge. | 5 | 75 000 000 |
| Nileza's Laboratory |
Defeat Nileza in this boss's dungeon. | 10 | 200 000 000 |
| Nileza (Cautious) |
Defeat Nileza in his dungeon while completing the “Cautious” challenge. | 10 | 200 000 000 |
| Nileza (Last) |
Defeat Nileza in his dungeon while completing the “Last” challenge. | 10 | 200 000 000 |
| Nileza (Duo) |
Defeat Nileza in his dungeon while completing the “Duo” challenge. | 20 | 400 000 000 |
| Nileza (Special) |
Defeat Nileza in his dungeon while completing the “Alchemisafe” challenge. | 10 | 200 000 000 |
Cautious
No ally may end their turn next to an enemy. Fairly simple: don't get locked if you go into contact with a monster. The Snowdew, the Nessil and Nileza have a fleeing AI and rarely come to you.
Last
Nileza must be finished last. The basic strategy already kills Nileza last: the achievement is almost a gift. It was only difficult back when Nileza had an invulnerable state.
Special: Alchemisafe
No ally may enter the Pacifist state. Respect the distances on odd turns: 11 RNG on turn 3, 9 on turn 5, 7 on turn 7, then 5. Also beware of your own spells: the Enutrof's Toolbox and Corruption, the Feca's Truce make you Pacifist. Kill Nileza quickly, and hit him to swap places and put everyone at the right distance.
Duo
Two characters maximum, under 40 turns. Two mobile or positioning classes, with lots of damage. Kill the monsters with the reflect, Snowdew and Nessil first, out of the Molar Fraction lines. If you struggle against Nileza alone, flee out of his reach to heal, even if you stay 2 turns Pacifist, then come back before an odd turn. Heal before turn 9 and the Unhealable state.
Drops and loot of Nileza's Laboratory
Base in-game rates, before Prospecting bonuses.
On Nileza
- Nileza's EmbroideryGarment12 %
 Nougat Rabmarac BarTreat6 %
 Bag of Babbage LeavesContainer3 %
 Nileza's ButtonholeGarment2 %
 Al Howin GobtubbyCeremonial pet1 %
 Paragon of PowerMain quests0,7 %
 Tasty CarrionMeat0,6 %
On the henchmen of Nileza
- Dodox FeatherFeather · Dodox12 %
- Tasty MeatMeat · Dodox12 %
- Snowdew BractPlant · Snowdew12 %
- Krackal CanineBone · Krackal12 %
- Nessil SlobberLiquid · Nessil12 %
 Thermite LegLeg · Thermite12 %
 Dodox BeakBone · Dodox2 %
 Bottle of CocalaneDrink · Nessil2 %
 Snowdew SepalPlant · Snowdew2 %
 Krackal ManeHair · Krackal2 %
 Nessil MolarBone · Nessil2 %
 Thermite CarapaceCarapace · Thermite2 %
- Bag of Babbage LeavesContainer · Dodox1 %
 Bearendizer's Map fragment 6/8Map fragment · Dodox0,8 %
 Bearendizer's Map fragment 2/8Map fragment · Dodox0,8 %
 Bearendizer's Map fragment 1/8Map fragment · Snowdew0,8 %
 Bearendizer's Map fragment 5/8Map fragment · Snowdew0,8 %
 Bearendizer's Map fragment 3/8Map fragment · Krackal0,8 %
 Bearendizer's Map fragment 7/8Map fragment · Krackal0,8 %
 Bearendizer's Map fragment 8/8Map fragment · Nessil0,8 %
 Bearendizer's Map fragment 4/8Map fragment · Nessil0,8 %
Capturing the soul of Nileza
 Bring a Soul Stone for Gigantic Souls for Nileza, who is level 220.
| Stone ingredient | Quantity |
|---|---|
 Pandawushu Artefact |
2 |
 Supreme Soul Splinter |
10 |
 Drawing Board |
2 |
Where is Nileza's Laboratory?
In the Winter Gardens, on Frigost Island, at . The nearest zaap is the one at Alma's Cradle ; you must have defeated the Celestial Bearbarian to access the zone.
What level should you be for Nileza's Laboratory?
Minimum level 190, 200 recommended. It is the most accessible level 200 dungeon: Nileza is level 220, with no invulnerability at all.
Which quest should you do at Nileza's Laboratory?
A Nileza Hack and Slash and Mind Over Masters, with Yver Cutter in front of the entrance . Saving Gus in Private, with Hazieff Taroun, also has you face Nileza.
How do you beat Nileza?
Use his reflect to kill his monsters, then finish him quickly. When hit from a distance, he swaps places with you and reflects 200% of the damage around his arrival cell.
Why does an ally die in one hit?
Because of Alchaline Solution: ending your turn in contact with another character kills you. Summons don't count.
How do you avoid the Pacifist state?
Stay close to Nileza before every odd turn, from turn 3. 11 RNG on turn 3, 9 on turn 5, 7 on turn 7, then 5; hit him to swap places and bring him closer.
Can you hit Nileza in melee?
Yes, but only on turns 3, 6, 9 and later. The rest of the time, Failing Solution heals and strengthens him with every hit received on contact.
Which monster should you target first in Nileza's Laboratory?
The Snowdew and the Nessil. The former pushes you back when you hit a protected monster, the latter reflects your ranged damage.
Which stone should you use to capture Nileza?
A Soul Stone for Gigantic Souls. Nileza is level 220.
Can Nileza's Laboratory be done with two players?
Yes, it's even an achievement: Duo, in under 40 turns. Two mobile classes that hit hard, who kill the monsters with the reflect before finishing Nileza.




Comments
No comments yet. A tip, or a detail about this page? Be the first.