 2 × Skt-Zo Leg
Dungeon Silent Wrecks
Bethel's Tower
Level 200 dungeon in the Silent Wrecks, at [-48,-82]: five rooms of Submerged Ones that resurrect, and a boss that only his own Dagon can hurt, Bethel Akarna. Quests to start, map of each room, strategy, monsters, achievements and loot.
Quests linked to Bethel's Tower
Two quests before your first visit: Fatal Weapon gives the Necronyx spell, without which the fight is impossible, and The Livid Hearts is completed on Bethel Akarna. Both require Anger of the Gods, which also opens the area. Accept The Livid Hearts before entering: a fight won without the quest in progress doesn't count.
It gives you the Necronyx spell, which is essential. Gobannus the Smith and the Sadida Priestess have you craft a necronyx doll, to which you sacrifice Trépamorts, before talking to God Sadida.
- Start
- Gobannus the Smith, Realm of the Gods
- Prerequisites
- Level 180 and Anger of the Gods
It is completed on Bethel Akarna. After Solar's Tower, enter Bethel's Tower, defeat Bethel in a single fight, reach the top of the tower and focus on the heart of the Submerged Ones.
- Start
- Voice of the Twelve, Realm of the Gods
- Prerequisites
- Level 180 and Anger of the Gods
 Charred Ones' Bloodone Submerged Ones' Shell and 50,000,000 XP
For later
Sramsara sends you to face Bethel in his tower. Bring her the Corrupted Soul Shell, then follow the trail of the reincarnated Crocoburio to Meriana.
- Start
- Meriana, Koalak Mountain
- Prerequisites
- Level 180 and To Dream's End
 Submerged Ones' Shell3 shells and 60,000,000 XP
Bethel Akarna can give you the Totem of Disgust. Maimane asks for six emotion totems, each from a boss of your choice: for disgust, Bethel Akarna, Corruption, Dantinea, Nileza or the Protoz'orror.
- Start
- Maimane, Destroyers' Nightmare
- Prerequisites
- Level 180
 Totem of Balanceonce the six totems are handed in
During events
- Tiwaapi Simulation
Tiwaapi can point out Bethel Akarna as the guardian to defeat. Incarnam, .
The 5 rooms of Bethel's Tower
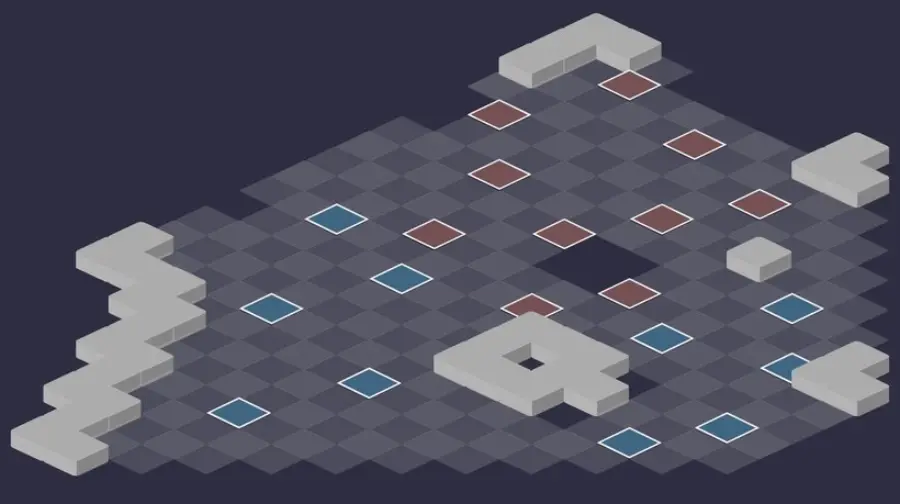
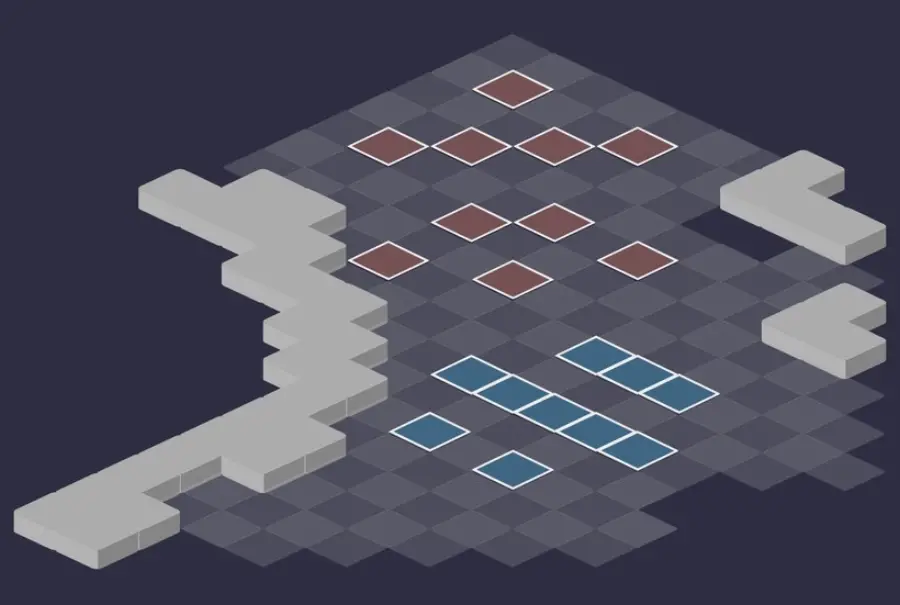
Five fights against the Submerged Ones, all of whom resurrect thanks to Aquazomb: plan for Necronyx before every kill, starting in the first room. For each room: the scenery, then the tactical view with the starting cells (blue: you, red: the monsters). Tap an image to enlarge it.
Room 1

Room 2

Room 3

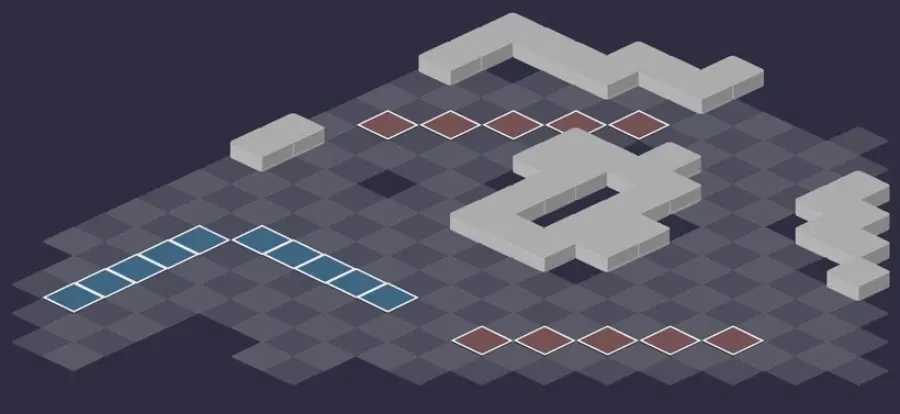
Room 4

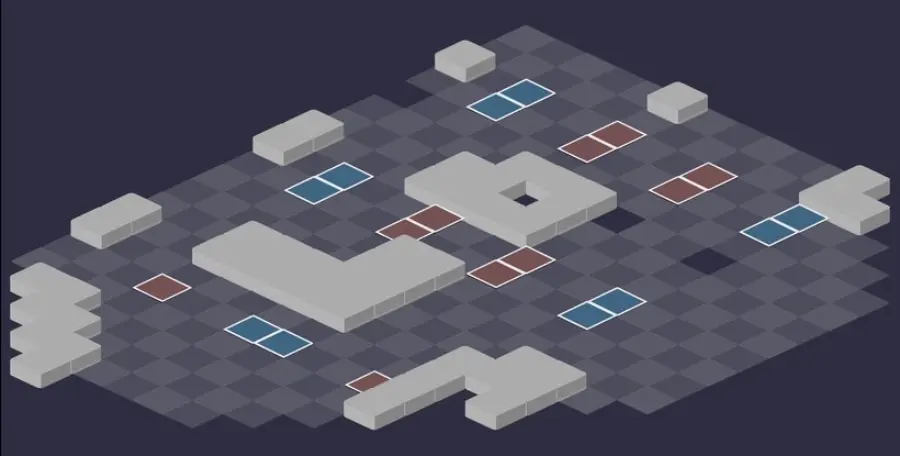
Room 5 — Bethel Akarna
Bethel Akarna's room. A glyph runs along the entire edge of the map: entering it removes all your MP and puts you under Gravity. Bethel loves pushing you into it.

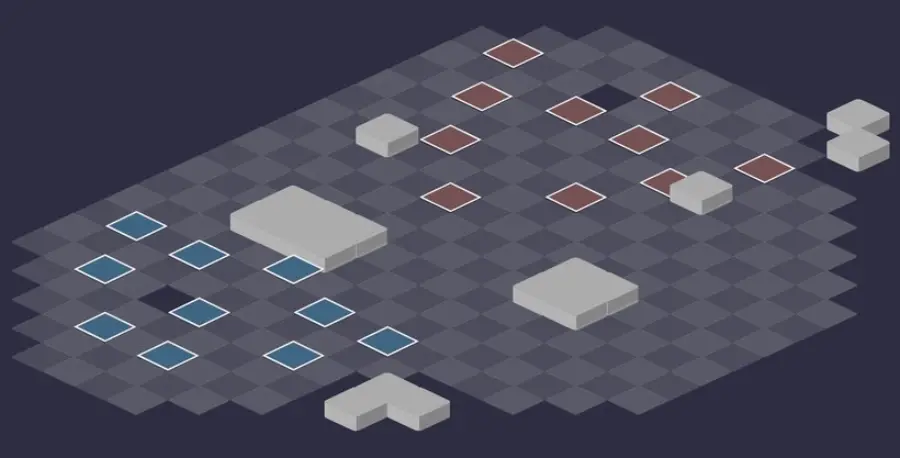
Defeat Bethel Akarna
Necronyx before each death
A monster killed without the Necronyx state is resurrected by an ally, still able to strike. Bethel must also be under Necronyx when he dies, otherwise the whole team dies with him. The spell makes you skip your turn and can only be cast every other turn: plan for it.
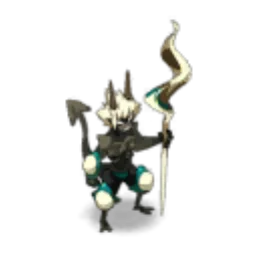
Level 220
 6,500 HP
 15 AP
 6 MP
- Resistances (%)
 Earth 0%
 Fire 0%
 Water 0%
 Air 0%
 Neutral 0%
Invulnerable, it only takes hits from the Dagon of the Deep that has switched to your side. Pantang hits hard up to 12 range and, without Necronyx, pushes you toward the glyph at the edge of the map. Once the Monolith is dead, Starfish teleports it and covers a large part of the map with a punishing glyph.
 Pantang4 AP · 12 Range ·81 to 100 Air damage · Bethel Akarna Generic State 02 · -20% Resistance
Big Air hit up to 12 Range, which also reduces your resistances.
 Prosecution
 Monolithic Offering
Cast in melee range of the Monolith: Vaporous Tentacle Pile around your characters, and power for Bethel and his monsters. Cooldown: 3 turns.
 Starfish
Once the Monolith is dead, every two turns: Bethel teleports and places a large glyph that strikes at the start of the turn and removes AP and MP. Get out of it and reposition him.
The five-step strategy against Bethel Akarna
Turn 1: Necronyx on Bethel. Apply Necronyx to him on the very first turn: without it, he pushes you toward the edge of the map, where the glyph pins you down. Since the update of January 20, 2026, he gets rid of it after 3 turns, on the turn of whoever applied it: reapply it on turn 4.
Stay within 6 range of a monster. From turn 2, end each turn within 6 range or less of a monster: otherwise, all monsters gain 2 MP and 1 range, cumulatively, plus a bonus specific to each one. The Monolith, summons and resurrected monsters don't count.
The Monolith, in melee. Invulnerable at Range, it can only be hit in melee. Dispel its shield of 2,600 points, which it regains every turn before pushing its neighbors back 2 cells. Also push the enemy Dagon every turn: once Unshakable, it can no longer pull itself to you.
The Dagon hits Bethel. When the Monolith dies, the Dagon is resummoned on your side by the player closest to it, who can control it. Only it can hurt Bethel, in melee with Scalding Breath: boost it and stick it to Bethel every turn. The new enemy Monolith and enemy Dagon don't play, ignore them.
Reposition Bethel, then finish him. Every two turns, Starfish teleports Bethel and places a large glyph that hits and removes AP and MP: put him back in place and get out of it. The phase lasts 7 to 8 turns. Necronyx on Bethel before the fatal blow; after that, the remaining monsters can be killed without Necronyx.
Aquazomb and Necronyx
From the start of each fight, the Submerged Ones cast Aquazomb: a monster that's killed is immediately resurrected by the next one. Necronyx, cast on an enemy before it dies, stops it from striking once resurrected. It makes you skip your turn and can only be cast every other turn.
Each turn that ends more than 6 range from a monster, starting on turn 2, also triggers their bonuses: the Drowhirl becomes invisible, the Sucgunner gains 20% ranged damage, the Micrab a shield, the Funerbroadsword damage reduction, and the Zombrute MP dodge and the Unshakable state.
The Monolith and the Dagon
At the start of the fight, Bethel summons a Monolith and a Dagon of the Deep. Each turn, the Monolith gives 2,600 shield points to monsters within a radius of 4 cells, and 200 power to summons, yours included. Monolithic Offering surrounds your characters with Vaporous Tentacle Piles: 110 HP, there to block you, while Bethel gains 300 power and his monsters 200.
The enemy Dagon pulls itself to you up to 8 range with Aquatic Charge and removes 3 AP in melee with Frightening Presence. Yours, after the Monolith dies, hits for about 1,000 per turn with Scalding Breath: it is your only weapon against Bethel.
The monsters of Bethel's Tower
Five level 200 Submerged Ones, all with 6,000 HP, each weak to one element. In Bethel's room, they play after the Monolith and the boss: once Bethel is dead, there's no more need for Necronyx to finish them. The resistances in red are their weaknesses.

Level 200
- 6,000 HP
- 12 AP
- 5 MP
- Resistances (%)
- Earth 31%
- Fire -19%
- Water 11%
- Air 16%
- Neutral 11%
Hydrozoa strikes in a circle from 6 Range minimum and leaves a trap that hits everyone in it when someone walks on it. Mortallusk erodes and poisons from a distance. Weak to Fire.
 Mortallusk2 AP · 12 Range · 10% Erosion ·21 to 30 Air damage · Sucgunner Generic State
Erosion and Air poison at range, two turns.
 Hydrozoa4 AP · 12 Range ·51 to 60 Water damage · Reveals invisible entities · Places a trap
In a line, at 6 Range minimum: area of 2 cells and a Water trap on the same area. Go around it.
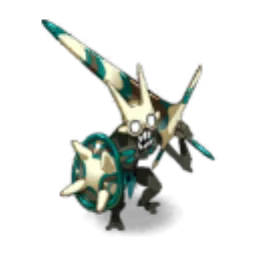
 Magellanaval
The Sucgunner becomes unlockable.
Level 200
- 6,000 HP
- 12 AP
- 5 MP
- Resistances (%)
- Earth 21%
- Fire 6%
- Water 26%
- Air -19%
- Neutral 16%
Ocean Depths removes 4 Range from characters more than 9 Range away, Talion strikes in melee or nearly, Prickly makes it reflect part of the damage for 2 turns. Weak to Air.
-
Talion4 AP · 2 Range ·51 to 60 Earth damage · Talion State
 Ocean Depths4 AP · on itself ·6 Water damage per 1 MP used · -4 Range
Removes 4 range from characters far from the Funerbroadsword and punishes MP spent.
 Prickly
Reflects part of the damage for 2 turns: hit another monster.

Level 200
- 6,000 HP
- 12 AP
- 5 MP
- Resistances (%)
- Earth -14%
- Fire 36%
- Water 21%
- Air 6%
- Neutral 1%
Marine Putrefaction hits from a distance, Pincer Strike poisons every AP you spend, Steam hits in a circle around it. Avoid its melee range. Weak to Earth.
 Marine Putrefaction3 AP · 10 Range · Minimises the target's random effects ·41 to 60 Air damage · Removes the spell's effects
 Pincer Strike3 AP · 5 Range ·41 to 50 Earth damage · 4 Earth damage per 1 AP used
Poison based on the AP used: play your big spells before it hits you, or dispel.
 Steam4 AP · on itself ·51 to 60 Fire damage
Whack of Fire all around the Micrab, up to 2 cells.
Level 200
- 6,000 HP
- 12 AP
- 5 MP
- Resistances (%)
- Earth 21%
- Fire 11%
- Water -14%
- Air 16%
- Neutral 16%
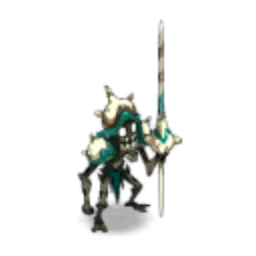
Crossing teleports it and makes you take 20% more damage for 2 turns, Monodent pushes back 2 cells. Staither removes 2 MP, flight and lock in a cross. Weak to Water.
 Crossing4 AP · 6 Range ·51 to 60 Fire damage · Damage taken x120% · Reveals invisible entities · Teleports to the targeted cell
Teleportation and damage taken increased by 20% for 2 turns on its target.
-
Monodent3 AP · 8 Range ·61 to 70 Water damage · Push Away 2 cells
Pushes back 2 cells: it can send you onto the glyph at the edge of the map.
 Staither4 AP · 12 range ·-2 MP · -40 Flight · -40 Lock
Removes 2 dodgeable MP, Flight and Lock in a cross around the targeted cell.

Level 200
- 6,000 HP
- 12 AP
- 5 MP
- Resistances (%)
- Earth -9%
- Fire 16%
- Water 6%
- Air 31%
- Neutral 6%
Siphon removes 300 power in an area from a distance, Multiple Slap hits all around it and reduces pushback resistance, Aquapony gives MP and Range to its group. A tank can block it. Weak to Earth.
-
Multiple Slap4 AP · on itself ·61 to 80 Earth steal · -200 Pushback Resistance · Zombrute Generic State
Whack hits the cells around the Zombrute, diagonals included, and reduces pushback resistance.
 Siphon4 AP · 12 Range ·51 to 60 Air damage · -300 Power
Area of 2 cells at range and -300 power for one turn.
 Aquapony4 AP · on itself ·1 MP · 1 Range · 2 MP · 2 Range
Extra MP and range for the Zombrute and its nearby allies.
Preparing your run through Bethel's Tower
A dungeon for teams of level 190 to 200 ready to follow a strict mechanic: without the Necronyx spell, victory is impossible. You come here for The Livid Hearts, for the achievements and for Bethel Akarna's Tail.
How to enter Bethel's Tower
The entrance is in the Silent Wrecks, on Frigost island, at ; the nearest zaap is the one at Alma's Cradle . The area opens after Anger of the Gods. Three ways to open it: a Key to Bethel's Tower (consumed), the keyring if it's registered there, or the automatic group search.
Crafting the Key to Bethel's Tower
It's crafted at a handyman's workshop. Five ingredients drop from the tower's Submerged Ones, at 12%: Drowhirl Lance Tip, Funerbroadsword Protection, Sucgunner Aquarachnee, Piece of Micrab Armour and Tasty Meat. Limpet (fishing), Salikronia and Quisnoa (harvesting) complete the recipe.
| Ingredient | Quantity | Level |
|---|---|---|
 Drowhirl Lance Tip |
2 | 200 |
 Funerbroadsword Protection |
2 | 200 |
 Sucgunner Aquarachnee |
2 | 200 |
 Piece of Micrab Armour |
2 | 200 |
 Tasty Meat |
2 | 200 |
 Limpet |
1 | 200 |
 Salikronia |
1 | 200 |
 Quisnoa |
1 | 200 |
Which team to bring against Bethel Akarna
Necronyx on several characters. The spell makes you skip your turn and can only be cast every other turn: the more of you who have it, the more flexibility you keep to prepare each kill. It's obtained with Fatal Weapon.
A tank and melee. The Monolith can only be hit in melee: sturdy melee characters take it down quickly. A tank Pandawa with a Queen Jhessica's Belt blocks Bethel and the Zombrute; aim for at least 4,000 HP and an Ivory Dofus to withstand it.
Positioning. You need to push the enemy Dagon, stick yours to Bethel and reposition Bethel after each Starfish. Push and positioning spells work throughout the fight.
The classes that are comfortable. The Pandawa is the centerpiece: as a tank, it blocks Bethel and the Zombrute, pushes the enemy Dagon and repositions yours. Round out the team with melee characters for the Monolith and at least one healer or protector.
The six achievements of Bethel's Tower
Each achievement gives 200,000,000 XP and 2 Bethel Akarna's Tail, Duo doubles the XP; Sidekick gives 75,000,000 XP. Special almost follows the basic strategy: only Bethel receives Necronyx before his death.
| Achievements | Condition | Points | XP |
|---|---|---|---|
 Bethel's Tower |
Defeat Bethel Akarna in this boss's dungeon. | 10 | 200 000 000 |
| Bethel Akarna (Mystique) |
Defeat Bethel Akarna in his dungeon while completing the “Mystique” challenge. | 10 | 200 000 000 |
| Bethel Akarna (Zombie) |
Defeat Bethel Akarna in his dungeon while completing the “Zombie” challenge. | 10 | 200 000 000 |
| Bethel Akarna (Duo) |
Defeat Bethel Akarna in his dungeon while completing the “Duo” challenge. | 20 | 400 000 000 |
| Bethel Akarna (Special) |
Defeat Bethel Akarna in his dungeon while completing the “Death Is Patient” challenge. | 10 | 200 000 000 |
| Bethel Akarna (Sidekick) |
Defeat Bethel Akarna in his dungeon while completing the “From Beyond the Grave” challenge | 5 | 75 000 000 |
Special: Death Is Patient
No enemy may enter the Necronyx state before Bethel dies. Play in melee to kill the Monolith quickly. On turn 1, Necronyx on Bethel, whom a tank Pandawa blocks throughout the fight; the others rush to the Monolith. Push the enemy Dagon every turn, then stick yours to Bethel, about 7 to 8 turns of hitting. Once Bethel is dead, finish the monsters without Necronyx.
Mystique
Allies may only deal spell damage and spell heals during their turn. No weapon: spells only, for damage as well as for heals. The rest of the fight doesn't change.
Zombie
Use exactly one MP per game turn. Keep one MP to spend each turn and plan that step before your attacks, without forgetting to end 6 Range from a monster. Crossing, Monodent and Staither move you or remove MP from you: anticipate them.
Duo
Two characters maximum, fewer than 40 turns. One character able to tank, another who heals or hits from range. Kill the Monolith quickly, then keep the Dagon in melee range of Bethel to hold out for 40 turns.
Sidekick: From Beyond the Grave
Four characters minimum, including an eligible sidekick: Koksiks, Kubitus, Kalkaneus, Ektope or Hichete. The fight plays out as usual: the sidekick must also end up 6 Range from a monster from turn 2, and stay alive until victory.
Drops and loot of Bethel's Tower
Base in-game rates, before Prospecting bonuses.
On Bethel Akarna
 Ocean ShardTowers of the Brotherhood of the Forgotten12 %
 Bethel Akarna's TailTail12 %
 Nougat Rabmarac BarTreat6 %
 Bag of AuberginesContainer3 %
- Submerged Ones' ShellShell2 %
 Al Howin GobtubbyCeremonial pet1 %
 Paragon of PowerMain quests0,7 %
 Tasty CarrionMeat0,6 %
On the henchmen of Bethel Akarna
- Sucgunner AquarachneeShell · Sucgunner12 %
 Infectious Fungal InfectionTowers of the Brotherhood of the Forgotten · Sucgunner12 %
- Tasty MeatMeat · Sucgunner12 %
- Ocean ShardTowers of the Brotherhood of the Forgotten · Sucgunner12 %
- Funerbroadsword ProtectionGarment · Funerbroadsword12 %
- Piece of Micrab ArmourGarment · Micrab12 %
- Drowhirl Lance TipBone · Drowhirl12 %
 Zombrute FleshMiscellaneous Resource · Zombrute12 %
- Submerged Ones' ShellShell · Sucgunner2 %
- Bag of AuberginesContainer · Sucgunner1 %
Where is Bethel's Tower?
In the Silent Wrecks, on Frigost Island, at . The nearest zaap is the one at Alma's Cradle ; the area opens after Anger of the Gods.
What level should you be to do Bethel's Tower?
Level 190 minimum, 200 recommended. Bethel Akarna is level 220 and his Submerged Ones level 200.
Is the Necronyx spell mandatory?
Yes, Necronyx is essential. It's obtained with the quest Fatal Weapon; without it, killed monsters resurrect and keep striking.
Which quest should I do in Bethel's Tower?
The Livid Hearts, at Voice of the Twelve , who sends you to the tops of Solar's then Bethel's towers. It's completed by defeating Bethel in a single fight.
Why doesn't Bethel take my damage?
Only the Dagon of the Deep that has switched to your side can hurt him, in melee. First kill the Monolith, in melee, to get this Dagon.
How do you avoid Aquazomb's bonuses?
End each turn 6 Range or less from a monster, from turn 2. Otherwise, all monsters gain MP, range and their own bonus, cumulatively.
What happens if Bethel dies without Necronyx?
The whole team dies with him. Check the state before the fatal blow: since January 2026, Bethel gets rid of it after 3 turns.
Can Bethel's Tower be done with two characters?
Yes, it's even an achievement: Duo, in fewer than 40 turns. One character who tanks and another who heals or hits from range, killing the Monolith quickly.




Comments
No comments yet. A tip, or a detail about this page? Be the first.