 2 × Skt-Zo Leg
Dungeon Crucible of Fortunes
King Nidas's Palace
Level 200 dungeon in the Enurado dimension, at [-5,-5]: a single room, five waves of monsters and a boss that swaps places with you, King Nidas. The simplest of the dimension dungeons, and the most farmed. Quests to start, strategy, monsters, achievements and loot.

Quests linked to King Nidas's Palace
Two Enurado quests are completed on King Nidas: Brilliant Barber, at Leonard's, and A Piece of King, in Richard the Treasurer's series. Both start from the Crucible of Fortunes. Accept them before entering: a fight won without the quest in progress doesn't count.
It is completed by defeating King Nidas. Leonard wants to regain the king's favor: bring him a Blue Crystal, a Golden Nugget, a Bag and a resource from four of the palace's monsters, see Majus 'Ol, then defeat King Nidas and leave the palace.
- Start
- Leonard, Crucible of Fortunes
- Prerequisites
- Level 180
 Hairsh Golden Ball3 balls, 50 Orichor and 50,000,000 XP
Pluck a nose hair from King Nidas. Richard the Treasurer fears the king is ill, but Nidas refuses doctors: take it “violently”, in combat, then bring it back.
- Start
- Richard the Treasurer, Crucible of Fortunes
- Prerequisites
- All That Glitters
Hairsh Golden Ball3 balls, 50 Orichor and 50,000,000 XP
For later
Defeat King Nidas to break the precious casket. Archon Kebesto sends you to Enurado before approaching Queen Thanatena: investigate the casket, defeat the king, then bring the news to Ilyzaelle and Dardondakal.
- Start
- Archon Kebesto, Externam
- Prerequisites
- The Grey Country
 Jewel from King Nidas's Crownand 60,000,000 XP
King Nidas can give you the Totem of Joy. Maimane asks for six emotion totems, each from a boss of your choice: for joy, King Nidas, Klime, Merkator, King Imagami or Servitude.
- Start
- Maimane, Destroyers' Nightmare
- Prerequisites
- Level 180
 Totem of Balanceonce the six totems are handed in
You need a King Nidas's Blue Nose Hair. Chef Zutlédoâ needs one, along with a long list of other ingredients, to recover the recipe for his invigorating dish.
- Start
- Brenshi Forgebelly, Gargandyas's Tail
- Prerequisites
- Level 180 and Trouble in Paradise
During events
- Tiwotokar Simulation
Tiwotokar can designate King Nidas as the guardian to defeat. Astrub, .
Other quests go through the palace without this fight: Dissroyal has you meet the king, and Protect Us From the Protector sends you there to fetch Sumens's sigil.
The room of King Nidas's Palace
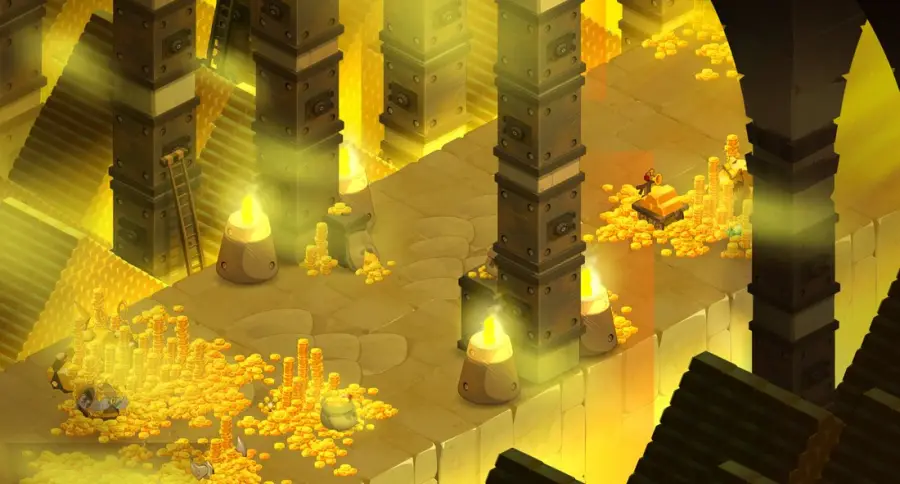
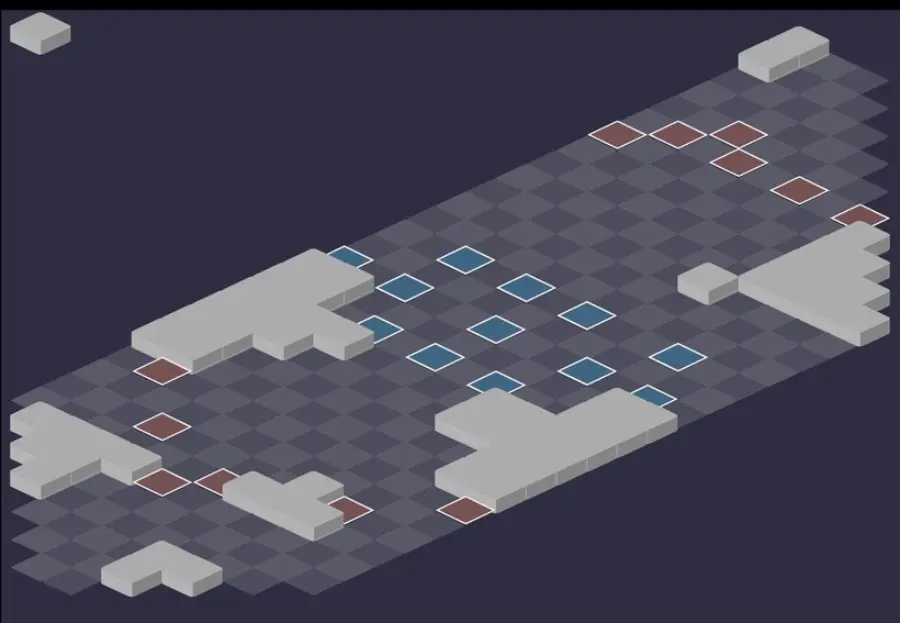
A dimension dungeon: a single room and a single fight, but five waves of monsters, as many opponents as a regular dungeon. The scenery, then the tactical view with the starting cells (blue: you, red: the monsters). Tap an image to enlarge it.
You start in the center of the map, often with monsters on both sides. The first wave is there on turn 1, then a new one arrives every 5 turns, on the monsters' starting cells. Each new wave stays invulnerable until it has played a turn.
Defeat King Nidas
Discord on the next turn
Confusion marks all the characters hit with the Discord state. On King Nidas's next turn, each of them strikes around itself in a 2 Range circle and removes 2 turns of effects from those it hits. Spread the marked characters more than 2 Range apart before the king's turn.

Level 220
 15,000 HP
 20 AP
 5 MP
- Resistances (%)
 Earth 42%
 Fire 25%
 Water 20%
 Air 12%
 Neutral 16%
It hits at medium range, pulls you in line and swaps places with the Pouch without line of sight, which makes it unpredictable. While the Pouch is an enemy, it benefits from its boosts more than anyone. Weak Point: Air, at 12%; avoid Earth, at 42%.
-
Liquidation4 AP · 5 Range ·61 to 80 Fire damage · Water Damage: 20% erosion of the caster's eroded HP
Strikes in a diagonal cross and adds a share of the king's eroded HP as Water damage.
-
Rebel Quell4 AP · 6 Range · Pulls 6 cells ·61 to 80 Neutral damage · Switches positions
In a line up to 6 Range, from turn 2: pulls you 6 cells, then swaps places with you. Get out of its lines.
 My Precious
Swaps places with the Pouch up to 10 Range away, without line of sight, on turns 3, 5, 7, 9… The king can reappear elsewhere.
 Confusion4 AP · 5 Range ·61 to 80 Air damage · Triggers: Discord
Strikes in a circle and applies Discord: on the king's next turn, each marked character strikes around itself and removes 2 turns of effects. Spread out by 2 Range.
The four-step strategy against King Nidas
Play at a distance. The dungeon can be done with almost any team, but it is easier to avoid hits than to take them. Keep King Nidas at a distance until he dies, stay out of his lines from turn 2 and remove MP and Range from the monsters that advance.
The dangerous monsters first. In each wave, deal with the Levitrof first, which can kill a character, then the Kamasterisk and the Hairsh. The Staruman and the Pazpartu are less pressing, as long as you watch their boosts.
Keep up with the pace of the waves. The waves arrive on turns 1, 6, 11, 16 and 21, or as soon as the previous one is dead. Kill each wave before the next: otherwise, the new monsters play at the end of the timeline, several in a row. From wave 2, they have 25% less vitality.
Turn the Pouch around. Bring it down to 1 HP: it switches to your side for 2 turns and gives your characters 500 shield points. It then returns to King Nidas's side; anticipate turns 3, 5, 7 and 9, when My Precious can teleport the king in its place.
The five waves
With four characters or fewer: wave 1, on turn 1, King Nidas, a Kamasterisk, a Staruman and a Levitrof; wave 2, on turn 6, two Levitrofs, a Pazpartu and a Hairsh; wave 3, on turn 11, two Starumen, a Levitrof and a Hairsh.
Wave 4, on turn 16: two Hairsh, a Staruman and a Kamasterisk; wave 5, on turn 21: two Pazpartu, a Hairsh and a Kamasterisk. Each additional character adds one monster to each wave, and the king's HP increase with the number of players.
The Pouch
It starts in melee with King Nidas. It is not a summon: it plays last. On the enemy side, its Poisoned Gift gives 200 power and 30% critical to all the monsters, 300 power and 50% critical to the king.
At 1 HP, it switches sides for 2 turns. Its Poisoned Gift then gives 500 shield points to your characters, summons excluded, but kills summons in melee with its target: keep yours away. After the 2 turns, it returns to the king's side.
The monsters of King Nidas's Palace
Five level 200 Enutoughs with 6,000 HP, each weak at -14% in a different element. The Levitrof, the Kamasterisk and the Hairsh are the main dangers of the fight. The resistances in red are their weaknesses.
In which order to kill the monsters
- Levitrof — its Toe Busker kills the targeted character if they haven't hit it before its next turn.
- Kamasterisk — it applies Gravity around itself, pulls into melee and teleports into the middle of the team.
- Hairsh — it removes 3 MP, kills summons in melee and protects its neighbors when hit.
- Staruman, then Pazpartu — one hits harder and harder, the other gives 400 power to its neighbors.

Level 200
- 6,000 HP
- 12 AP
- 5 MP
- Resistances (%)
- Earth -14%
- Fire 6%
- Water 11%
- Air 31%
- Neutral 26%
Take it out of range: it becomes harmless. Toe Busker dooms the targeted character if they don't hit it before their next turn; Kama Hamaha adds half of your eroded HP as damage. Evasive, it locks itself with about 110 lock. Weak to Earth.
 Toe Busker
The targeted character, colored green, must hit the Levitrof before their next turn, or they die. Only their own hit counts: if someone else hits first, the state remains. Killing the Levitrof also removes it.
 Kama Hamaha4 AP · 8 Range ·51 to 60 Fire damage · Fire Damage: 50% erosion of the target's eroded HP
From 3 to 8 Range: a second line of damage equal to half of your eroded HP. Heal the erosion or stay out of range.

Level 200
- 6,000 HP
- 12 AP
- 5 MP
- Resistances (%)
- Earth 31%
- Fire 26%
- Water -14%
- Air 6%
- Neutral 11%
At the start of its turn, it applies Gravity to everyone within 4 Range and pulls those in line into melee. Blinking teleports it up to 3 Range and strikes around its arrival cell, but it often doesn't cast it if it has already moved. Weak to Water.
-
Blinking4 AP · 3 Range · Teleports to the targeted cell ·51 to 70 Air steal
Teleportation up to 3 Range with line of sight, then life steal in a circle around its arrival cell.
 Torpor4 AP · 2 Range · 20% Erosion ·71 to 90 Earth damage
In melee or nearly, up to 2 Range: big Earth damage and 20% erosion for one turn.

Level 200
- 6,000 HP
- 12 AP
- 5 MP
- Resistances (%)
- Earth 11%
- Fire 31%
- Water 26%
- Air -14%
- Neutral 6%
When hit, it gives 1,000 shield points to everyone within 2 Range, allies and enemies alike. Avoid area spells and focus it alone; finishing it with an area spell no longer gives a shield. Slap kills summons in melee, Devastating Smile removes 3 MP. Weak to Air.
 Slap4 AP · melee ·91 to 110 Air damage · Kills the target
In melee: big Air damage, and kills the target if it is a summon.
 Devastating Smile4 AP · 4 Range ·51 to 70 Neutral damage · 2 AP · -3 MP
Removes 3 dodgeable MP up to 4 Range, but gives the target 2 AP.

Level 200
- 6,000 HP
- 12 AP
- 6 MP
- Resistances (%)
- Earth 26%
- Fire -14%
- Water 6%
- Air 11%
- Neutral 31%
Barba Trick hits harder with every cast, up to 4 Range: don't let yourself get hit several times. From its 3rd turn, then every 2 turns, Super Science gives it 2 MP, 300 power and the Unlockable state on the following turn. Weak to Fire.
 Barba Trick4 AP · 4 Range ·41 to 50 Neutral damage · Barba Trick: +15 base damage
Its base damage increases with each cast: every hit taken makes the next one more painful.
 Super Science4 AP · on itself ·2 MP · 300 Power · Unlockable State
Effect on the next turn: 2 MP, 300 power and Unlockable for one turn. Move away from the Staruman when it casts it.
Level 200
- 6,000 HP
- 12 AP
- 4 MP
- Resistances (%)
- Earth 6%
- Fire 11%
- Water 31%
- Air 26%
- Neutral -14%
An evasive fighter, it only hits from 2 Range: a character with about 110 lock in melee with it stops it from playing. Give it a target at exactly 5 Range, a Cawwot for example, and it will then back off. Guydeal gives 400 power around it from its 3rd turn. Weak to Neutral.
 Clemence4 AP · 5 Range ·51 to 70 Water damage · Invulnerable State
 Guydeal
400 power for one turn to monsters within a radius of 2 around the Pazpartu, from its 3rd turn and then every 2 turns.
 The Key to Success4 AP · 5 RNG ·51 to 70 Earth damage
Preparing your run through King Nidas's Palace
The simplest of the high-level dimension dungeons, for teams of level 190 to 200. People come for the Enurado quests, the achievements and above all the experience: King Nidas cannot be captured.
How to enter King Nidas's Palace
The entrance is in Enurado, at ; the nearest zaap is the one at Crackler Mountain . To enter the dimension, do a portal hunt, which is started at the Voyagers' Tower . You then need a King Nidas's Palace Key (consumed): the key ring doesn't work in a dimension. Automatic group search is available for this dungeon.
Crafting the King Nidas's Palace Key
It is crafted by a handyman. Four ingredients drop from the palace's monsters, at 12%: Staruman Eyebrow, Levitrof Tooth, Pazpartu Key Fragment and Kamasterisk Horn. Enutough Beard Hair is bought at the outpost for 3 Orichor; Icefish, Snowdrop and Frosteez complete the recipe.
| Ingredient | Quantity | Level |
|---|---|---|
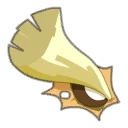 Staruman Eyebrow |
2 | 200 |
 Levitrof Tooth |
2 | 200 |
 Pazpartu Key Fragment |
2 | 200 |
 Kamasterisk Horn |
2 | 200 |
 Enutough Beard Hair |
1 | 200 |
 Icefish |
1 | 200 |
 Snowdrop |
1 | 200 |
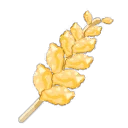 Frosteez |
1 | 200 |
Which team to bring against King Nidas
In order: distance, hindrance, positioning. Prioritize, in order of importance, ranged damage, hindrance (MP and Range removal) and positioning. The goal is to kill each wave fast enough not to be overwhelmed when the next one arrives.
Something to remove Range. A Levitrof without Range can no longer cast Toe Busker or Kama Hamaha. Range removal neutralizes the most dangerous monster in the palace, and MP removal keeps the rest at a distance.
The classes that feel at home. The Cra and the Enutrof are perfect here: ranged damage, MP and Range removal. The Rogue boosts the hitters with its bombs and Kaboom, the Pandawa moves entities outside its turn, which is valuable for the Statue achievement. Almost every class gets through, played at a distance.
The six achievements of King Nidas's Palace
Each achievement gives 200,000,000 XP and 2 Jewel from King Nidas's Crown; Trio doubles the XP; Sidekick gives 75,000,000 XP. Stinginess is completed effortlessly in a normal fight, if you watch your area spells.
| Achievements | Condition | Points | XP |
|---|---|---|---|
 King Nidas (Special) |
Defeat King Nidas in his dungeon while completing the “Stinginess” challenge. | 10 | 200 000 000 |
| King Nidas (Sidekick) |
Defeat King Nidas in his dungeon while completing the “Rats… literally or figuratively” challenge | 5 | 75 000 000 |
| King Nidas's Palace |
Defeat King Nidas in this boss's dungeon. | 10 | 200 000 000 |
| King Nidas (First) |
Defeat King Nidas in his dungeon while completing the “First” challenge. | 10 | 200 000 000 |
| King Nidas (Statue) |
Defeat King Nidas in his dungeon while completing the “Statue” challenge. | 10 | 200 000 000 |
| King Nidas (Trio) |
Defeat King Nidas in his dungeon while completing the “Trio” challenge. | 20 | 400 000 000 |
First
King Nidas must be finished off first. To avoid being overwhelmed during the focus, hit in the elements where he resists the least and avoid Earth, at 42%. Despite his critical resistances, there's no need to take off your Turquoise Dofus. Characters able to hinder the other monsters are recommended. Possible team bases: Air, Fire or Water Rogue with a Pandawa, or Eliotrope with an Ecaflip, an Iop or both.
Statue
Each ally must end their turn on the cell where they started it, throughout the fight. Come with a very strong ranged team and lots of hindrance. You start in the center, with monsters on both sides: set up your final positioning from the first turns. Beware of the Levitrof, which swaps places under Toe Busker, and of the king, who swaps and dispels in an area. A Pandawa, or any class that moves entities outside its turn, helps a lot.
Special: Stinginess
An ally that deals damage must be in line or diagonal with its target. No particular difficulty. Watch out for area attacks: they can hit a monster that is neither in line nor diagonal and make the challenge fail.
Drops and loot of King Nidas's Palace
Base game rates, before Prospecting bonus. The eight Voldelor map fragments drop in the palace, two per monster, except from the Hairsh.
On King Nidas
- Jewel from King Nidas's CrownPrecious stone12 %
 Nougat Rabmarac BarTreat6 %
 KamatrixMiscellaneous Resource3 %
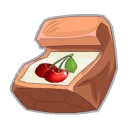 Bag of CherriesContainer3 %
 Al Howin GobtubbyCeremonial pet1 %
 Wa Odanowth ShieldCeremonial shield0,95 %
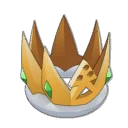 Queen Odasouth CrownCeremonial hat0,95 %
 Wa Odanowth's CwownCeremonial hat0,95 %
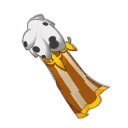 Wa Odanowth's CloakCeremonial cape0,95 %
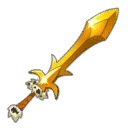 Wa Odanowth's SwordCeremonial weapon0,95 %
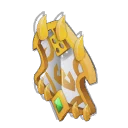 Queen Odasouth ShieldCeremonial shield0,95 %
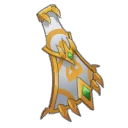 Queen Odasouth CloakCeremonial cape0,95 %
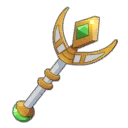 Queen Odasouth WandCeremonial weapon0,95 %
 Paragon of PowerMain quests0,7 %
 Tasty CarrionMeat0,6 %
On the henchmen of King Nidas
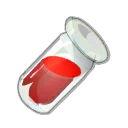 Enutough Blood SampleDivine Dimensions · Staruman24 %
- Staruman EyebrowHair · Staruman12 %
 Tasty MeatMeat · Staruman12 %
- Kamasterisk HornPrecious stone · Kamasterisk12 %
- Levitrof ToothBone · Levitrof12 %
- Pazpartu Key FragmentMiscellaneous Resource · Pazpartu12 %
- Hairsh Golden BallPrecious stone · Hairsh12 %
 OrichorToken · Staruman3,6 %
- KamatrixMiscellaneous Resource · Staruman3 %
- Bag of CherriesContainer · Staruman1 %
 Voldelor Map Fragment 6/8Map fragment · Staruman0,8 %
 Voldelor Map Fragment 2/8Map fragment · Staruman0,8 %
 Voldelor Map Fragment 5/8Map fragment · Kamasterisk0,8 %
 Voldelor Map Fragment 1/8Map fragment · Kamasterisk0,8 %
 Voldelor Map Fragment 7/8Map fragment · Levitrof0,8 %
 Voldelor Map Fragment 3/8Map fragment · Levitrof0,8 %
 Voldelor Map Fragment 8/8Map fragment · Pazpartu0,8 %
 Voldelor Map Fragment 4/8Map fragment · Pazpartu0,8 %
XP farming and modifiers
The dungeon to chain
Dimension monsters give more experience than others at an equal level, and King Nidas is the simplest of the high-level dimension bosses: it's the dungeon people chain for XP. Typical team: a Rogue who boosts the hitters with its bombs and Kaboom, three ranged hitters and one or two MP and Range hindrance characters. The goal: stay untouchable the whole fight.
The Enurado modifiers
The dimension applies one combat modifier out of ten, which only changes once King Nidas's Palace is completed. Some help, like Measured Distance (enemies hit in melee lose 1 MP, you take 20% less damage at range); others hinder, like Explosive Disappearance, which makes each dead monster explode on its allies, or Cyclic Power, which gives enemies 50% vitality.
Where is King Nidas's Palace?
In the Enurado dimension, at , at the Crucible of Fortunes. The nearest zaap is the one at Crackler Mountain ; the portal hunt to enter the dimension is started at the Voyagers' Tower .
What level should you do King Nidas's Palace at?
Minimum level 190, 200 recommended. It is the most accessible of the high-level dimension dungeons, rated easy.
Which quest should you do at King Nidas's Palace?
Brilliant Barber, at Leonard's , or A Piece of King, at Richard the Treasurer's: both are completed on King Nidas. Accept them before entering.
How do you avoid dying from Toe Busker?
Hit the Levitrof with the targeted character, before the monster's next turn, or kill it. Poison doesn't count, and another character hitting it first doesn't clear the state.
What should you do with the Pouch?
Bring it down to 1 HP: it switches to your side for 2 turns and gives 500 shield points to your characters. As an enemy, it boosts all the monsters, especially the king.
How do you handle Discord?
Move the marked characters more than 2 Range away from each other before the king's next turn. Otherwise, they hit each other and remove 2 turns of effects from each other.
How many waves are there?
Five, on turns 1, 6, 11, 16 and 21, or sooner if the previous one is dead. With four characters, each wave has four monsters; one more for each additional character.
Can you capture King Nidas?
No, King Nidas cannot be captured. No soul stone is needed.
Does the key ring work for King Nidas's Palace?
No, not in a dimension. You need a King Nidas's Palace Key, crafted with resources from the palace and Enutough Beard Hair bought at the outpost.



Comments
No comments yet. A tip, or a detail about this page? Be the first.