 2 × Skt-Zo Leg
Dungeon Eliocalypse
Eliocalypse Storm
Level 200 dungeon in the Eliocalypse, in [15,-20]: four fightless rooms, then the four Horsemen together in a single fight, with the help of the Primordial Fire. Access, quest, strategy, monsters, achievements and loot.

Quests linked to the Eliocalypse Storm
The dungeon's quest is The Wokening, the last act of the Eliocalypse series: it has you cross the four rooms with Martalo, then defeat the four Horsemen. Once completed, it unlocks the mount exchange at the end of the dungeon.
It is completed on the four Horsemen. First finish A Matter for Death and The War in Cania Won't Happen, only one active at a time, then follow Maysial to Xelor. At the Sanctuary of Last Hope, Martalo guides you through the Storm; after the victory, Septangel leads you to the solo fight against Eliocalyptic Torment.
- Start
- Maysial, Cania Massif
- Prerequisites
- The Four Wills and The Root of All Evil
Each Horseman is first fought alone, in its own dungeon: Death and Renewal requires defeating Corruption, Break One's Chains Servitude, Storm Warning Misery and The Longest Day War. These four victories open access to the Storm.
The 5 rooms of the Eliocalypse Storm
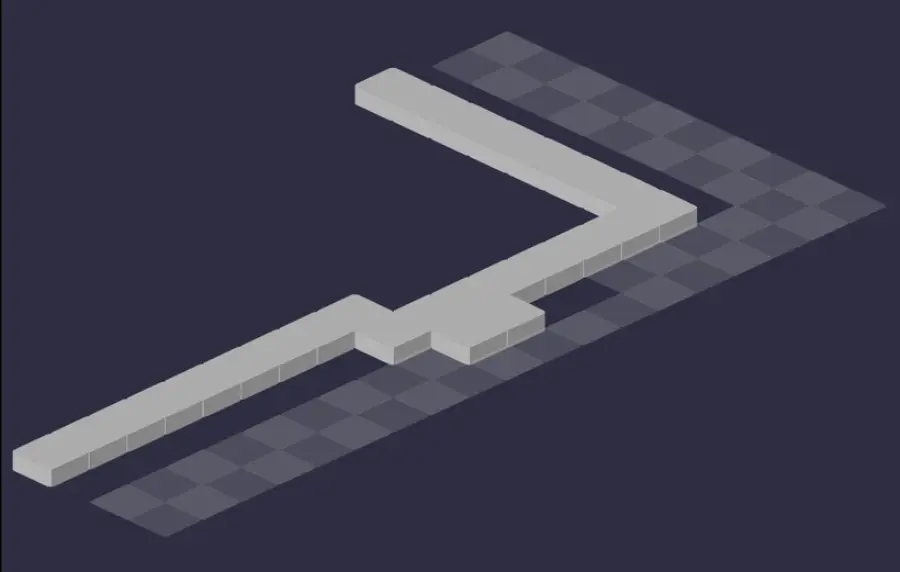
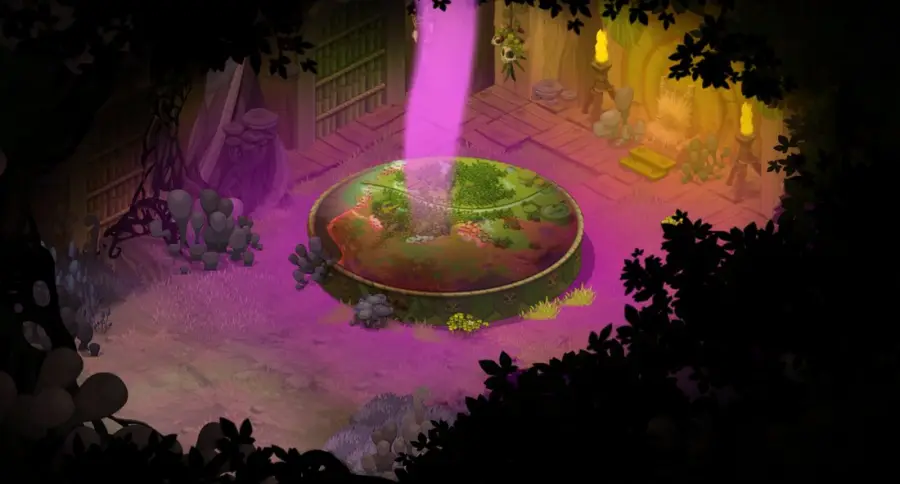
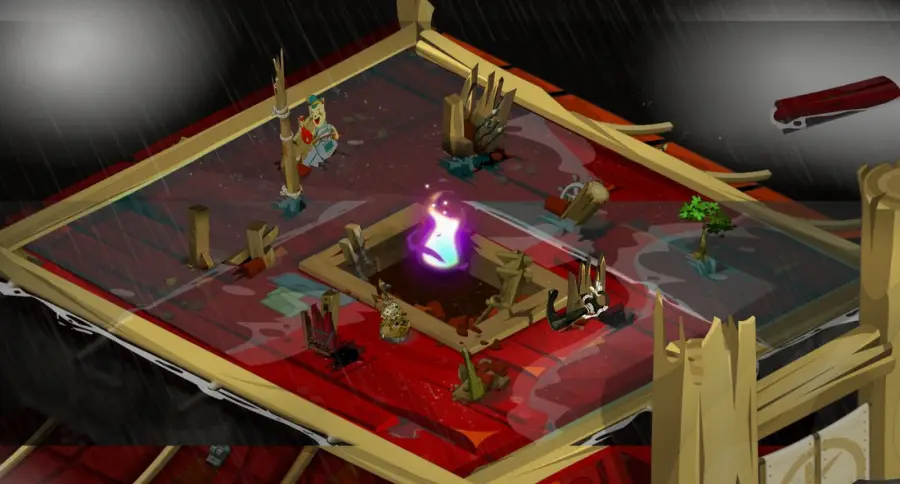
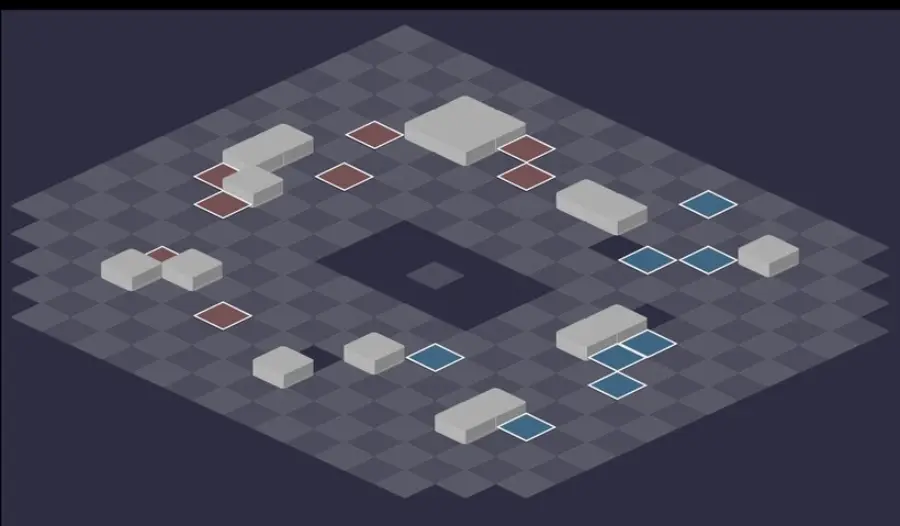
Five rooms, but only one fight, in the last one: the first four are scenes ravaged by the Eliocalypse. On the first pass, Martalo walks you through them with commentary; once the Storm is defeated, he offers to revisit them or teleport you straight to the Horsemen. For each room: the scenery, then the tactical view with the starting cells (blue: you, red: the monsters). Tap an image to enlarge it.
Room 1 — the Valley of the Great Spirit
No fight, just a cutscene: the assassination of Queen Dayatsu.

Room 2 — the Last Crimson Dawn
The last fight of the king of Bonta and the prince of Brakmar, frozen in the scenery. No fight.


Room 3 — King Sheran Sharm's Throne
The corruption of the Sadida kingdom, around its king's throne. No fight.

Room 4 — the Temple of the Twelve
The network of zaaps and portals infected by anomalies. Last scene before the Horsemen.


Room 5 — the four Horsemen
The four Horsemen together, with one extra monster per character beyond four. The first character in initiative summons the Primordial Fire: the strategy is detailed just below.
Defeat the four Horsemen
The character who summons the Fire
The first character in initiative summons the Primordial Fire at the start of their first turn, and their fates are linked. If they die, the fight is lost immediately. Give initiative to a sturdy character and watch out for Misery's pulls as well as Corruption's position swaps.

Level 220
 21,000 HP
 20 AP
 4 MP
- Resistances (%)
 Earth 16%
 Fire 5%
 Water 11%
 Air 25%
 Neutral 22%
It places its allies under Comeuppance, your characters under Rotting Skin, and its spells transmit diseases. Healing an entity in contact with Corruption removes the state from it and all its allies, and makes it get off its mount for 3 turns. The easiest to isolate: it is the first to kill.
 Corrupted Spade4 AP · 2 Range · Effect duration: -1 ·34 to 46 Fire damage · -3 AP · Corrupted Spade state
 Incu-Beater6 AP · 14 Range ·48 to 56 Water damage · Triggers: Each time the target receives damage, it returns to its previous location.
 Prolific Convalescence2 AP · 10 Range ·28 to 35 Air damage · Pushes back 2 cells
 Liquefaction1 AP · 14 Range ·17 to 24 Water damage · Teleports or switches places · No additional effects · Triggers: _RANDOM DISEASE
Switches positions and gives a random disease. Once put under Gravity after getting off its mount, Corruption can no longer use it.
 Putrefaction4 AP · 10 range ·56 to 68 Fire damage
 Bacteriological Bomb
Transmits one of the nine diseases, which spreads around the target at the end of its turn. Move away from the sick character and heal them three times.
 Germinal Outbreak2 AP · 5 Range ·24 to 30 Neutral damage · -200 Power · Shield: 150% of level
-
Bacteriological Bomb
Transmits one of the nine diseases, which spreads around the target at the end of its turn. Move away from the sick character and heal them three times.

Level 220
- 22,000 HP
- 12 AP
- 6 MP
- Resistances (%)
- Earth 35%
- Fire 35%
- Water 25%
- Air 25%
- Neutral 30%
Invulnerable as long as she is not alone on the battlefield: she necessarily dies last. Every 20% of HP lost, she summons a weapon that strikes in an area around her. One turn in three, Valour makes one character the Fearless, the only one who can hit her without becoming Pacifist.
 Valour3 AP · 3 range · Fearless State · 200 Lock · 200 Flight ·2 MP · Gravity State · Unhealable State
Designates the Fearless for 2 turns, one turn in three: only they hit War fully, the others become Pacifists after one line of damage on her. Stay out of her range to avoid it.
 Impact5 AP · 3 range · 20% Erosion ·71 to 85 Fire damage
 Execution3 AP · melee ·71 to 85 Fire damage
 Magmalediction5 AP · 6 range ·61 to 70 Fire steal
-
Magmalediction5 AP · 6 range ·61 to 70 Fire steal
 Velocity
Forced position swap with unlimited range: this is how War switches places with her weapons to restart their strike.
-
Velocity
Forced position swap with unlimited range: this is how War switches places with her weapons to restart their strike.
 Martyr3 AP · melee ·71 to 80 Fire steal
-
Martyr3 AP · melee ·71 to 80 Fire steal

Level 220
- 18,000 HP
- 20 AP
- 6 MP
- Resistances (%)
- Earth 32%
- Fire 19%
- Water 12%
- Air 28%
- Neutral 9%
She pulls all entities toward her at the start of her turn and each time she takes damage, from 1 to 4 cells, more as she loses HP. Harmless before her 50% threshold: she then mounts her steed, stays invulnerable for one turn, and must die before playing again.
 Scale-Mace3 AP · 6 Range · -200 Power · 200 Power ·9 to 13 Air damage · 9 to 13 Water damage · 9 to 13 Fire damage · 9 to 13 Earth damage
 Sky Burial3 AP · 8 Range · Switches places (forced) ·41 to 50 Air damage
 Buzzard4 AP · 2 Range ·41 to 60 Neutral damage · -150 Pushback Resistance · Pushes back 6 cells
Pushes far and greatly reduces your pushback resistance: beware of obstacles behind you.
 Dakhma4 AP · 2 Range ·51 to 70 Fire damage · -100 MP · -100 AP · Invulnerable state · Teleports the target to the cell where they started their turn · Tower of Silence state · Removes the spell's effects
Makes the target invulnerable, sends it back to its turn-start cell and deprives it of AP and MP for one turn. An ally's damage spell on it removes the effect.
 Barchan3 AP · 6 Range ·31 to 40 Water steal · Heals Received x50% · -100 Heals
Halves the healing received: annoying when three heals are needed to cure a disease.

Level 220
- 26,000 HP
- 11 AP
- 7 MP
- Resistances (%)
- Earth 15%
- Fire 30%
- Water 25%
- Air 25%
- Neutral 20%
It reflects 200% of the damage taken: it can only be hit with the Traitor state, gained on its white glyph. It summons an Armiscreant on turn 1 and then every two turns, six at most. At 1 HP, it brings everyone back to its starting cell and heals 25% of its HP.
-
Betrayal
 Subjugation2 AP · 10 Range · 100 Lock · Pulls 9 cells ·Steals 1 MP · 71 to 80 Air damage
 Protective Thrall3 AP · 5 Range ·76 to 85 Water damage · 1000 Shield · 1 MP
 Tyranny5 AP · on self ·101 to 110 Water damage · Steals 1 AP
-
Subjugation2 AP · 10 Range · 100 Lock · Pulls 9 cells ·Steals 1 MP · 71 to 80 Air damage
-
Protective Thrall3 AP · 5 Range ·76 to 85 Water damage · 1000 Shield · 1 MP
-
Betrayal
-
Betrayal
-
Betrayal
-
Betrayal
-
Betrayal
-
Tyranny5 AP · on self ·101 to 110 Water damage · Steals 1 AP
The five-step strategy
The first turns. The Primordial Fire boosts the whole team as soon as it is summoned. Heal each character who attacks once to remove the Rotting Skin from them, which reduces their damage by 90%; leave it on the tanks, which it protects from diseases. With five or more, kill the added monsters first, Junker and Olgoth above all, as well as the turn-1 Armiscreant, without Comeuppance.
Corruption. Heal an ally or a summon in contact with it: it loses the Comeuppance and gets off its mount. Put it under Gravity before it plays, to block its position swaps, then kill it in one or two turns: it only remounts 3 turns later. Meanwhile, end your turns on Servitude's white glyphs with your best hitters.
Servitude. Hit it with the Traitor state, or under a Feca's protections, and place it in the Fire's line of sight, which hits it every turn. Make it Unhealable before taking it to 1 HP, with the Pandawa's Prohibition or the Masqueraider's Ardour: it brings everyone back to its starting cell without healing, and one last attack finishes it off.
Misery. Hit her from a distance, pushing her back each turn. Pass her threshold with a character who plays among the first, buff yourselves during her invulnerability turn, then kill her before she plays again. Otherwise, heal and protect yourselves. A fast Feca or Enutrof can neutralize her turn with Truce or the Corruption spell.
War last. Alone, she becomes vulnerable. Stay more than 3 cells away to avoid Valour. At each threshold, either kill the weapon before War plays again, by passing the threshold right after her turn, or ignore it by hitting War from afar. The Fire's bonuses are enough to finish quickly.
The Primordial Fire
Summoned on the central cell, it gives all your characters 500 power, 2 AP, 2 MP, 10% resistances and 50% more HP; its summoner receives 100% HP and 15% resistances. Invulnerable and unmovable, it deals about 750 Neutral damage to all enemies in its line of sight on each of its turns. Misery, when hit by the Fire, pulls you in on her turn: anticipate it.
Once per turn, hitting the Fire gives its summoner 600 power and 800 shield for one turn, if they are in its line of sight. If an enemy hits the Fire while the summoner is in its line of sight, the summoner loses their vitality bonus until the end of the fight. Do not leave Servitude's white glyph under the Fire: someone would take the Traitor state there in your place.
Corruption's states and diseases
The Rotting Skin reduces your damage by 90% and removes 10% of your current HP at the end of each turn from turn 2, but prevents you from catching a disease; a heal removes it. On the enemies' side, each line of damage on a Comeuppance carrier costs you a poison of 1,300 Earth damage at the end of the turn. The state returns on all enemies when Corruption gets back on its mount.
A disease is removed with three heals, life steal included. The worst is Brutalitis, one chance in nine: the sick character reflects part of their damage within a radius of 3 cells. Heal them first and, until then, make sure they do not attack with an ally 3 cells away or closer.
Servitude and the Traitor state
The first Traitor state is obtained by ending your turn on the white glyph that Servitude places on turns 2, 4, 6 and onward; the glyph stays as long as nobody has ended their turn on it. Then hit your allies to stack the states, one per line of damage, up to five.
Each line of damage on Servitude consumes one state. Never consume the last one, or you will have to go back to a glyph. A Feca gets around this: Barricade, Bastion or Ataraxia on your best hitters let them hit Servitude without suffering the reflect.
The monsters of the Eliocalypse Storm
Four level-200 monsters are added one by one beyond four characters: Junker at the fifth, Olgoth at the sixth, Pistilick at the seventh, Armiscreant at the eighth. Servitude also summons its own Armiscreants, from turn 1. The resistances in red are their weaknesses.
In which order to kill the monsters
- Junker, then Olgoth — the two to eliminate first from five characters, before touching the Horsemen.
- Armiscreants — summoned by Servitude on turn 1 and then every two turns: without Comeuppance and with the Fire's bonuses, they go down fast.

Level 200
- 6,000 HP
- 12 AP
- 6 MP
- Resistances (%)
- Earth -8%
- Fire 17%
- Water 15%
- Air 26%
- Neutral 34%
It pulls 4 cells with Grey Terminal and covers itself with a shield using DIY Assembly, without spending AP. Dismantling hits three times in melee and gnaws at your HP. Weak to Earth: break its shield, then finish it off.
 Dismantling4 AP · melee ·16 to 25 Neutral damage · -10% HP · 10% Vitality · Collection state
 Grey Terminal3 AP · 5 Range · -50 Damage · 50 Damage ·31 to 40 Neutral steal · Pulls 4 cells · Collection state
Pulls 4 cells and steals damage: do not stay within the Junker's range with a fragile character.
 DIY Assembly
Free shield, no AP: break it before hitting the Junker for real.

Level 200
- 5,500 HP
- 12 AP
- 5 MP
- Resistances (%)
- Earth 10%
- Fire 5%
- Water 20%
- Air 10%
- Neutral 5%
It mostly hits in melee, where Pressure steals 1 MP and Quake hurts; Olgofist also lets it hit at range. Its resistances are low in Fire and Neutral: keep it out of melee and kill it early.
 Olgofist3 AP · 7 range ·46 to 60 Fire damage
 Pressure3 AP · melee ·61 to 75 Fire damage · Steals 1 MP
Steals 1 MP on contact: do not end up stuck to the Olgoth.
-
Quake5 AP · on self ·61 to 75 Earth damage

Level 200
- 5,500 HP
- 10 AP
- 6 MP
- Resistances (%)
- Earth 30%
- Fire 30%
- Water 15%
- Air 20%
- Neutral 20%
Taming sends its target back to its turn-start cell at the end of their turn. Look at who it targeted and play accordingly, even charging in since you will come back. Repulsive Anchor pulls then pushes.
 Skirmich
-
Repulsive Anchor4 AP · 2 Range · Pulls 1 cell ·61 to 70 Earth damage · Pushes back 3 cells
 Taming4 AP · 10 Range ·61 to 70 Fire damage · Teleports the target to the cell where they started their turn
Up to twice per turn, without line of sight: the target returns to its turn-start cell at the end of its turn. Gravity, Rooted, Unmovable or a dispel cancels this return.

Level 200
- 7,100 HP
- 12 AP
- 4 MP
- Resistances (%)
- Earth 26%
- Fire 10%
- Water 17%
- Air -7%
- Neutral -13%
Sporadical intercepts damage and gives it MP: remove its interception before concentrating your damage. Maturation reduces your tackle. Weak to Air and Neutral.
 Sporadical4 AP · on self · Intercepts damage ·2 MP
Damage interception and extra MP: remove it before concentrating your damage.
 Laziatry4 AP · 5 Range ·20 to 30 Earth damage · Triggers: _STATE FLEMINGYTE COUNTER +
 Maturation3 AP · 6 Range ·27 to 38 Fire damage · -25 Lock
Preparing your run through the Eliocalypse Storm
The last fight of the Eliocalypse series, for teams of level 190 to 200 who already know the four Horsemen. The difficulty stays reasonable thanks to the Primordial Fire; people come here for The Wokening, the achievements and the mounts. The Horsemen cannot be captured.
How to enter the Eliocalypse Storm
You must first have defeated the four Horsemen in their own dungeon. Take the zaap at the Arche de Vili to travel through time to the Sanctuary of Last Hope. In the central room, go to the room at the top left: the strange device takes you to Martalo, at the dungeon entrance. You need an Eliocalypse Storm Key (consumed) or the key ring: no automatic group search.
Crafting the Eliocalypse Storm Key
It is crafted at a handyman's workshop. Five ingredients drop from the added monsters, which only appear from five characters: Armiscreant Hood, Pistilick Tongue, Junker Shoulder Pad, Armour Fragment (Olgoth) and Tasty Meat, all at 12%. Icefish (fishing), Snowdrop and Frosteez (harvesting) complete the recipe.
| Ingredient | Quantity | Level |
|---|---|---|
 Armiscreant Hood |
2 | 200 |
 Pistilick Tongue |
2 | 200 |
 Junker Shoulder Pad |
2 | 200 |
 Armour Fragment |
2 | 200 |
 Tasty Meat |
2 | 200 |
 Icefish |
1 | 200 |
 Snowdrop |
1 | 200 |
 Frosteez |
1 | 200 |
The right team for the Eliocalypse Storm
A tank first in initiative. The first character in initiative summons the Primordial Fire, and its death loses the fight. Give this role to a tank, often a Pandawa, and only heal them when they are low: the Rotting Skin protects them from diseases.
A Feca, the real plus. Their protections allow hitting Servitude without the Traitor state, their Gravity spells counter Corruption and the Armiscreants, and Truce cancels Misery's turn in the second phase. Have them play right after Misery, in second or third position. With six or more, they can even tackle War as a tank.
Five or more characters. The dungeon is easier with five or more: the added monsters die quickly with the Fire's bonuses, and the Horsemen struggle to overcome a large group.
The comfortable classes. The Pandawa, the best positioning class, puts Corruption under Gravity and Servitude under Unhealable with Prohibition. The Feca protects, applies Gravity and stalls with Truce. The Eniripsa removes the Rotting Skin, the Comeuppance and the diseases. The Masqueraider can also make Servitude unhealable with Ardour.
The twenty achievements of the Eliocalypse Storm
Three challenges are played against the combined Horsemen: Freedom, which is easy, Quartet, accessible thanks to the Primordial Fire, and Impertinence, one of the hardest achievements in the game.
| Achievements | Condition | Points | XP |
|---|---|---|---|
 Tree of Death |
Defeat Corruption in this boss's dungeon. | 10 | 200 000 000 |
| Corruption (Tight) |
Defeat Corruption as a team in its dungeon by completing the “Tight” challenge. | 10 | 200 000 000 |
| Corruption (Clean Hands) |
Defeat Corruption in its dungeon by completing the “Clean Hands” challenge. | 10 | 200 000 000 |
| Corruption (Duo) |
Defeat Corruption in its dungeon by completing the “Duo” challenge. | 20 | 400 000 000 |
 Blood Throne |
Defeat War in this boss's dungeon. | 10 | 200 000 000 |
| War (Zombie) |
Defeat War in her dungeon by completing the “Zombie” challenge. | 10 | 200 000 000 |
| War (Misanthrope) |
Defeat War as a team in her dungeon by completing the “Misanthrope” challenge. | 10 | 200 000 000 |
| War (Duo) |
Defeat War in her dungeon by completing the “Duo” challenge. | 20 | 400 000 000 |
 Shackles of Tyranny |
Defeat Servitude in this boss's dungeon. | 10 | 200 000 000 |
| Servitude (Focus) |
Defeat Servitude in its dungeon by completing the “Focus” challenge. | 10 | 200 000 000 |
| Servitude (Versatile) |
Defeat Servitude in its dungeon by completing the “Versatile” challenge. | 10 | 200 000 000 |
| Servitude (Duo) |
Defeat Servitude in its dungeon by completing the “Duo” challenge. | 20 | 400 000 000 |
 Judgement of the Scales |
Defeat Misery in this boss's dungeon. | 10 | 200 000 000 |
| Misery (Impertinence) |
Defeat Misery in her dungeon by completing the “Impertinence” challenge. | 10 | 200 000 000 |
| Misery (Clean Hands) |
Defeat Misery in her dungeon by completing the “Clean Hands” challenge. | 10 | 200 000 000 |
| Misery (Duo) |
Defeat Misery in her dungeon by completing the “Duo” challenge. | 20 | 400 000 000 |
| Corruption (Special) |
Defeat Corruption in its dungeon by completing the “Collective Immunity” challenge. | 10 | 200 000 000 |
| Servitude (Special) |
Defeat Servitude in its dungeon by completing the “Walkabout” challenge. | 10 | 200 000 000 |
| Misery (Special) |
Defeat Misery in her dungeon by completing the “Abject Opulence” challenge. | 10 | 200 000 000 |
| War (Special) |
Defeat War in her dungeon by completing the “Total Arsenal” challenge. | 10 | 200 000 000 |
Freedom
Do not try to remove MP or Range from opponents. No particular difficulty: removing MP and Range is of little use in this fight. Just check that none of your spells removes any by accident.
Impertinence
Allied fighters must end their turn on a cell adjacent to an enemy's. Come with five or six, with two Pandawas, a Feca, a bit of healing and lots of damage. On turn 1, a Pandawa brings the Junker or the Olgoth close to the others. The trap comes from the Armiscreants: what counts is the cell you land on after Taming, so counter it with Gravity, Gravitational Glyph, Ataraxia, Inertia, a fragile summon or a dispel. Then stick close to Misery's carcasses: a killed entity leaves one if Misery has played during its lifetime, four at most; Misery destroys them all at the start of her turn, and the Fire destroys those in its line of sight. Summon far from the enemies to prepare the next ones. A carcass carried by a Pandawa, who is himself wedged against an obstacle, escapes Misery and serves as a support point. Plan a carcass near your starting cells before Servitude, at 1 HP, brings everyone back there, and a spot against War before killing Misery. Facing War, never let her play with a living weapon: pass each threshold right after her turn, kill the weapon, cut the Fire's line of sight to her, and save Stabilisation and Prohibition for those moments.
Quartet
Four characters maximum, fewer than 40 turns. Not very difficult thanks to the Primordial Fire, even if the dungeon is easier with more players. A Pandawa to position, a healer for Corruption's states and a big hitter to kill the Horsemen quickly; a Feca is a huge plus, without being mandatory.
Drops and loot of the Eliocalypse Storm
Base game rate, before the prospecting bonus. Each Horseman drops its resource at 12%: twenty copies can be traded for its mount at the end of the dungeon.
On the bosses
 Corruption's HornBone · Corruption12 %
 War's CapGarment · War12 %
 Misery's FeatherFeather · Misery12 %
 Servitude's LockMiscellaneous Resource · Servitude12 %
 Nougat Rabmarac BarTreat · War6 %
 Bag of BeansContainer · Corruption3 %
 Barrel of Scurvion BloodContainer · War3 %
 Bag of SpicesContainer · Misery3 %
 Bag of Temporal PowderContainer · Servitude3 %
 Corrupted SproutsMiscellaneous Resource · Corruption2 %
 Sharp BladeCombat Resource · War2 %
 Sterile SoilMiscellaneous Resource · Misery2 %
 Slave NecklaceMiscellaneous Resource · Servitude2 %
 Al Howin GobtubbyCeremonial pet · Corruption1 %
 Paragon of PowerMain quests · Corruption0,7 %
 Tasty CarrionMeat · Corruption0,6 %
On the henchmen
- Armiscreant HoodGarment · Armiscreant12 %
 Shackles KeyEliocalypse · Armiscreant12 %
- Tasty MeatMeat · Armiscreant12 %
- Junker Shoulder PadGarment · Junker12 %
- Armour FragmentMiscellaneous Resource · Olgoth12 %
- Pistilick TongueMiscellaneous Resource · Pistilick12 %
- Slave NecklaceMiscellaneous Resource · Armiscreant2 %
- Sterile SoilMiscellaneous Resource · Junker2 %
- Sharp BladeCombat Resource · Olgoth2 %
- Corrupted SproutsMiscellaneous Resource · Pistilick2 %
- Bag of Temporal PowderContainer · Armiscreant1 %
- Bag of SpicesContainer · Junker1 %
- Barrel of Scurvion BloodContainer · Olgoth1 %
- Bag of BeansContainer · Pistilick1 %
The Horsemen's mounts
Four mounts to trade
Once the fight is won, if you have completed The Wokening, choose before leaving the dungeon a mount you do not have yet, in exchange for 20 resources from the corresponding Horseman: Corruption Death Cap (Corruption's Horn), Servitude Bow Wow (Servitude's Lock), War Gobbalrog (War's Cap) or Misery Vulture (Misery's Feather). Each one can only be obtained once per character.
Where is the Eliocalypse Storm?
In the Sanctuary of Last Hope, in , via the zaap at the Arche de Vili. Travel back in time to the sanctuary, then take the strange device in the top-left room.
What are the requirements to enter the Eliocalypse Storm?
Having defeated the four Horsemen in their own dungeon. You then need an Eliocalypse Storm Key or the key ring: no automatic group search.
At what level should you do the Eliocalypse Storm?
Level 190 minimum, 200 recommended. The four Horsemen are level 220, but the Primordial Fire's bonuses make the fight reasonable.
Which quest should you do in the Eliocalypse Storm?
The Wokening, the last act of the Eliocalypse series, which begins at Maysial's . It has you defeat the four Horsemen and unlocks the mount exchange.
In what order should you kill the Horsemen?
Corruption, Servitude, Misery, then War. Corruption is the easiest to isolate, Misery is harmless before her threshold, and War is invulnerable as long as she is not alone.
What is the Primordial Fire for?
It boosts the whole team and hits the enemies in its line of sight. The first character in initiative summons it; if that character dies, the fight is lost.
How do you hit Servitude without suffering its reflect?
With the Traitor state, obtained by ending your turn on its white glyph. Without it, it reflects 200% of the damage. Make it Unhealable before taking it to 1 HP.
How many characters should you plan for?
Five or more, preferably. Each character beyond four adds a monster, quickly killed with the Fire's bonuses, and the Horsemen have a harder time against a large group. The Quartet challenge is played with four.
Can the Horsemen be captured?
No, they cannot be captured. No soul stone is needed for this dungeon.
How do you get the Horsemen's mounts?
Finish The Wokening, then trade 20 resources from a Horseman after the victory. One mount per Horseman, only once per character, to be chosen before leaving the dungeon.



Comments
No comments yet. A tip, or a detail about this page? Be the first.