 2 × Skt-Zo Leg
Dungeon Uncertain Future
Eye of Vortex
Level 200 dungeon in the Xelorium dimension, at [7,-7]: a single room, five waves of monsters and a boss that stays invulnerable until those waves are corrupted, Vortex. Quests to start, how the Auroraire works, strategy, monsters, achievements and loot.
Quests linked to the Eye of Vortex
Two Xelorium quests go through the dungeon: Truth at Bottom is completed on Vortex, The Sands of Time asks you to reach its exit. Accept them before entering: a fight won without the quest in progress doesn't count.
The dungeon quest. Doc Ettem Bworn puts you on the trail of Doctor William Lebb: join Tessie Hood in , defeat Vortex in a single fight, talk to it, then jump into the well of souls to meet God Xelor.
- Start
- Doc Ettem Bworn, Xelorium outpost
- Prerequisites
- The Army of 12 Maniacs
 Wastrel Feather3 feathers, 50 Orichor and 50,000,000 XP
You must reach the exit of the Eye of Vortex. Kinsharamyn sends you on the trail of the Dagger of Time: after infiltrating the Fugitives, discover the entrance and then the exit of the dungeon, and defeat Elvis Irr in a single fight, solo.
- Start
- Kinsharamyn, Xelorium outpost
- Prerequisites
- Level 180 and All You Need Is Kill
 Hystairkal Horn5 horns, 50 Orichor and 50,000,000 XP
For later
Tear a shard of broken destiny from Vortex. For the Scissors of Destiny, Rimanda has you take a shard from Count Harebourg and then another from Vortex, to bring back to Maha Shoja.
- Start
- Rimanda, Huppermage temple on Rok Island
- Prerequisites
- In the Dragon's Mouth
 Count Harebourg's Bandages3 Miniature Sandglass and 60,000,000 XP
Vortex can give you the Totem of Sadness. Maimane asks for six emotion totems, each from a boss of your choice: for sadness, Vortex, Captain Meno, Queen Amirukam, Sylargh or Turtelonia.
- Start
- Maimane, Destroyers' Nightmare
- Prerequisites
- Level 180
 Totem of Balanceonce the six totems are handed in
During events
- Tiwotokar Simulation
Tiwotokar can designate Vortex as the guardian to defeat. Astrub, .
The room of the Eye of Vortex
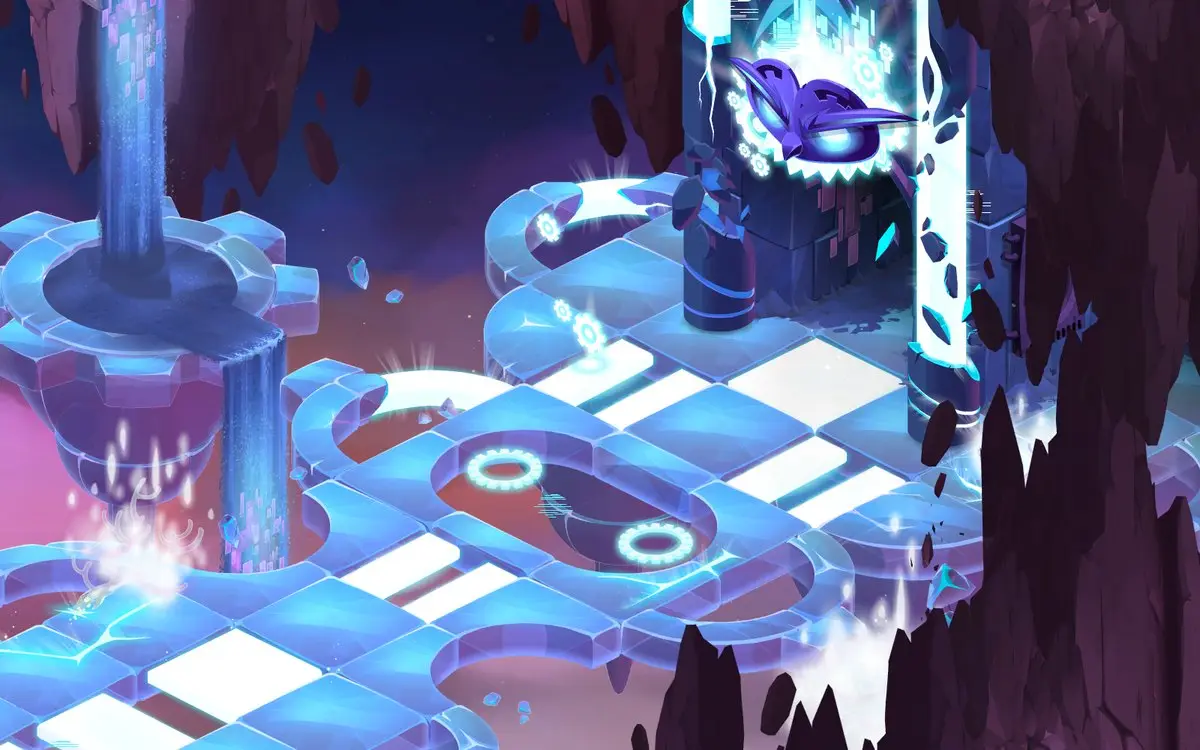
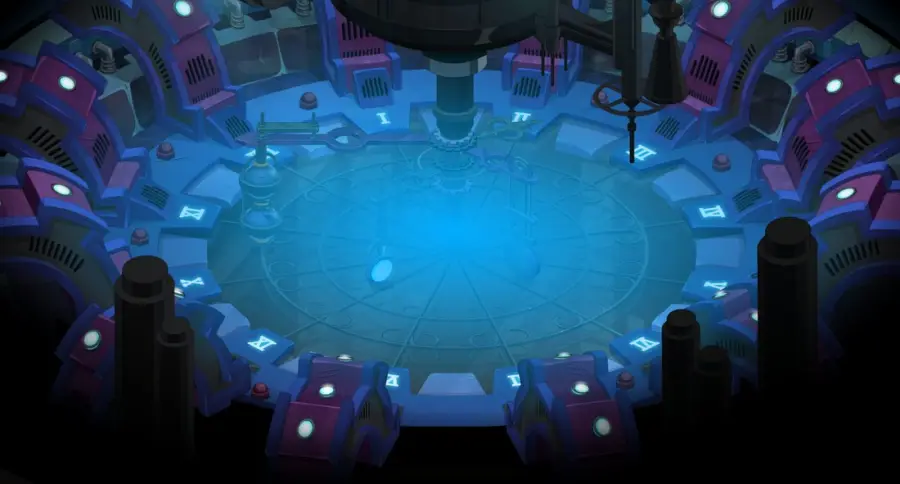
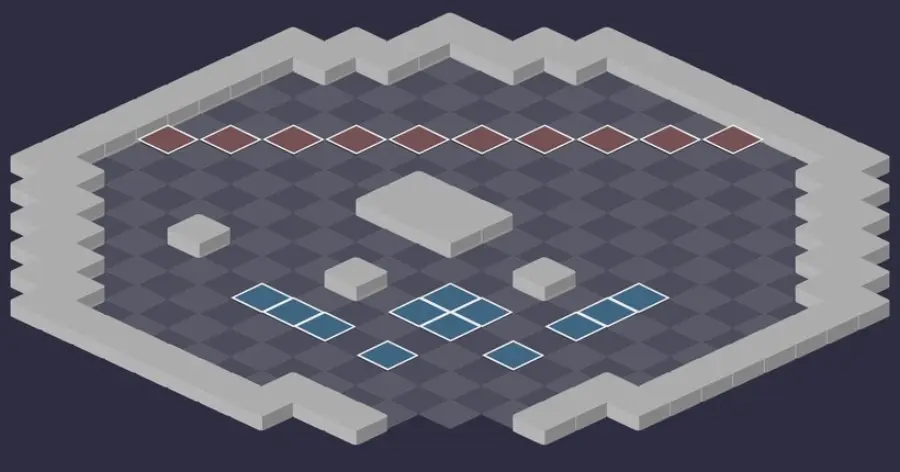
A dimension dungeon: a single room and a single fight, but as many monsters as a regular dungeon, spread over five waves. The scenery, then the tactical view with the starting cells (blue: you, red: the monsters). Tap an image to enlarge it.
Vortex is there from the start with the first wave: three monsters with four players, one more for each additional character, then as many monsters as fighters in each wave. The next wave arrives after a number of turns shown in the timeline, or sooner if the current wave is completely killed. Each wave arrives invulnerable for one turn.
Defeat Vortex
The Aurour's lines
On each of its turns, Vortex casts All in Good Time on all characters and summons lined up with the Aurour, with erosion as a bonus. Never end your turn in the line where the Aurour will be on Vortex's turn: with 3, 4 or 6 characters, these lines are always the same.

Level 220
 15,000 HP
 16 AP
 5 MP
- Resistances (%)
 Earth 33%
 Fire 12%
 Water 21%
 Air 28%
 Neutral 6%
It starts out invulnerable, unmovable and with no MP, and resurrects every monster you kill. Once all five waves are corrupted, it strikes in a line up to 8 Range without line of sight with Time Out, which inflicts Pacifist, and teleports onto the Auroraire every 3 turns. Weak Point: Neutral, at 6%.
 Time Out4 AP · 8 Range · Effect duration: -2 · Pacifist State ·41 to 50 Air damage · 41 to 50 Fire damage
Up to three times per turn, in a line up to 8 range and without line of sight: reduces your enchantments by 2 turns and makes you Pacifist, a state that can be dispelled.
 Vormhole
Hits the target and everyone within 2 cells of it, sends it back to its previous position and repeats on the next turn. Don't stay grouped within 4 range of Vortex.
 All in Good Time1 AP · 63 Range ·10 AP
Cast automatically on each of Vortex's turns, even while invulnerable: strikes and erodes everything lined up with the Auroraire. Get out of these lines before ending your turn.
 Clockrock
Teleports Vortex into contact with the Aurour, every 3 turns. Note the turn he cast it to anticipate the next ones.
 Zombie Contamination
Makes unhealable within a radius of 2 range around a resurrected or corrupted monster. Move away from the corrupted, or move them away from you.
The five-step strategy against Vortex
The first wave. Play at a distance, out of the Auroraire's lines, and hit hard. The first wave gets one more turn than the others, with the second arriving on turn 7: corrupt its three monsters before wave 2. A monster still alive when a wave arrives is not a problem, but don't fall behind.
Kill twice at the same hour. Each monster killed comes back with the hour's bonus. To corrupt it, kill it again when the Aurour passes that hour again: a yellow star appears above it at the right moment. Anticipate by watching its boosts, or note on paper who killed what, and at what hour.
Don't let yourself be overrun. Without MP removal or a character able to take hits, re-kill the resurrected monsters every turn, even outside their hour: they will eventually carry the star. The price: the hour bonuses accumulate, on them as on Vortex, and the worst are damage taken x70% and the 30% vitality.
The two empty turns. After the last monster is corrupted, one turn passes with all the corrupted monsters on the field, then Vortex makes them disappear, sends everyone back to their starting cell and stays invulnerable for one turn. Buff yourself and position far away from it: it plays on the next turn. This moment often causes lag, even disconnections when multiboxing.
Vortex alone. Hit him at range, remove MP from him and never stay in his lines at 8 range. Every 3 turns, move away from the Aurour, not from Vortex: Clockrock teleports him there at the start of his turn. Continue like this until he dies.
The Auroraire and its twelve hours
At the start of each character's turn, the Aurour advances one hour. The monster killed gains the hour's bonus for its resurrection, cumulative if it dies at several hours, and Vortex collects each bonus, only once per hour. Killing five monsters at the same hour gives him only one bonus.
The hours that matter: damage taken x70% at hour 5, +30% vitality at hour 11, Unlockable state at hour 2, Unshakable state at hour 10, +4 AP at hour 8. Hours 3, 6, 9 and 12 only give 400 in one characteristic: these are the least troublesome hours.
Killing a monster resurrected at a different hour adds that hour to its possible hours: it can be corrupted at either one. A corrupted monster still comes back, but invulnerable, and it skips all its turns: the map fills up, with no extra danger.
A number of players that divides 12
With 2, 3, 4 or 6 characters, the Aurour always follows the same cycle: the same character re-kills the monster they killed, 3 turns later with four, 2 turns with six, 4 turns with three. An Iop who kills a Hystairkal on turn 2, with four, re-kills it on turn 5.
On Vortex's turn, the Auroraire is only at hours 4, 8 and 12 with four characters, 6 and 12 with six, 3, 6, 9 and 12 with three. Only these lines are dangerous, as long as nobody steps on a glyph. At 5, 7 or 8, the cycle keeps changing: be extra careful on Vortex's turn.
The monsters' glyphs
At the start of its turn, each monster leaves a glyph on its cell. Walking on it swaps your place with it, advances the Aurour by one hour and gives you, as well as the monster, a one-turn bonus: push damage (Wastrel), damage taken halved (Crushmore), power (Krossflire), 1 MP (Ickyrus) or a heal (Hystairkal). Useful for shifting an hour, dangerous out of habit.
The monsters of the Eye of Vortex
Five level 200 Fugitives with 6,000 HP, who keep coming back: each has a weakness at -14% in a different element. Here, the hour of death matters more than the order, but two monsters deserve your attention first. The resistances in red are their weaknesses.
In which order to kill the monsters
- Hystairkal — she makes you Pacifist with Ray of Plight: keep her away and remove her MP, especially those of wave 3.
- Krossflire — from turn 4, Poisoned Art hits the whole team for 3 turns.

Level 200
- 6,000 HP
- 12 AP
- 4 MP
- Resistances (%)
- Earth -14%
- Fire 24%
- Water 39%
- Air 3%
- Neutral 8%
Ray of Plight makes you Pacifist, in a line up to 3 range, and cannot be dispelled. Sitting Duck increases your damage taken, Hystairia swaps it with an ally and pushes back around its arrival cell. Weak to Earth.
 Ray of Plight4 AP · 3 Range ·31 to 40 Water damage · Pacifist State
Pacifist for one turn, cannot be dispelled. Stay more than 3 Range away in line from the Hystairkal.
 Sitting Duck4 AP · 7 Range ·31 to 40 Earth damage · Damage taken x150%
-
Hystairia
The Hystairkal swaps places with an ally between 8 and 10 Range away and pushes everything around it back 2 cells.

Level 200
- 6,000 HP
- 12 AP
- 5 MP
- Resistances (%)
- Earth 24%
- Fire 39%
- Water 3%
- Air 8%
- Neutral -14%
Poisoned Art poisons the whole team from turn 4, for 3 turns; a heal removes it. Double Kross removes 4 MP, cancelled if you are moved, and Optic Shots doubles the damage of the next attack you take. Weak to Neutral.
-
Optic Shots4 AP · 5 Range ·31 to 40 Neutral damage · Damage taken x200% · Removes the spell's effects
Diagonally up to 5 range: the next attack you take hurts twice as much.
 Double Kross4 AP · 7 Range ·31 to 40 Fire damage · -4 MP · Removes the spell's effects
Removes 4 MP in a line up to 7 range; the removal is cancelled if you are moved.
 Poisoned Art4 AP · on itself ·50 Water damage
Not before turn 4, cooldown 3 turns: a Water poison on all characters, removed by any heal.

Level 200
- 6,000 HP
- 12 AP
- 5 MP
- Resistances (%)
- Earth 3%
- Fire 8%
- Water -14%
- Air 24%
- Neutral 39%
It pushes back 4 cells with Placement, and Takeoff removes 300 pushback resistance from all its enemies. Neutralisation teleports you symmetrically and removes 3 MP if you have just been pushed. Weak to Water; don't underestimate its Neutral damage.
 Placement
 Takeoff
-300 push resistance for all its enemies for one turn: the Wastrel's pushes then hurt a lot. Not on turn 1, cooldown 3 turns.
 Neutralisation4 AP · 3 range · Teleports the target to the other side of the caster ·56 to 75 Neutral damage · -3 MP
Symmetric teleportation relative to the Wastrel; removes 3 MP if the target has taken push damage.

Level 200
- 6,000 HP
- 12 AP
- 6 MP
- Resistances (%)
- Earth 39%
- Fire 3%
- Water 8%
- Air -14%
- Neutral 24%
Each ranged attack gives it power and 1 MP with Absorbent Shield, up to three times. Crazy Drain hits in melee with life steal and Morcrux steals 2 MP up to 3 range. Weak to Air.
 Absorbent Shield4 AP · on self · 100 Power ·1 MP
 Crazy Drain4 AP · melee ·51 to 70 Air steal · Heals the attacker: 0% of the damage
Life steal in melee; the next monster that hits the target heals for half of its damage.
 Morcrux4 AP · 3 range ·Steals 2 MP · 41 to 60 Water damage

Level 200
- 6,000 HP
- 12 AP
- 5 MP
- Resistances (%)
- Earth 8%
- Fire -14%
- Water 24%
- Air 39%
- Neutral 3%
Winged Attraction pulls from 3 cells away around it, removes 3 MP and applies Gravity. In melee, Deadaloss removes 3 AP, and Ring of Fire strikes in a circle around it. Weak to Fire: keep your distance.
-
Winged Attraction4 AP · on self · Pulls 3 cells ·-3 MP · Gravity State · Steals 100 Agility
Pulls 3 cells within a radius of 3 around the Ickyrus, removes 3 MP and applies Gravity. Not on turn 1, cooldown 3 turns.
 Ring of Fire4 AP · on self · Steals 100 Intelligence ·61 to 80 Fire damage
 Deadaloss4 AP · melee · Steals 100 Strength ·-3 AP · 51 to 70 Earth damage
Preparing your run through the Eye of Vortex
A dungeon for teams of level 190 to 200 who like long fights and pixel-perfect positioning. People come for the Xelorium quests, the achievements and the Vortex Wings: Vortex cannot be captured.
How to enter the Eye of Vortex
The entrance is in the Xelorium, in Uncertain Future, at ; the nearest zaap is the Madrestam Harbour one . To reach the dimension, do a portal search. You then need a Vortex's Eye Key (consumed): the key ring doesn't work in a dimension. Automatic group search is available for this dungeon.
Crafting the Vortex's Eye Key
It is crafted by a handyman. Four ingredients drop from the dungeon's monsters, at 12%: Ickyrus Talon, Crushmore Claw, Krossflire Eye and Hystairkal Horn. The Fugitive Loop is bought at the Xelorium outpost for 3 Orichor; Icefish, Snowdrop and Frosteez complete the recipe.
| Ingredient | Quantity | Level |
|---|---|---|
 Ickyrus Talon |
2 | 200 |
 Crushmore Claw |
2 | 200 |
 Krossflire Eye |
2 | 200 |
| Hystairkal Horn |
2 | 200 |
 Fugitive Loop |
1 | 200 |
 Icefish |
1 | 200 |
 Snowdrop |
1 | 200 |
 Frosteez |
1 | 200 |
Which team to bring against Vortex
MP removal and positioning. The monsters keep coming back and the fight is long: a team that slows down and moves the enemies lasts the distance. An MP-removal Enutrof and a Cra make the simplest core.
Enough to remove the poison. Poisoned Art hits the whole team from turn 4, and any heal cancels it. Without a healer, place a Cawwot and stay on its glyph, out of the Aurour's lines, then kill it if it bothers you.
Remove your Ebony Dofus. Its poison stays on the resurrected monsters: it can kill them at the wrong hour, or fail Focus. Leave it aside: it also causes lag in this fight.
The classes that feel at home. The Enutrof and the Cra keep monsters at a distance, the Pandawa moves and protects, the Rogue builds a wall of bombs, provided you never place it on an Auroraire line. A Cawwot or a healer solves the poison problem.
The five achievements of the Eye of Vortex
Each achievement gives 200,000,000 XP and 2 Vortex Wing, the Trio doubles the XP. Since the fight is very long, aim for one or two challenges per run rather than all at once.
| Achievements | Condition | Points | XP |
|---|---|---|---|
 Vortex (Special) |
Defeat Vortex in his dungeon by completing the “Hour of Death” challenge. | 10 | 200 000 000 |
| Eye of Vortex |
Defeat Vortex in this boss's dungeon. | 10 | 200 000 000 |
| Vortex (Focus) |
Defeat Vortex in his dungeon by completing the “Focus” challenge. | 10 | 200 000 000 |
| Vortex (Impertinence) |
Defeat Vortex in its dungeon while completing the “Impertinence” challenge. | 10 | 200 000 000 |
| Vortex (Trio) |
Defeat Vortex in its dungeon while completing the “Trio” challenge. | 20 | 400 000 000 |
Special: Hour of Death
All enemies must be finished off at the same time. Come with four, for a regular cycle. Choose an hour with a mild bonus (hour 3, 6, 8, 9 or 12) and set the initiative: at hour 12, your last character to play finishes everything. They must be able to finish the four monsters of each wave, boosted just before the hour. A Roman numeral above the Aurour recalls the hour of the first kill; between waves, push back the monsters still active and move the corrupted away. Vortex must also die at that hour.
Focus
An attacked enemy must be finished off before another is attacked. Not difficult in itself, but monsters pile up and mistakes happen fast. Handle resurrections one by one, damage the one that has to be re-killed first, and use the wait to kill the others. Hitting an invulnerable target doesn't fail the challenge: with the Long-range Liaison modifier, group the corrupted in a bomb wall or hit them in an area to reach enemies more than 10 range away.
Impertinence
Each ally must end their turn on a cell adjacent to an enemy. On turn 1, a Pandawa under Pandiniuras goes to fetch the Krossflire, which hits the least, and throws it toward the team, which sticks to it; never the Hystairkal, because of Pacifist. Stabilize the Krossflire, which tackles, and untackle with a Sram's Mist. Corrupt the other monsters, bring a corrupted one into the middle of the team, then kill the Krossflire: the corrupted one, which no longer plays, serves as an adjacent enemy until the end. Against Vortex, boost the Pandawa's MP to bring him back, and kill him if possible before he plays.
Trio
Three characters maximum, under 80 turns. The simplest: a Cra and an MP-removal Enutrof, plus a character who hits hard; a Pandawa and a Rogue with a bomb wall also work. With three, a monster is re-killed by the same character 4 turns later. Avoid the line of hour 3 on turns 1, 5, 9, that of hour 6 on turns 2, 6, that of hour 9 on turns 3, 7, that of hour 12 on turns 4, 8.
Drops and loot of the Eye of Vortex
Base in-game rates, before Prospecting bonuses.
On Vortex
 Vortex WingWing12 %
 Nougat Rabmarac BarTreat6 %
 Bag of Temporal PowderContainer3 %
 Miniature SandglassMiscellaneous Resource3 %
 Al Howin GobtubbyCeremonial pet1 %
 Paragon of PowerMain quests0,7 %
 Tasty CarrionMeat0,6 %
On the henchmen of Vortex
 Tasty MeatMeat · Wastrel12 %
- Wastrel FeatherFeather · Wastrel12 %
- Crushmore ClawBone · Crushmore12 %
- Krossflire EyeEye · Krossflire12 %
- Ickyrus TalonLeg · Ickyrus12 %
- Hystairkal HornBone · Hystairkal12 %
 OrichorTokens · Crushmore3,6 %
- Miniature SandglassMiscellaneous Resource · Wastrel3 %
- Bag of Temporal PowderContainer · Wastrel1 %
The dimension's modifiers
Ten modifiers, only one active
Each dimension applies a combat modifier, which only changes once the level 200 dungeon of the zone is completed, here the Eye of Vortex. Some help, like Long-range Liaison, which sends back 20% of the damage taken by an enemy to enemies more than 10 Range away. Others complicate everything, like Cyclic Power, which gives enemies 50% vitality in exchange for increasing damage to you, reset every 5 turns.
Where is the Eye of Vortex?
In the Xelorium dimension, at , in the Uncertain Future. The nearest zaap is the Madrestam Harbour one ; do a portal search to reach the dimension.
What level should you do the Eye of Vortex at?
Minimum level 190, 200 recommended. Vortex is level 220 and his monsters level 200, with 6,000 HP each.
How do you make Vortex vulnerable?
By corrupting the five waves of monsters. Each monster must be killed a second time at the same hour as its first death; a yellow star marks the right moment.
What happens if I kill a monster at the wrong hour?
It comes back with one more bonus, and one more hour of corruption. You can finish it off at either of its hours, but the bonuses also stack on Vortex.
Why does Vortex hit my team when he is invulnerable?
All in Good Time hits the Aurour's lines on each of its turns. Don't end up lined up with the Aurour as it will be on Vortex's turn, and keep your summons out of those lines.
How many characters should you bring?
Four, or another divisor of 12 such as three or six. The Auroraire then always follows the same cycle: fewer dangerous lines, and the same character always re-kills the monster it killed.
Which quest should you do at the Eye of Vortex?
Truth at Bottom, at Doc Ettem Bworn's at the Xelorium outpost : it is completed by beating Vortex in a single fight. The Sands of Time also asks you to reach the dungeon exit.
Can Vortex be captured?
No, Vortex cannot be captured. No soul stone is needed.
Does the key ring work for the Eye of Vortex?
No, not in dimension. You need a Vortex's Eye Key, crafted by a handyman with resources from the dungeon's monsters and a Fugitive Loop bought at the outpost.




Comments
No comments yet. A tip, or a detail about this page? Be the first.